Plantronics RIG User Guide - Page 10
Xbox 360, setup - bill of rights
 |
View all Plantronics RIG manuals
Add to My Manuals
Save this manual to your list of manuals |
Page 10 highlights
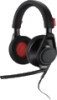
Xbox 360® setup Xbox 360 optical cable setup How you connect your Xbox 360's audio/video to your TV will generally be the most important factor in how audio is connected to the RIG Mixer. Use this setup if your TV or primary audio device has an optical port, and you have an optical cable (not included in package, sold separately by other manufacturers). An optical cable is an optional connection method that offers the highest performance audio possible with the RIG Mixer. HDMI 1 Attach a Toslink digital optical cable to the appropriate port on your Xbox 360 (Xbox 360 Slim models or to the Microsoft AV Adapter with included optical audio port), HDTV, A/V Receiver, or other audio device. 2 Plug the opposite end of the optical cable into the optical port on the rear of the RIG Mixer 3 Make sure the boom mic is attached properly to the RIG headset. Insert the 3.5mm plug into the headset jack on the front of the mixer located under the RIG logo tab, on the left side. 4 Insert the included Xbox Live chat cable into the 2.5mm jack (smaller of the two) located to the right of the headset jack on front of the mixer. Insert the other end into your Xbox game controller. For best performance, use the connector with the 90 degree angled plug attached to the Xbox 360 controller and the straight plug connected to the RIG Mixer. 5 Find a good balance of game and voice audio by adjusting the [GAME/CHAT SOUND] balancer on the right side of the mixer (over the orange LEDs). Remember that the 3 o'clock position will enable equal volume of both game and voice audio signal. Sliding the control upward makes game sound louder and voice (game chat) quieter. Sliding the control downward increases voice (game chat) while making game audio quieter. 10
-
 1
1 -
2
-
3
-
4
-
 5
5 -
 6
6 -
 7
7 -
 8
8 -
 9
9 -
 10
10 -
 11
11 -
 12
12 -
 13
13 -
 14
14 -
 15
15 -
16
-
17
-
18
-
19
-
20
-
21
-
22
 |
 |
