Poulan ES300 User Manual - Page 11
Maintenance - replacement bar and chain
 |
View all Poulan ES300 manuals
Add to My Manuals
Save this manual to your list of manuals |
Page 11 highlights
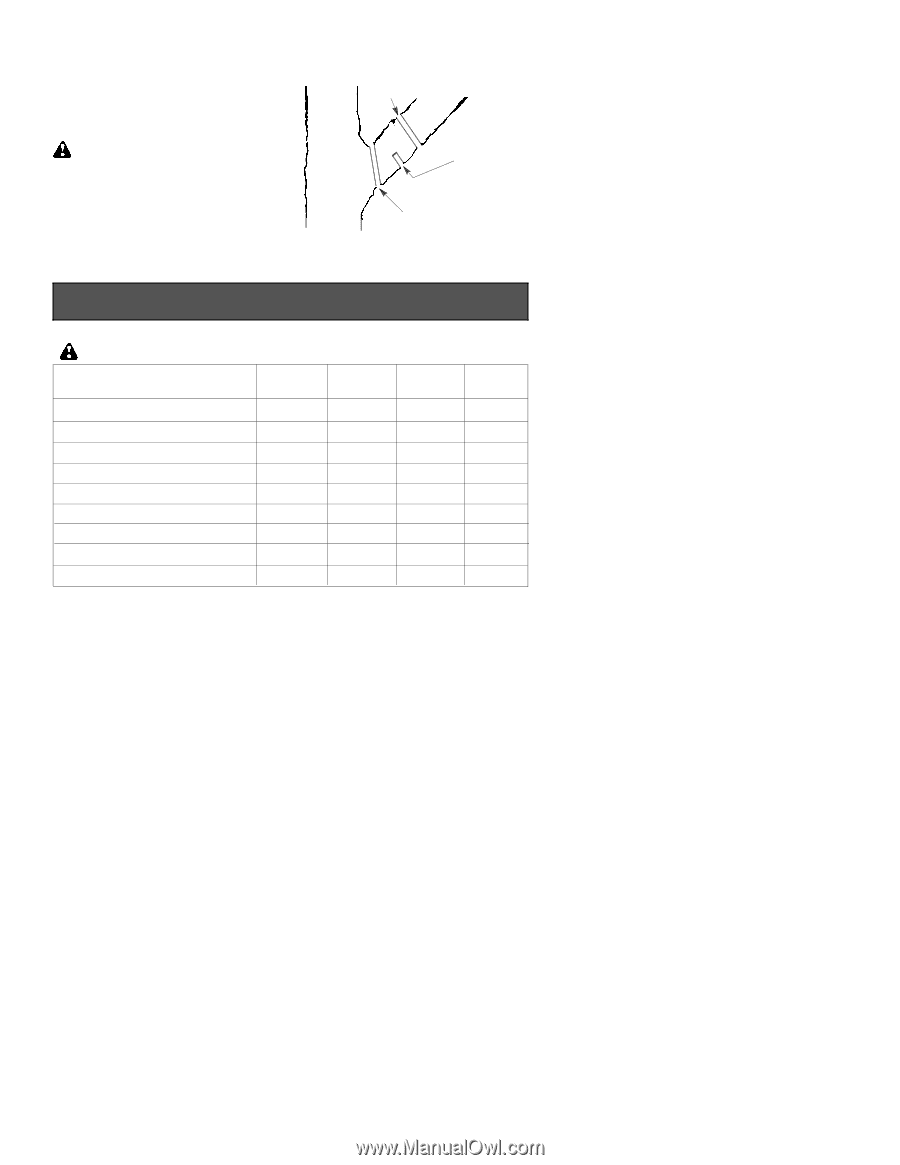
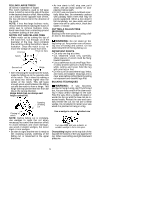
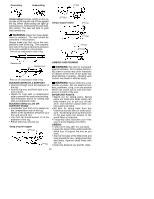
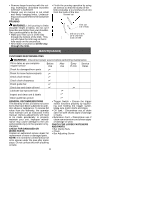
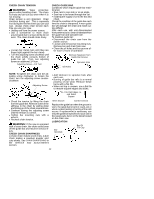
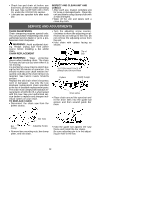
S Remove larger branches with the cutting techniques described BUCKING WITHOUT A SUPPORT. S Always use an overcut to cut small and freely hanging limbs. Undercutting could cause limbs to fall and pinch the saw. PRUNING WARNING: Limit pruning to limbs shoulder height or below. Do not cut if branches are higher than your shoulder. Get a professional to do the job. S Make your first cut 1/3 of the way through the bottom of the limb. This cut will make the limb sag so that it falls easily on the second cut. S Next make a second cut all the way through the limb. S Finish the pruning operation by using an overcut so that the stump of the limb protrudes 1 to 2 inches (3--5 cm) from the trunk of the tree. Second cut First cut 1/3 of way 3rd cut 1 to 2 in. (3--5 cm) from trunk of tree MAINTENANCE CUSTOMER RESPONSIBILITIES WARNING: Disconnect power source before performing maintenance. Fill in dates as you complete regular service Before Use After Use Every Service 15 min. Dates Check for damaged/worn parts n Check for loose fasteners/parts n Check chain tension n Check chain sharpness n Check guide bar n Check bar and chain oil level n Lubricate bar sprocket hole n n Inspect and clean unit & labels n Clean guide bar groove n GENERAL RECOMMENDATIONS The warranty on this unit does not cover items that have been subjected to operator abuse or negligence. To receive full value from the warranty, the operator must maintain unit as instructed in this manual. Various adjustments will need to be made periodically to properly maintain your unit. Improper maintenance may cause damage to the unit and possible injury to the operator or bystanders. CHECK FOR DAMAGED OR WORN PARTS Contact an authorized service dealer for replacement of worn or damaged parts. NOTE: It is normal for a small amount of oil to appear under the saw after motor stops. Do not confuse this with a leaking oil tank. S Trigger Switch -- Ensure the trigger switch functions properly by squeezing and holding the trigger switch. Make sure motor starts and stops. S Oil Tank -- Discontinue use of chain saw if oil tank shows signs of damage or leaks. S Extension Cord -- Discontinue use if chain saw extension cord shows signs of damage or wear. CHECK FOR LOOSE FASTENERS AND PARTS S Bar Clamp Nuts S Chain S Bar Adjusting Screw 11
-
 1
1 -
2
-
3
-
4
-
5
-
 6
6 -
 7
7 -
 8
8 -
 9
9 -
 10
10 -
 11
11 -
 12
12 -
 13
13 -
 14
14 -
 15
15 -
 16
16
 |
 |