Poulan ES300 User Manual - Page 13
Service And Adjustments - replacement bar
 |
View all Poulan ES300 manuals
Add to My Manuals
Save this manual to your list of manuals |
Page 13 highlights
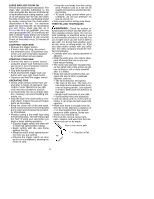
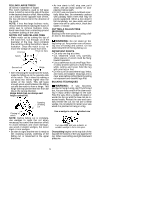
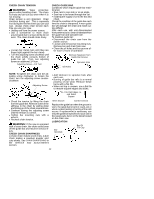
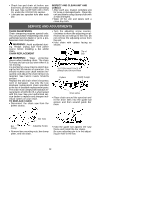
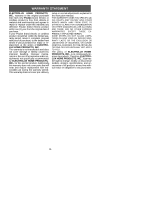
S Check bar and chain oil before use and every 15 minutes while operating the saw. See GUIDE BAR AND CHAIN OIL under the OPERATION section. S Lubricate bar sprocket hole after each use. INSPECT AND CLEAN UNIT AND LABELS S After each use, inspect complete unit for loose or damaged parts. Clean the unit and labels using a damp cloth with a mild detergent. S Wipe off the unit and labels with a clean dry cloth. SERVICE AND ADJUSTMENTS CHAIN SHARPENING Chain sharpening requires special tools. You can purchase sharpening tools at an authorized service dealer or go to a professional chain sharpener. WARNING: Avoid accidental starting. Always unplug saw from power source before installing a bar and/or chain. CHAIN REPLACEMENT WARNING: Wear protective gloves when handling chain. The chain is sharp and can cut you even when it is not moving. It is normal for a new chain to stretch during the first 30 minutes of operation. You should recheck your chain tension frequently and adjust the chain tension as required. See CHECK CHAIN TENSION section. Replace the old chain when it becomes worn or damaged. Use only the Low Kickback replacement chain specified in the list of available replacement parts. The chain must comply with kickback requirements of ANSI B175.1 when tested with this saw. See your authorized service dealer to replace and sharpen individual cutters on your chain. TO REPLACE CHAIN: D Disconnect the chain saw from the power source. S Turn the adjusting screw counterclockwise to move the adjusting pin almost as far as it will go to the rear. Do not remove the adjusting screw from the unit. S Hold chain with cutters facing as shown. Tip of Bar CUTTERS MUST FACE IN DIRECTION OF ROTATION Cutters Depth Gauge Drive Links S Place chain around the sprocket and fit the drive links into the guide bar groove and then around guide bar nose. Bar Nuts Bar Clamp Adjusting Screw S Remove bar mounting nuts, bar clamp plate, and old chain. S Hold the guide bar against the saw frame and install the bar clamp. Be sure adjusting pin is in the adjusting pin hole in the bar. 13
-
 1
1 -
2
-
3
-
4
-
5
-
6
-
7
-
 8
8 -
 9
9 -
 10
10 -
 11
11 -
 12
12 -
 13
13 -
 14
14 -
 15
15 -
 16
16
 |
 |
