Poulan PPG6000 User Manual - Page 11
Assembly
 |
View all Poulan PPG6000 manuals
Add to My Manuals
Save this manual to your list of manuals |
Page 11 highlights
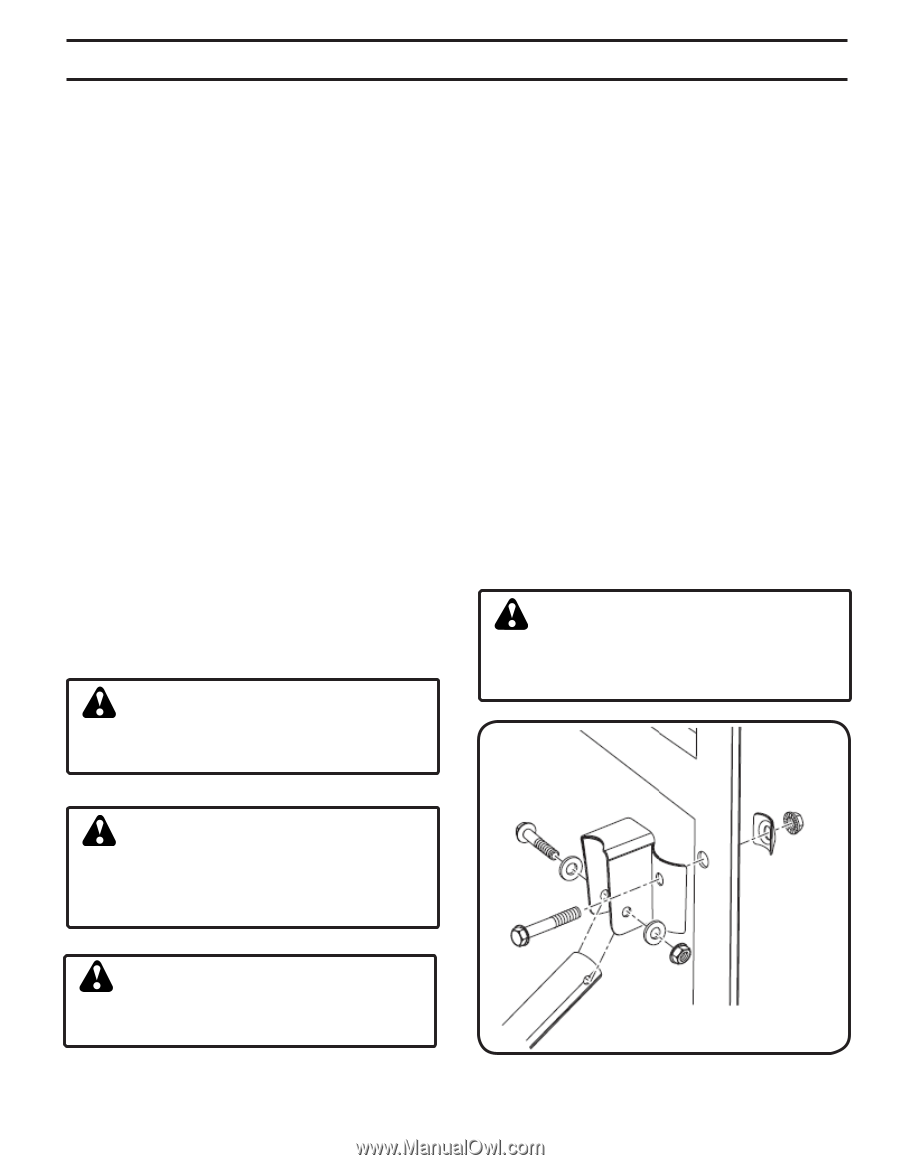
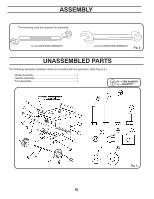
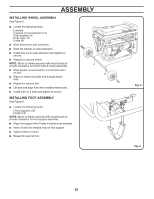
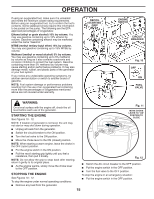
ASSEMBLY INSTRUCTIONS This product requires assembly. ■ Carefully remove the generator and any accessories from the box. NOTE: The generator is heavy. To avoid back injury, lift with your legs, not your back, and get help when needed. ■ Make sure that all items listed in the unassembled parts list are included. (See Figure 3.) ■ Inspect the generator carefully to make sure no breakage or damage occurred during shipping. ■ Do not discard the packing material until you have carefully inspected and satisfactorily operated the generator. ■ If any parts are damaged or missing, please call 1-866-237-1049 for assistance. PACKING LIST Generator Wheel Assembly Handle Assembly Foot Assembly Container of Oil Warranty Card Owner's Manual INSTALLING HANDLE ASSEMBLY See Figure 4. ■ Locate the following items: Handle (5) Left and right handle brackets (2) 4 bolts (3) 4 square curved washers (14) 4 nuts (6) 4 flat washers (4) ■ Align left handle bracket with hole in left side of generator frame. Insert bolt through handle bracket and frame. Slide curved washer on end of bolt, making sure the cupped side of washer faces the frame. Assemble nut; finger tighten. _ ■ Repeat above step with right handle bracket. ■ Put one side of handle inside left handle bracket. Slide washer over bolt, then insert bolt through the bracket handle and bracket. Push bolt through so that it exits on the other side of the handle, then add another washer and the nut. Finger tighten. ■ Repeat above step with other side of the handle and the right handle bracket. ■ Return to the first bolt installed. While holding bolt head steady with 10 mm box-end wrench, use 12 mm open-end wrench to tighten snugly. (See Figure 2.) Repeat with remaining bolts. WARNING: If any parts are missing, do not operate this generator until the missing parts are replaced. Failure to do so could result in possible serious personal injury. WARNING: Do not attempt to lift the unit by the handle assembly. If it is necessary to lift the generator, always grasp by the frame. Use proper lifting techniques to avoid back injury. WARNING: Do not attempt to modify this generator or create accessories not recommended for use with this generator. Any such alteration or modification is misuse and could result in a hazardous condition leading to possible serious personal injury. WARNING: Do not attempt to operate the generator until assembly is complete. Failure to comply could result in possible serious personal injury. Fig. 4 11
-
 1
1 -
2
-
3
-
4
-
5
-
 6
6 -
 7
7 -
 8
8 -
 9
9 -
 10
10 -
 11
11 -
 12
12 -
 13
13 -
 14
14 -
 15
15 -
 16
16 -
17
-
18
-
19
-
20
-
21
-
22
-
23
-
24
-
25
-
26
-
27
-
28
-
29
-
30
-
31
-
32
 |
 |