ProForm 375 English Manual - Page 8
Caution
 |
View all ProForm 375 manuals
Add to My Manuals
Save this manual to your list of manuals |
Page 8 highlights
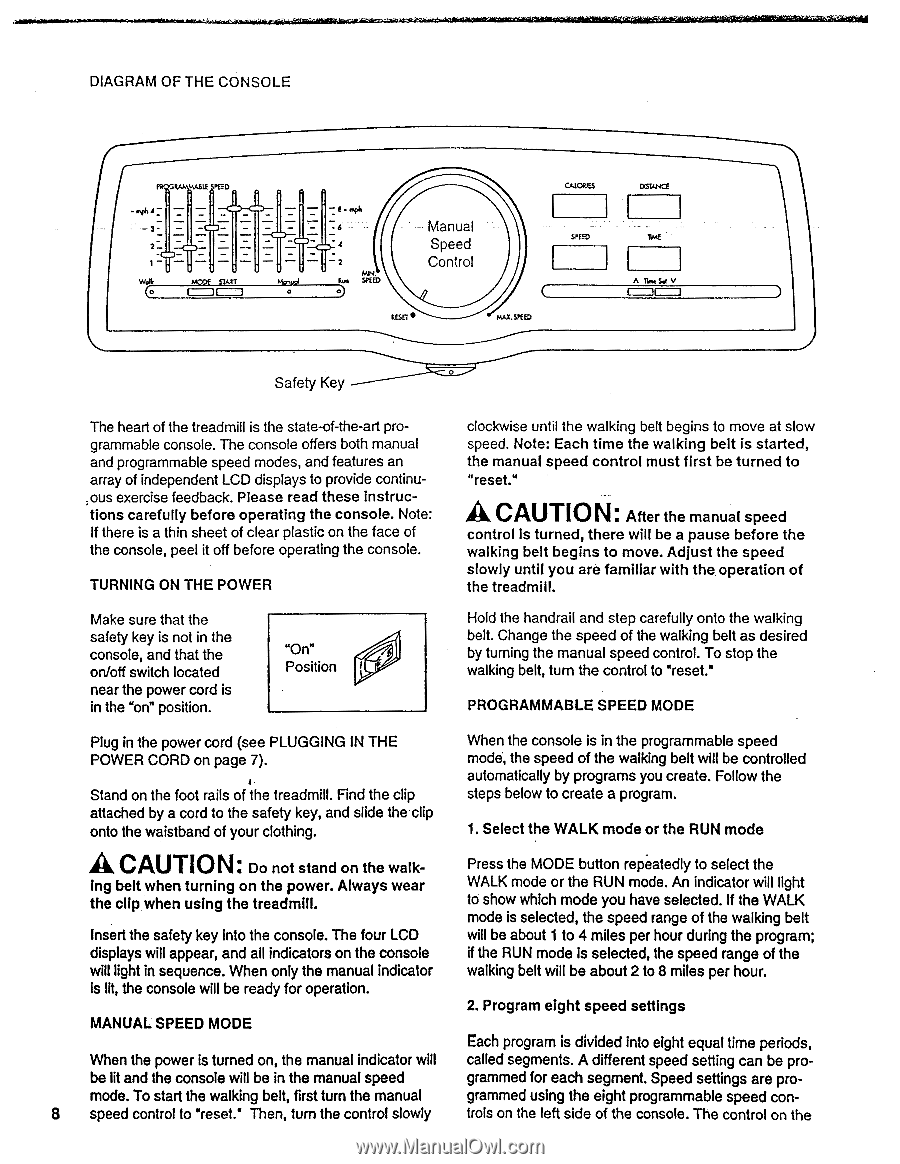
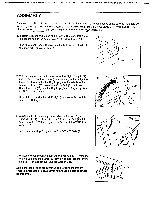
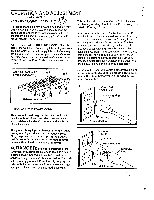
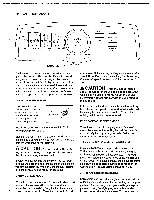
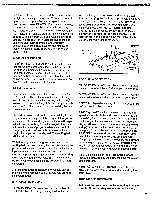
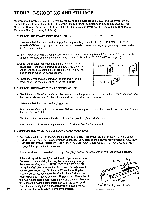
DIAGRAM OF THE CONSOLE YASLI SPEED MOM START 1 Meled O 2 :5. snip Manual Speed Control RESET • teAX.SPEED CALOAJES SPEED DESTANCE AV Set V I I Safety Key The heart of the treadmill is the state-of-the-art programmable console. The console offers both manual and programmable speed modes, and features an array of independent LCD displays to provide continuous exercise feedback. Please read these instructions carefully before operating the console. Note: If there is a thin sheet of clear plastic on the face of the console, peel it off before operating the console. TURNING ON THE POWER clockwise until the walking belt begins to move at slow speed. Note: Each time the walking belt is started, the manual speed control must first be turned to "reset." A CAUTION: After the manual speed control is turned, there will be a pause before the walking belt begins to move. Adjust the speed slowly until you are familiar with the operation of the treadmill. Make sure that the safety key is not in the console, and that the on/off switch located near the power cord is in the "on" position. "On" Position Hold the handrail and step carefully onto the walking belt. Change the speed of the walking belt as desired by turning the manual speed control. To stop the walking belt, turn the control to "reset." PROGRAMMABLE SPEED MODE Plug in the power cord (see PLUGGING IN THE POWER CORD on page 7). Stand on the foot rails of the treadmill. Find the clip attached by a cord to the safety key, and slide the clip onto the waistband of your clothing. When the console is in the programmable speed mode, the speed of the walking belt will be controlled automatically by programs you create. Follow the steps below to create a program. 1. Select the WALK mode or the RUN mode A CAUTION: Do not stand on the walk- ing belt when turning on the power. Always wear the clip when using the treadmill. Press the MODE button repeatedly to select the WALK mode or the RUN mode. An indicator will light to show which mode you have selected. If the WALK mode is selected, the speed range of the walking belt Insert the safety key into the console. The four LCD will be about 1 to 4 miles per hour during the program; displays will appear, and all indicators on the console if the RUN mode is selected, the speed range of the will light in sequence. When only the manual indicator walking belt will be about 2 to 8 miles per hour. is lit, the console will be ready for operation. 2. Program eight speed settings MANUAL SPEED MODE Each program is divided into eight equal time periods, When the power is turned on, the manual indicator will called segments. A different speed setting can be pro- be lit and the console will be in the manual speed grammed for each segment. Speed settings are pro- mode. To start the walking belt, first turn the manual grammed using the eight programmable speed con- 8 speed control to "reset.' Then, turn the control slowly trols on the left side of the console. The control on the
-
 1
1 -
2
-
 3
3 -
 4
4 -
 5
5 -
 6
6 -
 7
7 -
 8
8 -
 9
9 -
 10
10 -
 11
11 -
 12
12 -
 13
13 -
14
-
15
-
16
 |
 |