ProForm 7.5 Distance Trainer Treadmill English Manual - Page 14
How To Turn On The Power
 |
View all ProForm 7.5 Distance Trainer Treadmill manuals
Add to My Manuals
Save this manual to your list of manuals |
Page 14 highlights
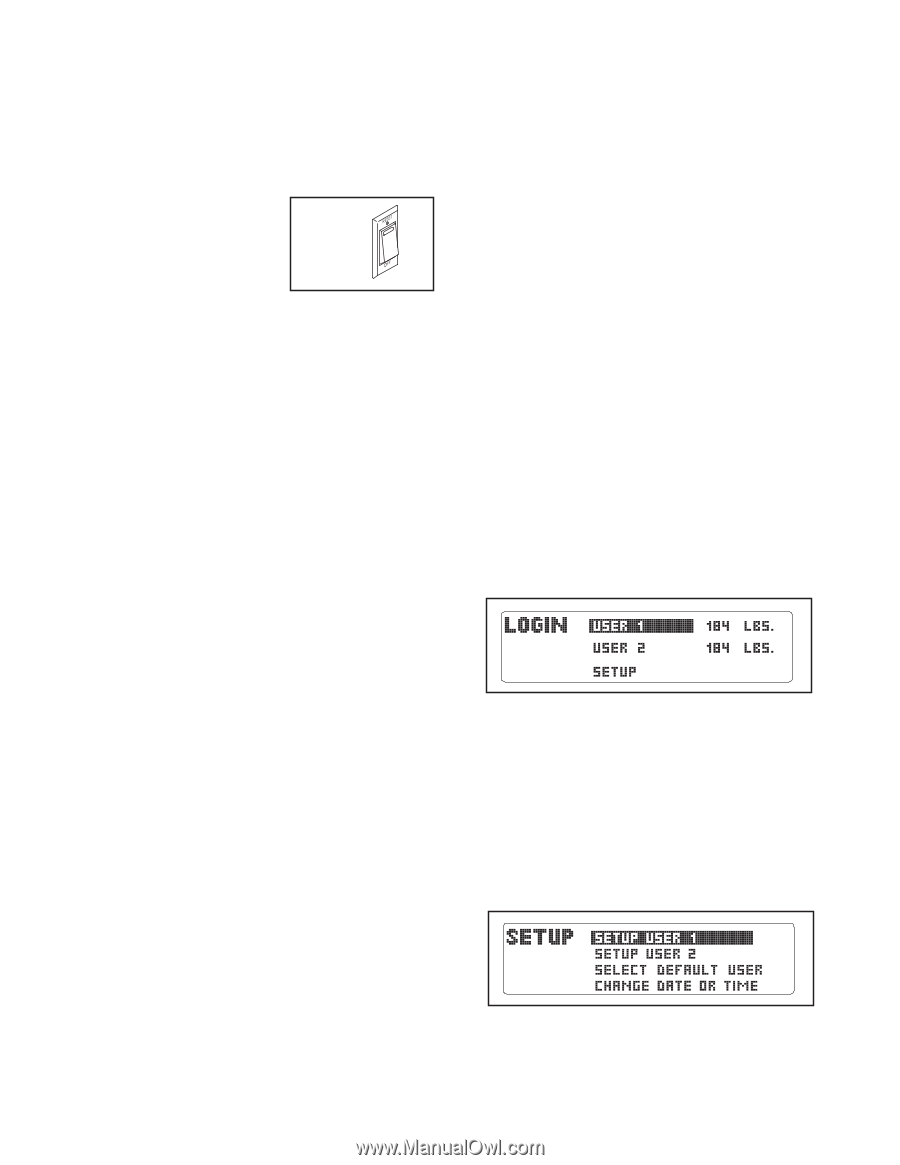
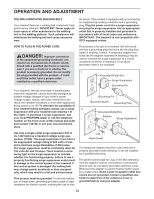
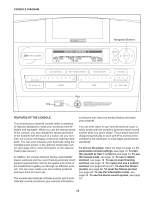
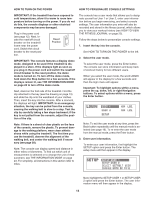
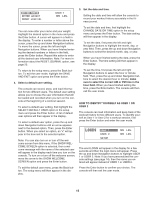
HOW TO TURN ON THE POWER HOW TO PERSONALIZE CONSOLE SETTINGS IMPORTANT: If the treadmill has been exposed to cold temperatures, allow it to warm to room temperature before turning on the power. If you do not do this, the console displays or other electrical components may become damaged. Plug in the power cord (see page 12). Next, locate the reset/off circuit breaker on the treadmill frame near the power cord. Switch the circuit breaker to the reset position. Reset Position IMPORTANT: The console features a display demo mode, designed to be used if the treadmill is displayed in a store. If the displays light as soon as you plug in the power cord and switch the reset/off circuit breaker to the reset position, the demo mode is turned on. To turn off the demo mode, hold down the Stop button for a few seconds. If the displays remain lit, see THE INFORMATION MODE on page 23 to turn off the demo mode. Next, stand on the foot rails of the treadmill. Find the clip attached to the key (see the drawing on page 13) and slide the clip onto the waistband of your clothes. Then, insert the key into the console. After a moment, the displays will light. IMPORTANT: In an emergency situation, the key can be pulled from the console, causing the walking belt to slow to a stop. Test the clip by carefully taking a few steps backward; if the key is not pulled from the console, adjust the position of the clip. Note: If there is a sheet of clear plastic on the face of the console, remove the plastic. To prevent damage to the walking platform, wear clean athletic shoes while using the treadmill. The first time you use the treadmill, observe the alignment of the walking belt, and center the walking belt if necessary (see page 28). Note: The console can display speed and distance in either miles or kilometers. To find out which unit of measurement is selected or to change the unit of measurement, see THE INFORMATION MODE on page 23. For simplicity, all instructions in this section refer to miles. The console has a user mode that allows you to designate yourself as User 1 or User 2, enter user information before you begin exercising, and select console settings. The user information you enter will also be recorded and stored in the fitness journal, which allows you to view your workout history (see HOW TO VIEW THE FITNESS JOURNAL on page 22). Follow the steps below to personalize console settings. 1. Insert the key into the console. See HOW TO TURN ON THE POWER to the left. 2. Select the user mode. To select the user mode, press the Enter button. The console can store information and keep track of workout history for two different users. When you select the user mode, the word LOGIN will appear in the display for a few seconds and then the login menu will appear. Important: To highlight options within a menu, press the up, down, left, or right Navigation buttons. To select options within a menu, press the Enter button. Note: To exit the user mode at any time, press the Back button repeatedly until the manual mode is selected (see page 16). To re-enter the user mode from the manual mode, press the Enter button. 3. Enter user information. To enter your user information, first highlight the SETUP option and press the Enter button. The setup menu will then appear in the display. Next, highlight the SETUP USER 1 or SETUP USER 2 option and press the Enter button. The user information menu will then appear in the display. 14
-
 1
1 -
2
-
3
-
4
-
5
-
6
-
7
-
8
-
 9
9 -
 10
10 -
 11
11 -
 12
12 -
 13
13 -
 14
14 -
 15
15 -
 16
16 -
 17
17 -
 18
18 -
 19
19 -
20
-
21
-
22
-
23
-
24
-
25
-
26
-
27
-
28
-
29
-
30
-
31
-
32
-
33
-
34
-
35
-
36
 |
 |