ProForm 7.5c Owners Manual - Page 4
Assembly
 |
View all ProForm 7.5c manuals
Add to My Manuals
Save this manual to your list of manuals |
Page 4 highlights
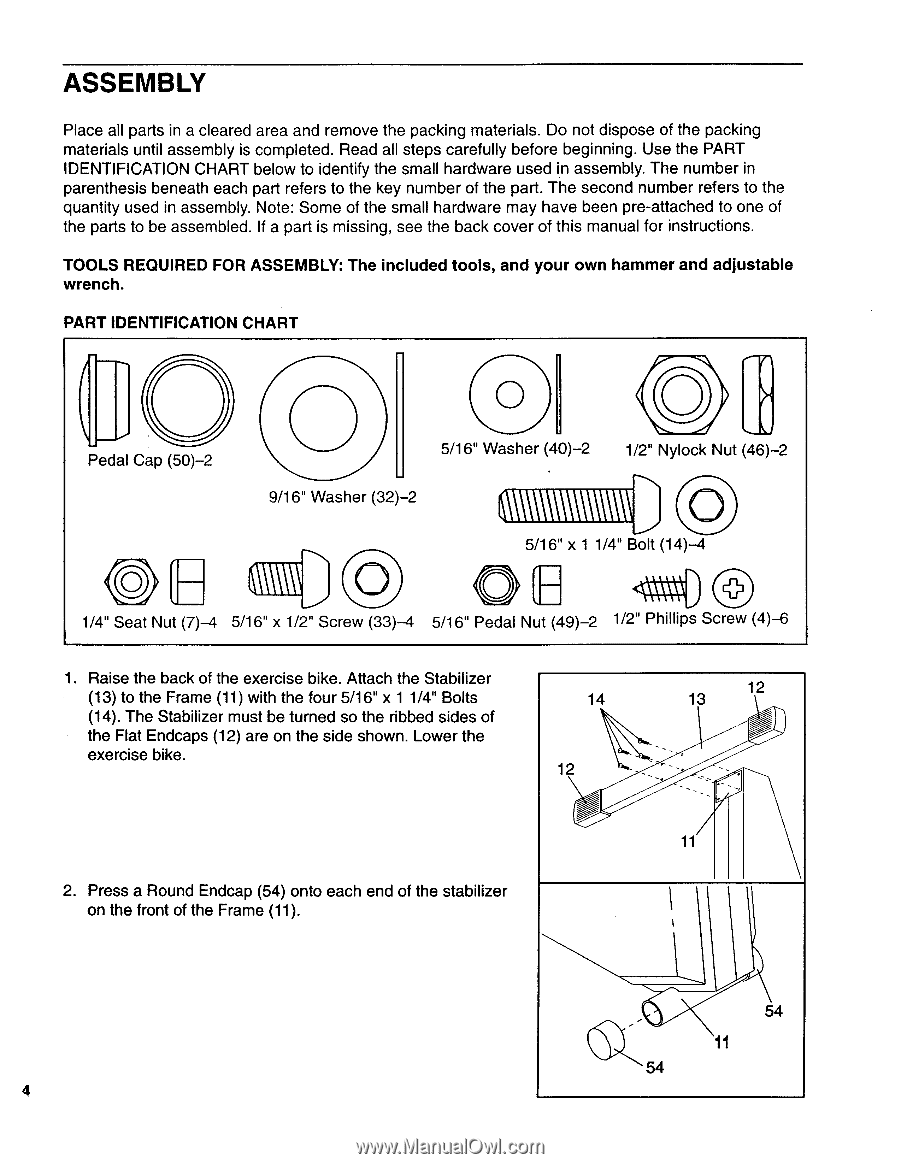
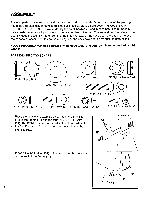
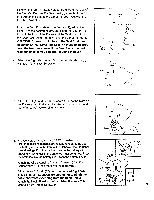
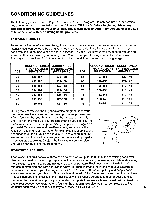
ASSEMBLY Place all parts in a cleared area and remove the packing materials. Do not dispose of the packing materials until assembly is completed. Read all steps carefully before beginning. Use the PART IDENTIFICATION CHART below to identify the small hardware used in assembly. The number in parenthesis beneath each part refers to the key number of the part. The second number refers to the quantity used in assembly. Note: Some of the small hardware may have been pre-attached to one of the parts to be assembled. If a part is missing, see the back cover of this manual for instructions. TOOLS REQUIRED FOR ASSEMBLY: The included tools, and your own hammer and adjustable wrench. PART IDENTIFICATION CHART Pedal Cap (50)-2 0 O 0 5/16" Washer (40)-2 1/2" Nylock Nut (46)-2 9/16" Washer (32)-2 I. 1/4" Seat Nut (7)-4 0 5/16" x 1/2" Screw (33)-4 5/16" x 1 1/4" Bolt (14)-4 c23 5/16" Pedal Nut (49)-2 1/2" Phillips Screw (4)-6 1. Raise the back of the exercise bike. Attach the Stabilizer (13) to the Frame (11) with the four 5/16" x 1 1/4" Bolts (14). The Stabilizer must be turned so the ribbed sides of the Flat Endcaps (12) are on the side shown. Lower the exercise bike. 14 12 12 13 11 2. Press a Round Endcap (54) onto each end of the stabilizer on the front of the Frame (11). G >( 54 11 54 4
-
 1
1 -
 2
2 -
 3
3 -
 4
4 -
 5
5 -
 6
6 -
 7
7 -
 8
8 -
 9
9 -
 10
10 -
11
-
12
 |
 |