ProForm Crosswalk 325 Treadmill Canadian English Manual - Page 8
Left Upper Body Arm to the Left Upright with two 3 Bolts - treadmill
 |
View all ProForm Crosswalk 325 Treadmill manuals
Add to My Manuals
Save this manual to your list of manuals |
Page 8 highlights
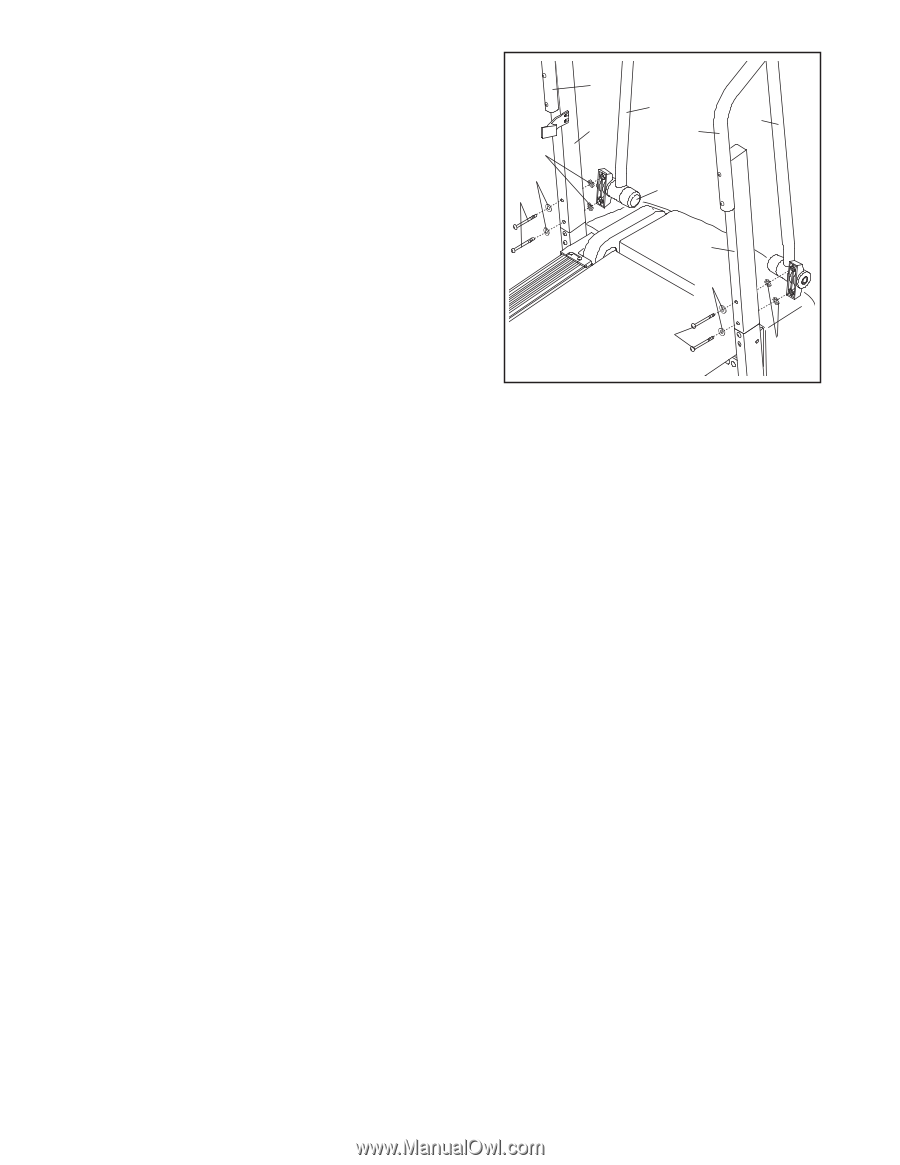
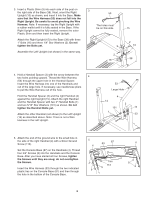
9. Identify the Left Upper Body Arm (56) (refer to the drawing on page 4). Hold the Left Upper Body Arm near the 9 Left Upright (14) as shown. Make sure that the Resistance Knob (64) is on the indicated side. Attach the Left Upper Body Arm to the Left Upright with two 3" Bolts 4 56 14 59 109 (7), two Washers (40), and two 3/8" Star Washers (54) as 54 shown. 40 64 Attach the Right Upper Body Arm (59) to the Right 7 Upright (15) as described above. Be careful not to pinch the wires in the Right Handrail (109). 15 Lift the treadmill frame (see HOW TO FOLD THE TREADMILL FOR STORAGE on page 12). Make sure that the frame is centered between the two Handrails (4). Firmly tighten all of the bolts and screws used in steps 3 and 4. Then, lower the frame to the floor. 40 7 54 10.Make sure that all parts used in assembly are properly tightened before you use the treadmill. Keep the included allen wrenches in a secure place for adjustment purposes (see page 14). To protect the floor or carpet, place a mat under the treadmill. 8
-
 1
1 -
2
-
 3
3 -
 4
4 -
 5
5 -
 6
6 -
 7
7 -
 8
8 -
 9
9 -
 10
10 -
 11
11 -
 12
12 -
 13
13 -
14
-
15
-
16
-
17
-
18
-
19
-
20
-
21
-
22
-
23
 |
 |