ProForm Equalizer 6.0s Owners Manual - Page 10
Maintenance, Storage.
 |
View all ProForm Equalizer 6.0s manuals
Add to My Manuals
Save this manual to your list of manuals |
Page 10 highlights
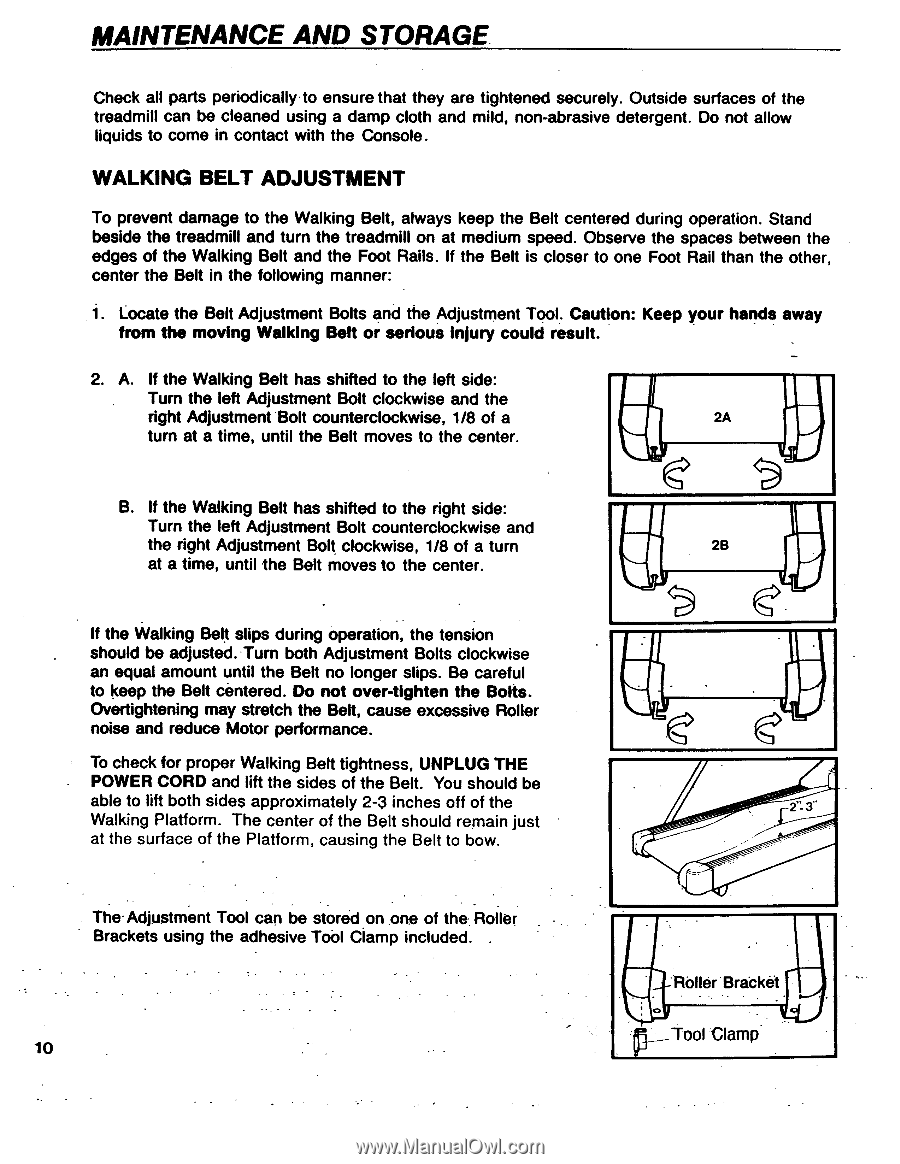
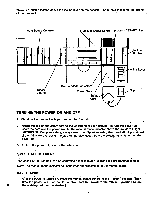
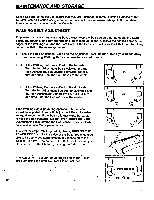
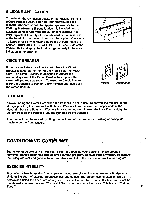
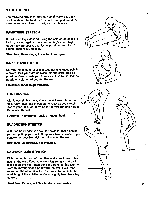
MAINTENANCE AND STORAGE. Check all parts periodically to ensure that they are tightened securely. Outside surfaces of the treadmill can be cleaned using a damp cloth and mild, non-abrasive detergent. Do not allow liquids to come in contact with the Console. WALKING BELT ADJUSTMENT To prevent damage to the Walking Belt, always keep the Belt centered during operation. Stand beside the treadmill and turn the treadmill on at medium speed. Observe the spaces between the edges of the Walking Belt and the Foot Rails. If the Belt is closer to one Foot Rail than the other, center the Belt in the following manner: 1. Locate the Belt Adjustment Bolts and the Adjustment Tool. Caution: Keep your hands away from the moving Walking Belt or serious injury could result. 2. A. If the Walking Belt has shifted to the left side: Turn the left Adjustment Bolt clockwise and the right Adjustment Bolt counterclockwise, 1/8 of a 2A turn at a time, until the Belt moves to the center. B. If the Walking Belt has shifted to the right side: Turn the left Adjustment Bolt counterclockwise and the right Adjustment Bolt clockwise, 1/8 of a turn 2B at a time, until the Belt moves to the center. If the Walking Belt slips during operation, the tension should be adjusted. Turn both Adjustment Bolts clockwise an equal amount until the Belt no longer slips. Be careful to keep the Belt centered. Do not over-tighten the Bolts. Overtightening may stretch the Belt, cause excessive Roller noise and reduce Motor performance. To check for proper Walking Belt tightness, UNPLUG THE POWER CORD and lift the sides of the Belt. You should be able to lift both sides approximately 2-3 inches off of the 13" Walking Platform. The center of the Belt should remain just at the surface of the Platform, causing the Belt to bow. The Adjustment Tool can be stored on one of the1. Roller Brackets using the adhesive To0l Clamp included. . 10 Roller Bracket p____Tool Clamp
-
 1
1 -
2
-
3
-
4
-
 5
5 -
 6
6 -
 7
7 -
 8
8 -
 9
9 -
 10
10 -
 11
11 -
 12
12 -
 13
13 -
 14
14 -
 15
15 -
16
 |
 |