ProForm Performance 1450 Treadmill English Manual - Page 11
Do not press
 |
View all ProForm Performance 1450 Treadmill manuals
Add to My Manuals
Save this manual to your list of manuals |
Page 11 highlights
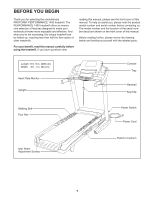
5. Hold the Left Upright (89) against the Base (94). Be careful not to pinch the Upright Wire (81). 5 Insert two 3/8" x 1 1/4" Screws (8) with two 3/8" Star Washers (13) and two 3/8" x 2 3/4" Screws (7) into the Left Upright. Partially tighten the 3/8" x 2 3/4" Screws (7) and the 3/8" x 1 1/4" Screws (8) until the heads of the Screws touch the Left Upright (89); do not fully tighten the Screws yet. Note: It may be helpful to use the short hex key (B) on the Screw shown. Attach the Right Upright (not shown) in the same way. Note: There are no wires on the right side. 89 7 B 13 8 6. Identify the Left Base Cover (82) and the Right Base Cover (83). Slide the Left Base Cover onto 6 the Left Upright (89). Slide the Right Base Cover onto the Right Upright (90). Do not press the Base Covers into place yet. Identify the Left Upright Cover (79) and the Right Upright Cover (80). Slide the Left Upright Cover onto the Left Upright (89). Slide the Right Upright Cover onto the Right Upright (90). 13 94 89 79 81 80 90 83 82 11
-
 1
1 -
2
-
3
-
4
-
5
-
 6
6 -
 7
7 -
 8
8 -
 9
9 -
 10
10 -
 11
11 -
 12
12 -
 13
13 -
 14
14 -
 15
15 -
 16
16 -
17
-
18
-
19
-
20
-
21
-
22
-
23
-
24
-
25
-
26
-
27
-
28
-
29
-
30
-
31
-
32
-
33
-
34
-
35
-
36
-
37
-
38
-
39
-
40
-
41
-
42
-
43
-
44
 |
 |
