Pyle PAW1 PAW1 Manual 1 - Page 8
Enter Declination angle, North
 |
View all Pyle PAW1 manuals
Add to My Manuals
Save this manual to your list of manuals |
Page 8 highlights
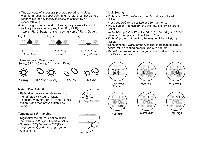
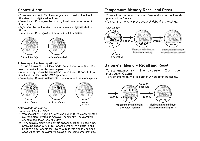
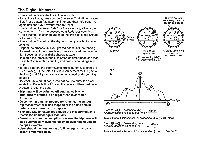
Calibration Mode Enter Declination angle for the true North • Declination refers to the measured difference between the magnetic North and the North of the map. The local declination Is given on the map margin either as easterly plus declination (El or as westef1y minus declination CN). When orienteering, the map direction Is corrected by subtracting the plus declination and adding the minus declination. • To input the value, press and hold button A to enter calibration mode • CAL' first and press button A again to confimn to enter declination setting mode " dEC'. • Right after entering the declination setting mode, a letter " E" start to flicker. Press button C to select the direction East- E or West· W and then press button A to confirm. • An angle digits will then start to flicker. To set the angle to be offset, press button C to adjust to desire value an then press button A to confirm. • As the declination setting will affect the direction direcUy, for a serious and final confimnation, press button C to tum the function " on • and then press button A again to confirm. • In order to understand the declination effect, let us quote an example. the current direction Is N 10 degree, If the declination angle is set to E 30 degree, the final wlli change to NE 40 degree or If the declination angle Is set to W 30 degree, the final direction will change to NW 340 degree a·-~~~. })) V After the ring move, tum the unit clockwise In two circles
-
 1
1 -
2
-
 3
3 -
 4
4 -
 5
5 -
 6
6 -
 7
7 -
 8
8 -
 9
9 -
 10
10
 |
 |
