RCA 75400 User Manual - 75400 - Page 10
Thermometer, Weather Forecast
 |
UPC - 044319650730
View all RCA 75400 manuals
Add to My Manuals
Save this manual to your list of manuals |
Page 10 highlights
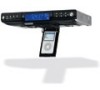
Weather Forecast By analysing air pressure, humidity and outdoor temperature, the unit can forecast weather conditions and displays as below: EN Sunny Slighly cloudy Cloudy To be able to forecast weather accurately, you need to adjust an off-set value according to your current altitude as air pressure changes with it. Press ALTITUDE (in the battery compartment) to select one of the off-set levels (00, 13, 25, 38, 50, 63) that matches with your location (see table below). Your selected off-set level will show on the right of the display temporarily. Above sea level Less than 100m (328ft) 100m (328ft) 200m (656ft) 300m (984ft) 400m (1312ft) 500m (1640ft) or higher Off-set level 00 (default) 13 25 38 50 63 Rainy Snowy Note: Snowy condition can be forecast only if the digital thermometer is used to monitor the outdoor temperature. Note: Since there is no previous weather information when using the unit for the first time, the display will show cloudy only. The unit may take over one hour to obtain sufficient information for weather forecast as changes in air pressure is slow. Thermometer Indoor Temperature The main unit has an internal thermometer that shows the current room temperature on the right of the display indicated by "IN". Outdoor Temperature A separate digital thermometer is included which can remotely transmit temperature information to the main unit and shows on the right of the display indicated by "OUT". Install 2 "AAA" batteries (not included) in the thermometer. 1. Unscrew at the battery compartment to open the door. 2. Install two "AAA" batteries by referring to the indications in the compartment. 3. Replace the battery compartment door of the thermometer and secure closing with the screw. Once the main unit is plugged for power, it can automatically synchronize with the digital thermometer (with batteries installed) to show the temperature. You do not need to do anything. 15 However, if you find abnormal temperature Back view with battery compartment door display on the main unit, you may synchronize the temperature manually by following the steps removed (batteries not included) below: 1. At the main unit: Battery door screw hole EN oC/oF - selects press and hold ID (in the battery temperature compartment) until the temperature display "- scale shows on - -" on the right of the display starts scrolling. the display. 2. At the digital thermometer: Unscrew at the battery compartment to open the door. Press and hold ID inside the battery compartment until the antenna icon on the display of the thermometer flashes. Synchronization starts automatically and should be finished within several seconds. • When synchronization succeeds, the antenna icon stops flashing and the synchronized ID - performs temperature information synchronization with the main unit. Receptor for connecting the line out temperature temperature shows on the main unit. sensor (included). 3. If synchronization fails (no temperature shows on the main unit), perform step 2 again. If synchronization still fails after several attempts and the temperature display "- - -" on the main unit stops scrolling and starts to flash, you have to perform both steps Tips: 1 and 2 again. • The thermometer sends the latest temperature information to the main unit Line Out Temperature Sensor every 35 seconds. There may be delay on the main unit to show the most updated If you are going to install the thermometer outdoor with extreme temperatures (below 14oF (-10oC)), the use of line out temperature sensor (included) is recommended to avoid battery failure. Insert the sensor connector to the receptor (below ID button) in the battery compartment. The sensor wire should be extended from battery compartment through the hole at the lower left of the door. temperature changes. • When the outdoor temperature display is flashing on the main unit, there may be no signal receiving from the digital thermometer. Please make sure the batteries of the thermometer are not empty and the thermometer is not placed too far from the main unit and without obstacles between them. • To reach stable temperature measurements Placing thermometer the unit should be operated minimum 2 The digital thermometer can be fixed on walls with the included holder (screws not provided). If you are placing it outdoor, ensure that it does not get wet by rain and is not under direct sunlight. hours. • Both the main unit and thermometer will show "LLL" if temperature is lower than -58oF (-50oC) and will show "HHH" if it is higher than 140oF (60oC). If you are using the line out temperature sensor, place the thermometer indoor and extend the sensor wire outside the window. • In case you see abnormal temperature display on the unit, you may want to reset the thermometer by pressing RESET (in the battery compartment) with a pin. 16
-
 1
1 -
2
-
3
-
4
-
 5
5 -
 6
6 -
 7
7 -
 8
8 -
 9
9 -
 10
10 -
 11
11 -
 12
12
 |
 |
