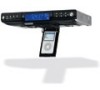
RCA 75400 User Manual - 75400 - Page 8
Clock & Timer, Radio
 |
UPC - 044319650730
View all RCA 75400 manuals
Add to My Manuals
Save this manual to your list of manuals |
Page 8 highlights
Clock & Timer Setting the Time Setting the Countdown Timer The time display has a 12-hour format with AM and PM indicator. To set the time: 1. Press VOLUME/TIMER to enter timer setting mode. EN 1. Press (inside battery compartment) to enter time setting mode. The TIMER icon will flash on the display. 2. To select countdown time, rotate VOLUME/ The clock icon will appear on the display. TIMER knob to select the countdown time 2. To set clock time, use the / buttons to from 00:01 to 59:59 (default: 01:00). The select the correct time. background light of VOLUME/TIMER will Press and hold to fast reverse or fast forward change to green during adjustment. clock time. 3. Press VOLUME/TIMER again to activate the 3. Press again to save clock time. The clock timer. The unit will beep twice to indicate icon will turn off. countdown has started. Remaining time shows on the display. The TIMER icon will remain lit during countdown. 4. Press VOLUME/TIMER to turn timer off at any Tips: time or after it has sounded. In standby mode, press / to show the seconds counter. Note: The radio or CD player is muted when alarm turns on. Radio Built-In AFC The Built-In Automatic Frequency Control (AFC) works only on FM. It helps to reduce drift on FM reception and to keep the radio locked in on the FM station to which it is tuned. Antennas AM Antenna - A built-in ferrite rod antenna eliminates the need for an outside antenna for AM reception. Rotating the unit slightly may improve reception of distant AM stations. FM Antenna - The power cord acts as your FM antenna. The power cord picks up moderate to strong stations and eliminates the need for an external antenna in most strong signal areas. Be sure the power cord is stretched out to its full length. Do not coil or bunch the cord together. Changing position of the power cord may improve reception. Turning on the Radio Press RADIO ON / BAND (or RADIO on remote control) to turn on the radio. Turning off the unit Press OFF (or on remote control) to turn off the radio. Selecting Radio Band Press RADIO ON / BAND (or RADIO on remote control) to select among FM, AM, TV and Wx bands. Tuning to a Channel Press to tune down radio frequency or select the previous TV channel. Press to tune up radio frequency or select the next TV channel. 11 Automatic Channel Search Press and hold or for more than 1 second and release to start automatic channel search in the direction selected. Search will stop once a channel is found. Press or to quit automatic channel search. Radio Frequency Memory 1. Follow steps in "Selecting Radio Band" and "Tuning to a Channel" to tune to the station you want to store into memory. 2. Press SET to assign a memory location to the selected station. "P" will flash with the next available memory location light on the display If you wish to assign another memory location or overwrite a previously set memory, press PRESET to select a memory location. 3. Press SET again to confirm selection. Memory Recall Press PRESET (or PRESET +/- on the remote control) to recall preset stations. Tips: A Maximum of 10 preset memory locations are available. "P--" shows on the display to indicate all memory locations are occupied. Nevertheless, you can still overwrite occupied locations by using PRESET (or PRESET +/- on the remote control). RBDS (Radio Broadcast Data System) The unit can support radio broadcast data system reception and display RBDS information in FM radio mode. Available information depend on EN individual radio channel. The RBDS icon lights on the display when data received. Press DISPLAY to cycle among RBDS information whenever available: FM frequency, program service name (PS), program type (PTY) and radio text (RT). RBDS icons (PS, PTY and RT) light on the display indicating the nature of information received. Program Type Search This function lets you search for a particular type of radio program among all RBDS radio channels. 1. Press DISPLAY until program type (PTY) information show on the display. 2. Press once to enter program type search mode with program type flashing on the display. 3. Press repeatedly to cycle among all program types available (e.g. news, sports, classic). 4. Press or to start backward or forward search through the radio frequencies for the particular type of program you have chosen. Radio is muted during the search. Tips: During program type search, the unit will search through the whole radio frequency range for the selected program type. If the search fails, the radio will return to the station previously being listened. 12
-
 1
1 -
2
-
 3
3 -
 4
4 -
 5
5 -
 6
6 -
 7
7 -
 8
8 -
 9
9 -
 10
10 -
 11
11 -
 12
12
 |
 |
