RCA RS2135I RS2135i Product Manual - Page 9
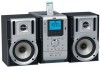
Radio, Recording to the USB drive - remote control
 |
UPC - 062118400042
View all RCA RS2135I manuals
Add to My Manuals
Save this manual to your list of manuals |
Page 9 highlights
Radio Auto Preset Programming (FM only) Press and hold the BAND button for 2 seconds to scan stations in the FM band. The stations will then be stored as preset channels. A maximum of 32 stations can be stored. Be careful of your preset channels being erased accidentally because the scanning and storing process is automatic upon pressing the button. You can stop the automatic scan by pressing any button, but the erased stations cannot be recovered. Using Presets In PRESET mode, press / to access the previous or next preset station. Suppressing Stereo Signal Press FM ST to toggle between FM mono and stereo mode. "STEREO" is displayed in stereo mode. Recording to the USB drive • You can record CD, Tuner or AUX files to any MSC devices connected to the USB Jack. • Recording function always records what is being played. Press SOURCE to select the source you want to record from. • In general, recording starts instantly RECORD is pressed. It stops when STOP is pressed. • During recording, "REC" displays. • There is one exception where recording will not start immediately when RECORD is pressed - while in CD mode and the CD is NOT playing. In this case, the unit goes into Recording Standby Mode, which is indicated by the flashing recording icon. This is to avoid recording "silence" to the USB device. • The unit will go from Recording Standby Mode to Recording Mode as soon as the CD starts playing. • When recording CD, there are 2 options: "Normal", which records the CD in real time as it plays; or "High Speed", which records the CD at roughly double the normal speed. Recording CD to USB drive 1. Connect the USB drive to the unit's USB Jack at the front of the unit. 2. In CD stop mode, press RECORD on the remote control or RECORD NORMAL on the unit. 3. The unit is now in recording standby mode with REC icon flahsing. Turn VOLUME CONTROL knob or press , , , to select the track to be recorded. 4. Press or RECORD to start recording. The REC icon displays. 5. Press TUNE/PRESET to stop recording. Record only selected tracks from a CD 1. Create a CD program by following the instructions under "Setting up a Program List" on page 18. 2. Press PROG to enter program mode. 3. Press RECORD on the remote control or RECORD NORMAL on the unit. Playback and recording should begin automatically. The PROGRAM and REC icons will light on the display. 4. Recording stops automatically when the program is finished. Recording to the USB drive High Speed Recording High speed recording is only available for CD to USB drive recording. It can only be activated by pressing RECORD HIGH SPEED on the unit. The recording operations remain the same as normal speed recording except no sound can be heard during the process. Recording Tuner/AUX to USB drive 1. In Tuner mode, select the station to record (refer to page 14-15 for details). 2. Press RECORD to start recording. 3. Press TUNE/PRESET to stop recording. Program Recording Refer to "Setting the Timer" on page 11. Deleting Files from USB Drive 1. In navigation mode, select the file for deletion using the navigation buttons (Refer to "Advanced Navigation Controls" on page 19 for details.) 2. Press DELETE on the main unit or DEL on the remote control. 3. Turn the Volume button on the main unit or press or on the remote control to select "Yes" to delete or "No" to cancel. 4. Press SELECT on the main unit or press on the remote control to confirm selection. If "Yes" is selected, the display shows memory usage information after deleting selected file. For a few seconds, the unit will return to the navigation mode. Deleting All Files In navigation and mp3 stop modes, press and EN hold DELETE on the main unit, or press DEL on the remote control to delete all the files on the mp3 player. Tips: • If CD playback has already started, recording will begin instantly when RECORD is pressed. • Recording stops automatically when CD stops. • To view recording time and remaining time, press BAND/INFO on the main unit or INFO on the remote during recording. 0:22 146:14 elapsed recording time remaining time • The encoding bitrate for tuner, CD and AUX signal are: CD / Aux: 128 kbps Tuner: 96 kbps 15 16
-
 1
1 -
2
-
3
-
 4
4 -
 5
5 -
 6
6 -
 7
7 -
 8
8 -
 9
9 -
 10
10 -
 11
11 -
 12
12 -
 13
13
 |
 |
