RCA S2501 User Manual - Page 11
Software setup, Computer connection, Connecting the player and wireless earphones to the computer - charger
 |
UPC - 044319651638
View all RCA S2501 manuals
Add to My Manuals
Save this manual to your list of manuals |
Page 11 highlights
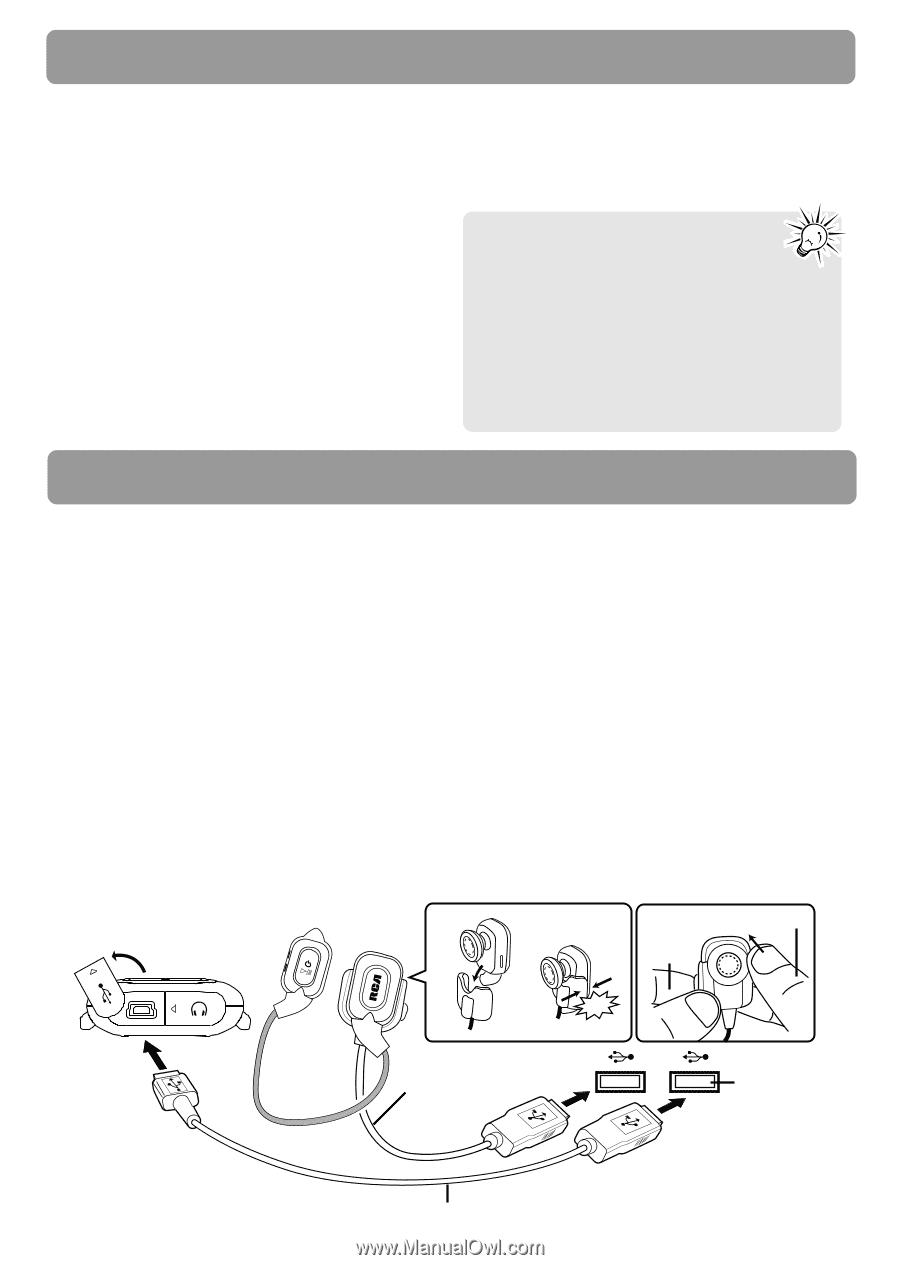
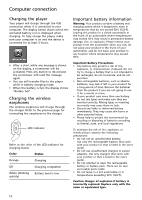
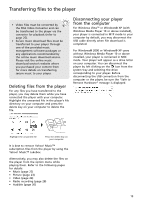
Software setup The Music Management CD that comes with your player contains all of the necessary software components you need to make your player work properly. 2. If the setup screen does not appear, double-click "My Computer", double click your CD drive icon, and double click "RCA Installer.exe" to run the installer. These components enable you to transfer files from your computer to the player. Inserting the included CD into CD Drive 1. Turn on your computer and place the Music Management CD that came with your player into your computer. IMPORTANT: Do not connect the USB cable to the PC or the player before or during the CD installation. The Music Management CD also contains a software package Yahoo! MusicTM Jukebox that can help transfer music content to your player. Please refer to the section on your installed software for detailed operations. Yahoo! MusicTM Jukebox is supported in Windows® XP or Windows VistaTM. Computer connection Connecting the player and The player is capable of transferring files at wireless earphones to the USB 2.0. If USB 2.0 port is available on your computer Connect the player to your computer with the mini USB cable provided. The player will turn on automatically. It will appear as a Windows portable device (Windows VistaTM or computer, use it to connect to your player. The player is still backward compatible with the older USB 1.1 ports. However, you will not be able to take full advantage of the potential speed increase. Windows® XP with Windows Media Player 10 installed) using the Media Transfer Protocol (MTP) or a drive letter if you are using Windows® 2000. To charge the wireless earphones, connect the charger to the computer USB port of your computer. Attach the left earphone to the charger for charging. Wireless earphones It might take several seconds for the player to be detected. Click "Refresh" in My Computer cannot be operated during charging. Refer to the illustration below for details. or Explorer to make sure the player has been detected. To place the left earphone in the charger: To detach from the charger: The player 1 2 Push earphone forward Hold the charger Push Push click To open the cover: lift it up and rotate (refer to page 16 for detailed description) Charger for wireless earphones USB port of your computer USB cable 11
-
 1
1 -
2
-
3
-
4
-
5
-
 6
6 -
 7
7 -
 8
8 -
 9
9 -
 10
10 -
 11
11 -
 12
12 -
 13
13 -
 14
14 -
 15
15 -
 16
16 -
17
-
18
-
19
-
20
-
21
-
22
-
23
-
24
-
25
-
26
-
27
-
28
-
29
-
30
-
31
-
32
-
33
-
34
-
35
-
36
-
37
-
38
-
39
-
40
-
41
 |
 |