Reebok Acd3 Treadmill User Manual
Reebok Acd3 Treadmill Manual
 |
View all Reebok Acd3 Treadmill manuals
Add to My Manuals
Save this manual to your list of manuals |
Reebok Acd3 Treadmill manual content summary:
- Reebok Acd3 Treadmill | User Manual - Page 1
customer satisfaction. If you have questions, or if there are missing or damaged parts, we will guarantee complete satisfaction through direct assistance from our factory. PLEASE CALL 800-999-3756 Mon.ÐFri., 6 a.m.Ð6 p.m. MST USER'S MANUAL CAUTION Read all precautions and instruc- tions in this - Reebok Acd3 Treadmill | User Manual - Page 2
HEART RATE MONITOR 7 TREADMILL OPERATION 9 HOW TO FOLD AND MOVE THE TREADMILL 19 TROUBLE-SHOOTING 20 REEBOK UNIVERSITY 22 EXERCISE GUIDELINES 24 PART LIST 26 HOW TO ORDER REPLACEMENT PARTS 27 LIMITED WARRANTY Back Cover Note: An EXPLODED DRAWING is attached in the center of this manual. 2 - Reebok Acd3 Treadmill | User Manual - Page 3
. 1. It is the responsibility of the owner to ensure that all users of this treadmill are adequately informed of all warnings and precautions. 2. Use the treadmill only as described in this manual. 3. Place the treadmill on a level surface, with at least eight feet of clearance behind it. Do not - Reebok Acd3 Treadmill | User Manual - Page 4
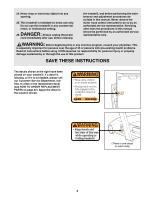
use, before cleaning the treadmill, and before performing the maintenance and adjustment procedures described in this manual. Never remove the motor hood unless instructed to do so by an authorized service representative. Servicing other than the procedures in this manual should be performed by an - Reebok Acd3 Treadmill | User Manual - Page 5
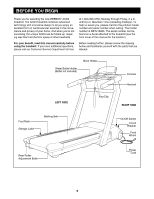
. The serial number can be found on a decal attached to the treadmill (see the front cover of this manual for the location). Before reading further, please review the drawing below and familiarize yourself with the parts that are labeled. Water Bottle Holder (Bottle not included) Book Holder - Reebok Acd3 Treadmill | User Manual - Page 6
completed. No tools are required. 1. With the help of a second person, carefully raise the Uprights (39) until the treadmill is in the position shown. 1 39 2. Make sure that all parts are tightened before you use the treadmill. Place a mat under the treadmill to protect the floor or carpet. 6 - Reebok Acd3 Treadmill | User Manual - Page 7
using a damp cloth; never use alcohol, abrasives, or chemicals. The chest strap may be hand washed and air dried. HEART RATE MONITOR TROUBLE-SHOOTING The instructions on the following pages explain how the heart rate monitor is used with the console. If the letters ÒPLSÓ appear in the PULSE display - Reebok Acd3 Treadmill | User Manual - Page 8
rate monitor can be affected by magnetic interference caused by high power lines or other sources. If it is suspected that this is a problem, try relocating the treadmill. ¥ The CR2032 battery may need to be replaced. Follow the steps below to replace the battery. Locate the battery cover on the - Reebok Acd3 Treadmill | User Manual - Page 9
ear, lug, or the like extending from the adapter must be connected to a permanent ground such as a properly grounded outlet box cover. Your treadmill, like any other type of sophisticated electronic equipment, can be seriously damaged by sudden voltage changes in your homeÕs power. Voltage surges - Reebok Acd3 Treadmill | User Manual - Page 10
general. ¥ If you have heart problems, or if you are over 60 in the manual mode, the speed and incline of the treadmill can treadmill as they guide you through effective workouts; three incline programs automatically control the incline of the treadmill instructions in this section refer to miles. 10 - Reebok Acd3 Treadmill | User Manual - Page 11
changes. I. MODE ButtonÑThis button is used to select the manual mode and workout programs. J. START ButtonÑThis button starts the walking plugged in (see page 9). Step onto the foot rails of the treadmill. Find the clip attached to the key, and slide the clip onto instructions on page 12. 11 - Reebok Acd3 Treadmill | User Manual - Page 12
ENTER button. Note: When the key is removed from the console, the maximum heart rate setting will be reset to 70%. HOW TO USE THE MANUAL MODE 1 Insert the key into the console. See HOW TO TURN ON THE POWER on page 11. Note: When you are familiar with the console - Reebok Acd3 Treadmill | User Manual - Page 13
as desired by pressing the INCLINE buttons Note: After the INCLINE buttons are pressed, it may take a moment for the treadmill to reach the selected incline setting. 6 Follow your progress with the LED track and the LED displays. The LED TrackÑThe LED track represents a distance - Reebok Acd3 Treadmill | User Manual - Page 14
of the treadmill as they guide you through effective workouts; the three incline programs automatically control the incline of the treadmill. Follow on page 9. 3 Select the desired program. When the key is inserted, the MANUAL mode will be selected. To select a speed program or an incline program, - Reebok Acd3 Treadmill | User Manual - Page 15
the program at any time, hold down the STOP button for two seconds. The MANUAL mode will then be selected. 6 Follow your progress with the LED displays. the incline of the treadmill to keep your heart rate within a predetermined range during your workouts. Follow the instructions below to use a - Reebok Acd3 Treadmill | User Manual - Page 16
and the speed and/or incline of the treadmill will automatically decrease. (See HEART RATE MONITOR TROUBLE-SHOOTING on page 7.) While the program is the Custom 1 or Custom 2 program. When the key is inserted, the MANUAL mode will be selected. To select a custom program, press the MODE button - Reebok Acd3 Treadmill | User Manual - Page 17
the first period, simply adjust the speed and incline of the treadmill to the desired levels with the SPEED and INCLINE buttons. Every Select the Custom 1 or Custom 2 program. When the key is inserted, the MANUAL mode will be selected. To select a custom program, press the MODE button repeatedly - Reebok Acd3 Treadmill | User Manual - Page 18
the indicator is lit. Next, adjust the speed and incline of the treadmill with the SPEED and INCLINE buttons. When the current period of the the program at any time, hold down the STOP button for two seconds. The MANUAL mode will then be selected. 5 Follow your progress with the LED displays. Refer - Reebok Acd3 Treadmill | User Manual - Page 19
, unplug the power cord. CAUTION: You must be able to safely lift 45 pounds (20 kg) in order to raise, lower, or move the treadmill. 1. Hold the treadmill with your hands in the locations shown at the right. CAUTION: To decrease the possibility of injury, bend your legs and keep your back - Reebok Acd3 Treadmill | User Manual - Page 20
TROUBLE-SHOOTING Most treadmill problems can be solved by following the steps below. Find the symptom that applies, and follow the steps listed. If further assistance is needed, please call our Customer Service Department tollfree at 1-800-999-3756, Monday through Friday, 6 a.m. until 6 p.m. - Reebok Acd3 Treadmill | User Manual - Page 21
and carefully walk on the treadmill for a few minutes. Repeat until the walking belt is properly tightened. PROBLEM: The heart rate monitor does not function properly a. If the heart rate monitor does not function properly, refer to HEART RATE MONITOR TROUBLESHOOTING on page 7. b. If the heart - Reebok Acd3 Treadmill | User Manual - Page 22
professionals, Reebok University has created a host of original programs, such as Step Reebok¨, Walk ReebokSM, Slide ReebokSM and Reebok City JamSM. The industry has adopted Reebok . WALKING AND BONE DENSITY Osteoporosis is a major health problem in the United States, affecting an estimated 15 to - Reebok Acd3 Treadmill | User Manual - Page 23
Several studies have reported that regular walking at moderate to brisk speeds appears to increase bone density. Specifically, Fradin and his colleagues6 found that 70-year-old subjects who walked at least 30 minutes per day had higher bone mineral content than subjects who walked less than 30 - Reebok Acd3 Treadmill | User Manual - Page 24
your heart rate as a guide. The chart below shows workout should include the following three parts: A Warm-upÑStart each adjust the speed or incline of the treadmill accordingly. Fat Burning Training Zone ExerciseÑAfter and will help prevent post-exercise problems. Exercise Frequency To maintain or - Reebok Acd3 Treadmill | User Manual - Page 25
SUGGESTED STRETCHES The correct form for several basic stretches is shown at the right. Move slowly as you stretchÑnever bounce. 1. Toe Touch Stretch Stand with your knees bent slightly and slowly bend forward from your hips. Allow your back and shoulders to relax as you 1 reach down toward - Reebok Acd3 Treadmill | User Manual - Page 26
parts listed below, refer to the EXPLODED DRAWING attached in the center of this manual. Key No. Qty. Description Key No. Qty. Description Belt Guide Support Motor Adj. Bolt Lift Frame Small Hood Bracket Chest Strap Motor Isolator Plate Motor Bolt Motor Isolator Incline Motor Nut Incline Motor - Reebok Acd3 Treadmill | User Manual - Page 27
The MODEL NUMBER of the product (RBTL15980) ¥ The NAME of the product (REEBOK¨ ACD3 treadmill) ¥ The SERIAL NUMBER of the product (see the front cover of this manual) ¥ The KEY NUMBER and DESCRIPTION of the part(s) (see the PART LIST on pages 26 and 27 and the EXPLODED DRAWING attached in the center - Reebok Acd3 Treadmill | User Manual - Page 28
EXPLODED DRAWINGÑMODEL NO. RBTL15980 R1198A 41 41 3 41 41 100 22 23 1 10 15 17 11 12 16 31 18 7 19 20 34 21 35 10 11 12 64 8 33 14 7 115 35 41 30 23 22 32 25 27 96 24 28 26 29 34 5 9 6 33 5 13 33 35 35 34 33 34 35 9 10 11 41 12 8 41 36 64 10 11 12 1 - Reebok Acd3 Treadmill | User Manual - Page 29
EXPLODED DRAWINGÑMODEL NO. RBTL15980 R1198A 103 4 114 117 118 119 40 73 39 107 99 98 42 43 113 44 54 61 45 111 55 58* 56 41 54 42 43 62 112 59 52 63 60 111 111 41 94 57 90 120 89 91 102 99 92 53 101 96 92 91 99 98 48 46 111 47 41 104 64 51 49 50 105 47 104 110 41 - Reebok Acd3 Treadmill | User Manual - Page 30
REEBOK¨ ACD3 after the date of purchase. The motor is covered for three years after the sale; store, operate, and maintain the Product as specified in the Manual; notify our Customer Service Department of any defect within 10 days after discovery of the defect; as instructed, return any defected part
-
 1
1 -
 2
2 -
 3
3 -
 4
4 -
 5
5 -
 6
6 -
 7
7 -
8
-
9
-
10
-
11
-
12
-
13
-
14
-
15
-
16
-
17
-
18
-
19
-
20
-
21
-
22
-
23
-
24
-
25
-
26
-
27
-
28
-
29
-
30
 |
 |
C
AUTION
Read all precautions and instruc-
tions in this manual before using
this equipment. Keep this manual
for future reference.
Serial Number
Decal
Q
UESTIONS?
As a manufacturer, we are com-
mitted to providing complete
customer satisfaction. If you
have questions, or if there are
missing or damaged parts, we
will guarantee complete satisfac-
tion through direct assistance
from our factory.
PLEASE CALL DIRECT TO OUR
TOLL-FREE CUSTOMER HOT
LINE. The trained technicians on
our customer hot line will provide
immediate assistance, free of
charge to you.
CUSTOMER HOT LINE:
1-800-999-3756
Mon.—Fri., 6 a.m.—6 p.m. MST
Model No. RBTL15980
Serial No.
U
SER’S
M
ANUAL
¤
¤
¤