Reebok Rl 10.0 Elliptical English Manual
Reebok Rl 10.0 Elliptical Manual
 |
View all Reebok Rl 10.0 Elliptical manuals
Add to My Manuals
Save this manual to your list of manuals |
Reebok Rl 10.0 Elliptical manual content summary:
- Reebok Rl 10.0 Elliptical | English Manual - Page 1
to providing complete customer satisfaction. If you have questions, or if parts are damaged or missing, PLEASE DO NOT CONTACT THE STORE; please all precautions and instructions in this manual before using this equipment. Keep this manual for future reference. USER'S MANUAL Visit our website at - Reebok Rl 10.0 Elliptical | English Manual - Page 2
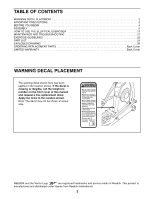
3 BEFORE YOU BEGIN 4 ASSEMBLY 5 HOW TO USE THE ELLIPTICAL EXERCISER 12 MAINTENANCE AND TROUBLESHOOTING 21 EXERCISE GUIDELINES 22 PART LIST 24 EXPLODED DRAWING 26 ORDERING REPLACEMENT PARTS Back Cover LIMITED WARRANTY Back Cover WARNING DECAL PLACEMENT The warning decal shown here has been - Reebok Rl 10.0 Elliptical | English Manual - Page 3
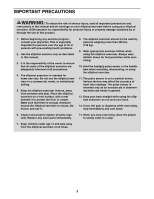
important for persons over the age of 35 or persons with pre-existing health problems. 2. Use the elliptical exercise only as described in this manual. 3. It is the responsibility of the owner to ensure that all users of the elliptical exerciser are adequately informed of all precautions. 4. The - Reebok Rl 10.0 Elliptical | English Manual - Page 4
for selecting the revolutionary REEBOK® RL 10.0 elliptical exerciser. The RL 10.0 elliptical exerciser provides a wide array of features designed to make your workouts at home more effective and enjoyable. For your benefit, read this manual carefully before you use the elliptical exerciser. If you - Reebok Rl 10.0 Elliptical | English Manual - Page 5
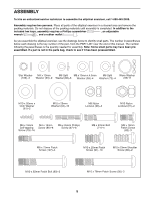
elliptical exerciser, use the drawings below to identify small parts. The number in parentheses below each drawing is the key number of the part, from the PART LIST near the end of this manual M10 x 20mm Patch Screw (91)-10 M10 x 23mm Shoulder Screw (80)-2 M10 x 62mm Patch Bolt (89)-2 M10 x 78mm - Reebok Rl 10.0 Elliptical | English Manual - Page 6
1. To make assembly easier, read the information on page 5 before you begin assembling the elliptical exerciser. Orient the Front Stabilizer (35) as shown. Attach the two Wheels (25) to the Front Stabilizer with two M10 x 62mm Patch Bolts (89) and two M10 Nylon Locknuts (97). Attach two Leveling - Reebok Rl 10.0 Elliptical | English Manual - Page 7
4. Hook the front ends of the Frame Covers (105, 106) together. Attach each Frame Cover to the 4 Frame (2) with three M4 x 16mm Self-tapping Screws (79 x 16mm Patch Screws (82) and three Star Washers (100). Avoid pinching the Wires (48, 110, 111) between the Upright and the Frame. 5 48 6 111 - Reebok Rl 10.0 Elliptical | English Manual - Page 8
6. Orient the Left Roller Leg (12), which is marked with a "Left" sticker, near the left Crank Arm (36) as shown. 6 Grease 36 98 Apply a small amount of the included grease to 94 both sides of a Wave Washer (98). Slide the 30 Wave Washer onto the end of the left Crank Arm (36). Next, slide - Reebok Rl 10.0 Elliptical | English Manual - Page 9
) through the right Frame Cover. Attach each Frame Cover (17) to the Frame (2) with two M4 x 16mm Screws (86). Avoid pinching the Controller Wires (110, 111) during this step. 9 Grease 65 17 86 110 2 86 111 17 Avoid pinching the Controller Wires (110, 111) during this step 10. Connect the Left - Reebok Rl 10.0 Elliptical | English Manual - Page 10
Right Pedal Leg (not shown). 12 11 Grease 32 98 94 91 31 12 Grease 32 98 31 94 91 14 94 91 94 91 10 - Reebok Rl 10.0 Elliptical | English Manual - Page 11
the battery cover. Note: The Console (5) can be operated with an optional power supply instead of batteries. To purchase a power supply, call the toll-free telephone number on the front cover of this manual. Plug one end of the power supply into the jack at the front of the elliptical exerciser - Reebok Rl 10.0 Elliptical | English Manual - Page 12
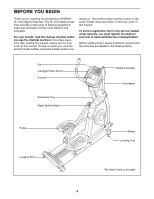
the front stabilizer until the rocking motion is eliminated. Crank Arm Cover Pedals To dismount the elliptical exerciser, wait until the pedals come to a complete stop. Note: The elliptical exerciser does not have a free wheel; the pedals will continue to move until the flywheel stops. When - Reebok Rl 10.0 Elliptical | English Manual - Page 13
system and listen to your favorite music or audio books while you exercise. To use the manual mode of the console, follow the steps beginning on page 14. To use a weight loss workout, see page 15. To use a trainer workout, see page 17. To play the Fat Blocker game, see page 18. To play the - Reebok Rl 10.0 Elliptical | English Manual - Page 14
keeps the backlight on while the console is on. To conserve the batteries, the "Auto" option keeps the backlight on only while you are pedaling. The "Off" option turns the backlight off. To select a backlight option, first press and hold down the Trainer Workouts button for several seconds. Next - Reebok Rl 10.0 Elliptical | English Manual - Page 15
or press any button on the console to turn on the console. A moment after you begin pedaling or press a button, the display will light. 2. Select a weight loss workout. To select one of the four weight Profile loss workouts, press the Weight Loss Workouts button repeatedly until the name of - Reebok Rl 10.0 Elliptical | English Manual - Page 16
the current segment is too high or too low, you can manually override the setting by pressing the numbered Resistance buttons. IMPORTANT: in the display. To restart the workout, simply resume pedaling. To reset the workout, press the Start/Reset button. 5. Follow your progress with the display. As - Reebok Rl 10.0 Elliptical | English Manual - Page 17
console to turn on the console. A moment after you begin pedaling or press a button, the display will light. 2. Select a trainer workout. To select one of the twenty trainer Profile workouts, press the Trainer Workouts high or too low, you can manually override the setting by pressing the - Reebok Rl 10.0 Elliptical | English Manual - Page 18
part of a stacked block reaches the top of the arena. When the game ends, the display will Display button. To resume the game, press the Display button repeatedly until the words FAT BLOCKER appear at the top of the display, and then begin pedaling. 5. When you are finished exercising, the console - Reebok Rl 10.0 Elliptical | English Manual - Page 19
the steps below to play the Calorie Destroyer game. 1. Begin pedaling or press any button on the console to turn on the console. A moment after you begin pedaling or press a button, the display will light. 2. Select the Calorie Destroyer game. To select the Calorie Destroyer game, press the Calorie - Reebok Rl 10.0 Elliptical | English Manual - Page 20
SOUND SYSTEM To play your own music or audio books through the console's stereo sound system while you exercise, first locate the jack under the ledge on the console. Plug an audio cable (not included) into the jack on the console and into a jack on your MP3 player or CD player; make sure - Reebok Rl 10.0 Elliptical | English Manual - Page 21
shields apart and remove the convenience tray. CONSOLE TROUBLESHOOTING If the console display becomes dim, the batteries should be replaced; most console problems are the result of low batteries. See assembly step 13 on page 11 for replacement instructions. Next, see the drawing below and locate - Reebok Rl 10.0 Elliptical | English Manual - Page 22
with pre-existing health problems. The pulse sensor detailed exercise rate as a guide to find the proper WORKOUT GUIDELINES Warming up-Start with 5 to 10 workouts each week, with at least one day of rest between workouts. After a few months of regular exercise, you may complete up to five workouts - Reebok Rl 10.0 Elliptical | English Manual - Page 23
SUGGESTED STRETCHES The correct form for several basic stretches is shown at the right. Move slowly as you stretch-never bounce. 1. Toe Touch Stretch Stand with your knees bent slightly and slowly bend forward from your hips. Allow your back and shoulders to relax as you reach down toward your toes - Reebok Rl 10.0 Elliptical | English Manual - Page 24
PART LIST-Model No. RBEL66807.1 R1207A Key No. Qty. Description Key No. Qty. Description 1 1 Base 2 1 Frame 3 2 Outer Crank Arm Cover 4 2 Inner Crank Arm Cover 5 1 Console 6 1 Upright 7 2 Roller Cover 8 1 Left Handlebar 9 1 Right Handlebar 10 1 Left Upright Cover 11 - Reebok Rl 10.0 Elliptical | English Manual - Page 25
Handlebar Wire Right Handlebar Wire Left Controller Wire Right Controller Wire Hex Key Grease Packet User's Manual Note: Specifications are subject to change without notice. See the back cover of this manual for information about ordering replacement parts. *These parts are not illustrated. 25 - Reebok Rl 10.0 Elliptical | English Manual - Page 26
9 26 35 101 79 76 98 41 18 41 19 23 71 109 93 6 79 79 11 108 8 10 100 82 79 86 96 19 41 81 79 41 93 71 18 33 86 33 98 98 82 77 77 100 82 86 17 2 80 111 52 64 86 79 86 65 38 86 47 84 17 45 3 36 75 - Reebok Rl 10.0 Elliptical | English Manual - Page 27
EXPLODED DRAWING B-Model No. RBEL66807.1 R1207A 27 33 32 31 94 91 31 33 91 94 14 41 94 41 91 13 88 87 46 88 46 88 85 46 88 42 87 87 60 98 86 54 30 79 94 91 79 12 32 28 41 98 41 91 94 85 24 83 82 34 79 7 83 82 34 27 22 27 37 33 94 91 32 31 86 29 79 54 30 91 94 91 - Reebok Rl 10.0 Elliptical | English Manual - Page 28
cover of this manual) • the name of the product (see the front cover of this manual) • the key number and description of the replacement part(s) (see the PART by an ICON authorized service center; products used for commercial or rental purposes; or products used as store display models. No other
-
 1
1 -
 2
2 -
 3
3 -
 4
4 -
 5
5 -
 6
6 -
 7
7 -
8
-
9
-
10
-
11
-
12
-
13
-
14
-
15
-
16
-
17
-
18
-
19
-
20
-
21
-
22
-
23
-
24
-
25
-
26
-
27
-
28
 |
 |
CAUTION
Read all precautions and instruc-
tions in this manual before using
this equipment. Keep this manu-
al for future reference.
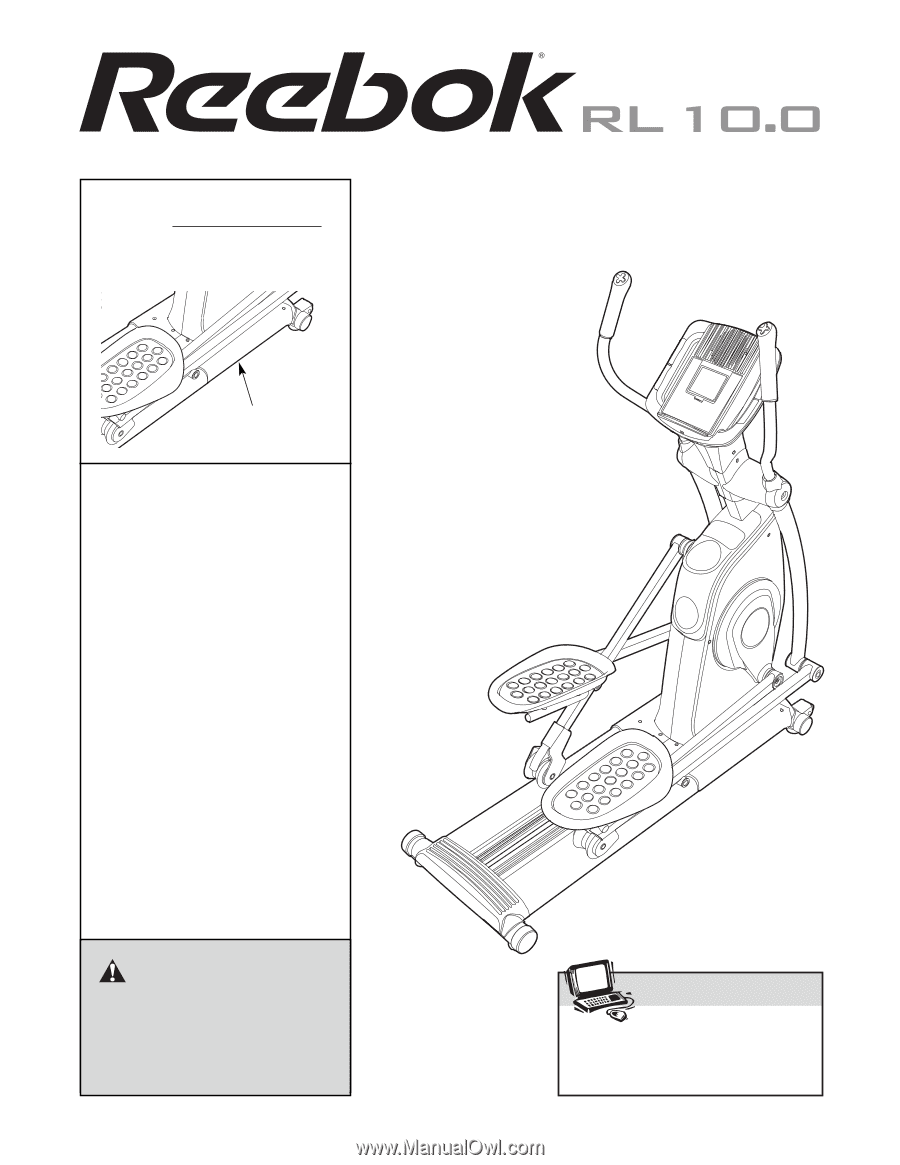
Model No. RBEL66807.1
Serial No.
Write the serial number in the
space above for reference.
USER’S MANUAL
Visit our website at
www.reebokhomefitness.com
new products, prizes,
fitness tips, and much more!
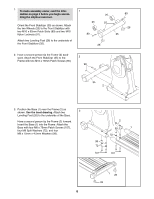
Serial Number Decal
(on underside of frame)
QUESTIONS?
As a manufacturer, we are commit-
ted to providing complete customer
satisfaction. If you have questions,
or if parts are damaged or missing,
PLEASE DO NOT CONTACT THE
STORE; please contact Customer
Care.
IMPORTANT: You must note the
product model number and serial
number (see the drawing above)
before contacting us.
CALL TOLL-FREE:
1-877-994-4999
Mon.–Fri. 6 a.m.–6 p.m. MST
Sat. 8 a.m.–4 p.m. MST
ON THE WEB:
www.reebokservice.com