Ricoh 3245 General Settings Guide - Page 100
Auth. Info, Specify Other Auth. Info, Do not Specify, Change, Folder, Browse Network
 |
UPC - 026649128660
View all Ricoh 3245 manuals
Add to My Manuals
Save this manual to your list of manuals |
Page 100 highlights
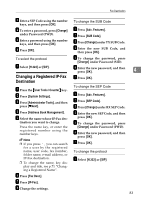
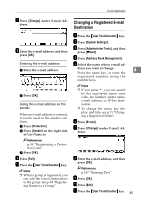
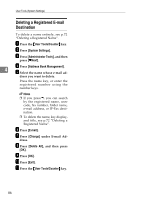
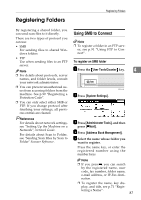
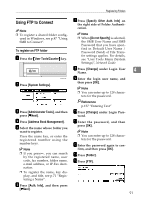
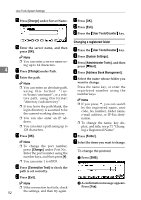
User Tools (System Settings) F Press [Auth. Info], and then press [TNext]. G Press [Specify Other Auth. Info] on the right side of Folder Authentication. Note ❒ When [Do not Specify] is selected, the SMB User Name and SMB Password that you have speci- fied in Default User Name / Password (Send) of File Trans- fer settings applies. For details, 4 see "User Tools Menu (System Settings)", Network Guide. H Press [Change] under Login User Name. I Enter the login user name, and then press [OK]. Note ❒ You can enter up to 128 characters for the password. Reference p.157 "Entering Text" J Press [Change] under Login Pass- word. K Enter the password, and then press [OK]. Note ❒ You can enter up to 128 charac- ters for the password. L Enter the password again to con- firm, and then press [OK]. M Press [Folder]. N Confirm that [SMB] is selected. Note ❒ To specify a folder, you can ei- ther enter the path manually or locate the folder by browsing the network. Reference p.88 "To locate the folder manually" p.88 "Using Browse Network to locate the folder" To locate the folder manually A Press [Change] under Path. B Enter the path where the folder is located. Note ❒ Enter the path using this for- mat: "\\ServerName\ShareName\PathName". ❒ You can also enter an IP address. ❒ You can enter a path using up to 128 characters. C Press [OK]. Note ❒ If the format of the entered path is not correct, a message appears. Press [Exit], and then enter the path again. Using Browse Network to locate the folder A Press [Browse Network]. The client computers sharing the same network as the machine appear. 88
-
 1
1 -
2
-
3
-
4
-
5
-
6
-
7
-
8
-
9
-
10
-
11
-
12
-
13
-
14
-
15
-
16
-
17
-
18
-
19
-
20
-
21
-
22
-
23
-
24
-
25
-
26
-
27
-
28
-
29
-
30
-
31
-
32
-
33
-
34
-
35
-
36
-
37
-
38
-
39
-
40
-
41
-
42
-
43
-
44
-
45
-
46
-
47
-
48
-
49
-
50
-
51
-
52
-
53
-
54
-
55
-
56
-
57
-
58
-
59
-
60
-
61
-
62
-
63
-
64
-
65
-
66
-
67
-
68
-
69
-
70
-
71
-
72
-
73
-
74
-
75
-
76
-
77
-
78
-
79
-
80
-
81
-
82
-
83
-
84
-
85
-
86
-
87
-
88
-
89
-
90
-
91
-
92
-
93
-
94
-
 95
95 -
 96
96 -
 97
97 -
 98
98 -
 99
99 -
 100
100 -
 101
101 -
 102
102 -
 103
103 -
 104
104 -
 105
105 -
106
-
107
-
108
-
109
-
110
-
111
-
112
-
113
-
114
-
115
-
116
-
117
-
118
-
119
-
120
-
121
-
122
-
123
-
124
-
125
-
126
-
127
-
128
-
129
-
130
-
131
-
132
-
133
-
134
-
135
-
136
-
137
-
138
-
139
-
140
-
141
-
142
-
143
-
144
-
145
-
146
-
147
-
148
-
149
-
150
-
151
-
152
-
153
-
154
-
155
-
156
-
157
-
158
-
159
-
160
-
161
-
162
-
163
-
164
-
165
-
166
-
167
-
168
-
169
-
170
-
171
-
172
-
173
-
174
-
175
-
176
-
177
-
178
-
179
-
180
-
181
-
182
-
183
-
184
-
185
-
186
-
187
-
188
-
189
-
190
-
191
-
192
 |
 |
