Ridgid EB4424 Owners Manual - Page 10
Features, Tools Needed - edge belt sander
 |
View all Ridgid EB4424 manuals
Add to My Manuals
Save this manual to your list of manuals |
Page 10 highlights
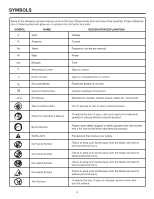
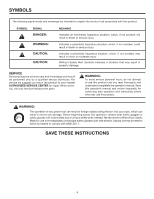
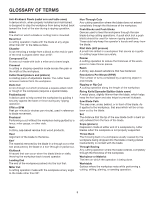
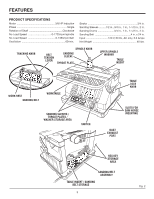
FEATURES KNOW YOUR OSCILLATING EDGE BELT/ SPINDLE SANDER See Figure 2. Before attempting to use this product, familiarize yourself with all operating features and safety rules. Sanding Belt Removes material from wood. Oscillates (3/4 in.) up and down to sand faster and prevents burning of the workpiece. Belt Tension Lever Slide lever left to release the sanding belt tension; slide right to apply belt tension. Tracking Knob Turning knob counterclockwise causes sanding belt to move towards the table; turning knob clockwise causes sanding belt to move away from the table. Spindle Knob Loosen knob to remove sanding belt assembly (or sanding drum) and change to spindle sanding (or belt sanding). NOTE: Knob has left hand threads. Turn knob clockwise to loosen and counterclockwise to tighten. Work rest Supports the workpiece on the sanding belt. Throat plate Fits around drum to help support workpiece. Sanding Sleeve/Drum Removes material from wood. Oscillates up and down to sand faster and prevents burning the workpiece. Table Lock Knob Loosening knob allows the front table to be tilted for bevel sanding. Dust exhaust Port 2-1/2 in. opening for wet/dry vac hook-up. Table Insert/Sanding Belt Storage Holds table insert or sanding belt when not being used. Table Insert Helps to support workpiece when drum sanding. worktable Equipped with a sturdy, worktable that provides a stable surface when using either the disc sanding or the belt sanding feature. TOOLS NEEDED The following tools (not included) are needed for making adjustments to your tool: STRAIGHT EDGE COMBINATION SQUARE Fig. 3 10
-
 1
1 -
2
-
3
-
4
-
 5
5 -
 6
6 -
 7
7 -
 8
8 -
 9
9 -
 10
10 -
 11
11 -
 12
12 -
 13
13 -
 14
14 -
 15
15 -
16
-
17
-
18
-
19
-
20
-
21
-
22
-
23
-
24
-
25
-
26
 |
 |
