Ridgid R3202 Owners Manual - Page 14
Starting/stopping The Saw, Warning, Adjusting Blade Depth
 |
View all Ridgid R3202 manuals
Add to My Manuals
Save this manual to your list of manuals |
Page 14 highlights
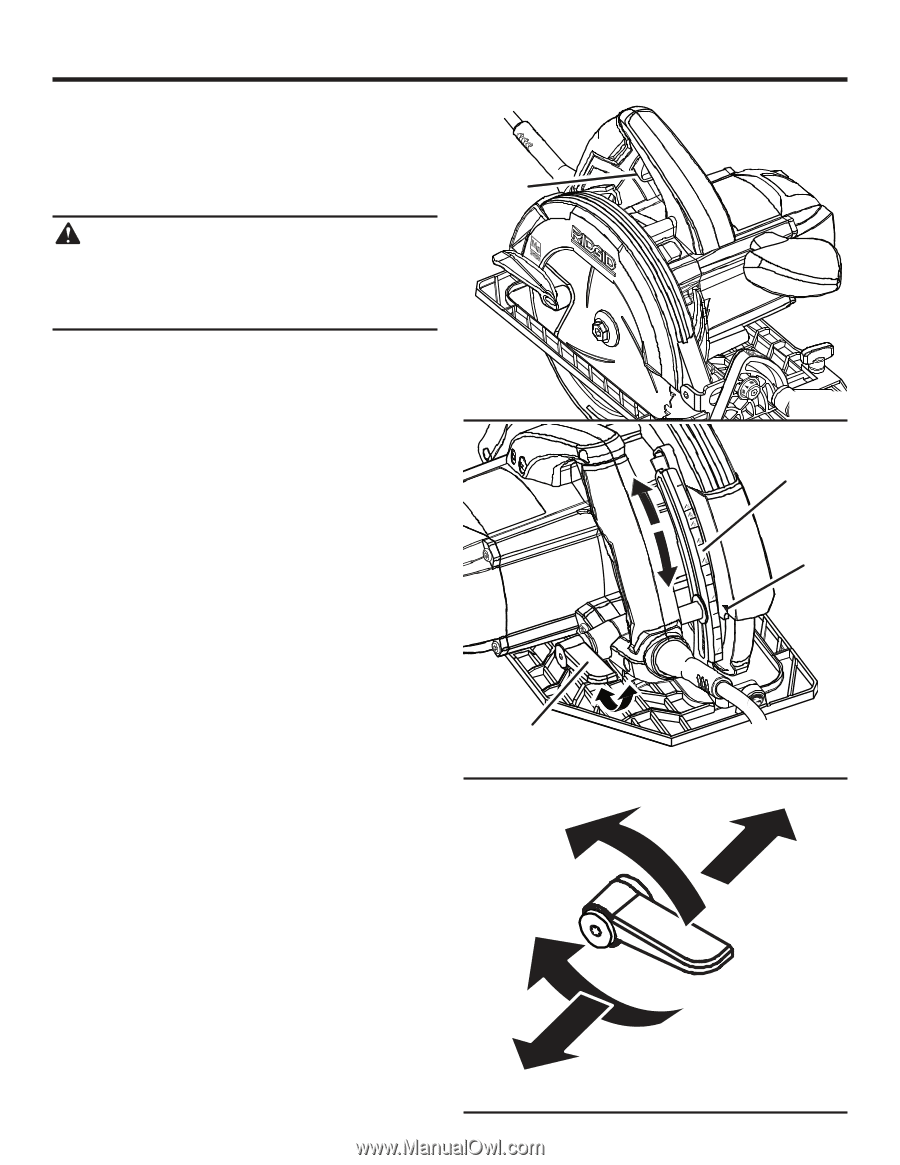
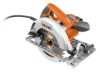
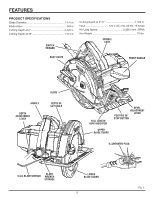
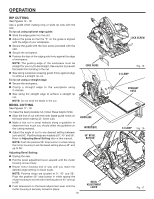
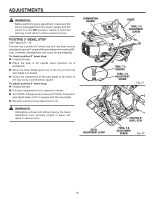
OPERATION STARTING/STOPPING THE SAW See Figure 9. To start the saw: Depress the switch trigger. Always let the blade reach full speed, then guide the saw into the workpiece. SWITCH Trigger WARNING: The blade coming in contact with the workpiece before it reaches full speed could cause the saw to "kickback" towards you resulting in serious injury. To stop the saw: Release the switch trigger. After you release the switch trigger, allow the blade to come to a complete stop. Do not remove the saw from the workpiece while the blade is moving. ADJUSTING BLADE DEPTH See Figure 10. Always keep correct blade depth setting. Less than a full tooth of the blade teeth should be visible below the workpiece. More blade depth will increase the chance of kickback and cause the cut to be rough. Unplug the saw. Pull depth adjustment lever upward to release. Determine the desired depth of cut. Hold base flat against the workpiece and raise or lower saw until the index point or mark on the saw aligns with the desired depth on the scale. Push down on depth adjustment lever to lock into position. INDEXABLE LEVERS See Figure 11. The levers on the saw can be repositioned for the best tightening position. Pull the lever out from the saw and to desired position. Push lever back in and down to lock into place. Check to be sure the base is clamped securely. depth adjustment lever Fig. 9 14 38 12 58 34 1 11 2 2 2716 DEPTH OF CUT SCALE index point Fig. 10 PUSH IN AND DOWN TO LOCK pull out and up to position Fig. 11 14
-
 1
1 -
2
-
3
-
4
-
5
-
6
-
7
-
8
-
 9
9 -
 10
10 -
 11
11 -
 12
12 -
 13
13 -
 14
14 -
 15
15 -
 16
16 -
 17
17 -
 18
18 -
 19
19 -
20
-
21
-
22
 |
 |