Rocketfish RF-RBAUX User Manual (English) - Page 21
Establishing communication
 |
View all Rocketfish RF-RBAUX manuals
Add to My Manuals
Save this manual to your list of manuals |
Page 21 highlights
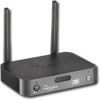
Establishing communication Rocketboost products form an audio network and each Rocketboost receiver can select the audio from any Rocketboost sender in the network. Important Every Rocketboost network must contain one hub device, which helps devices join the network. The network can have only one hub, which you can enable using the hub switch on the back of all Rocketboost senders and sender/receivers. If this is your first Rocketboost product, you should make the sender/receiver the hub, if you already have Rocketboost products, you should disable hub mode on this device. Important: Hub devices must always have power for your network to operate. The hub device can be in standby (power saving) mode, but must stay plugged in. All Rocketboost devices must be "joined" or wirelessly connected to your Rocketboost hub device so that audio can be sent between them. The following steps describe how to join Rocketboost devices. To establish communications: 1 If you are setting up your network for the first time, choose one of your Rocketboost senders to be your hub device by setting the Hub Status switch to Enable. For example, if you want the sender/receiver to be the hub, set the Hub Status switch on the sender/receiver to Enable. 2 If you already have a Rocketboost network established, set the Hub Status switch on the sender/receiver to Disable. The sender/receiver power indicator lights green if the sender/receiver Hub Status switch is enabled, or lights blue if the sender/receiver Hub Status switch is disabled. 3 If possible, bring your Rocketboost hub device, and the new Rocketboost device to which you'd like to join to the hub, into the same room. 4 Press the on the Rocketboost hub device to turn it on. 5 Press the on your other Rocketboost device to turn it on. RF-RBAUX 21
-
 1
1 -
2
-
3
-
4
-
5
-
6
-
7
-
8
-
9
-
10
-
11
-
12
-
13
-
14
-
15
-
 16
16 -
 17
17 -
 18
18 -
 19
19 -
 20
20 -
 21
21 -
 22
22 -
 23
23 -
 24
24 -
 25
25 -
 26
26 -
27
-
28
-
29
-
30
-
31
-
32
-
33
-
34
-
35
-
36
 |
 |
