Ryobi P20200VNM Operation Manual - Page 8
Assembly, Operation
 |
View all Ryobi P20200VNM manuals
Add to My Manuals
Save this manual to your list of manuals |
Page 8 highlights
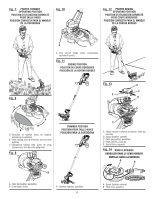
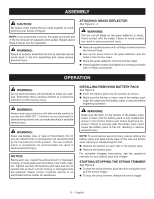
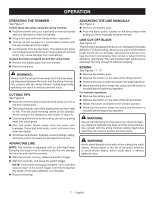
ASSEMBLY CAUTION: Be careful when sliding the two ends together to avoid pinching your hands or fingers. NOTE: Once assembled correctly, the upper and lower end of the tool should not separate when pulled. Repeat above steps if pieces can be separated. WARNING: Failure to properly assemble the tool as describe above could result in the tool separating and cause serious personal injury. ATTACHING GRASS DEFLECTOR See Figure 3 - 4. WARNING: The line cut-off blade on the grass deflector is sharp. Avoid contact with the blade. Failure to avoid contact can result in serious personal injury. Remove supplied screws with a Phillips screwdriver from the trimmer head. Line up the screw holes in the grass deflector with the holes in the trimmer head. Place the grass deflector onto the trimmer head. Install supplied screws and tighten by turning clockwise with a Phillips screwdriver. OPERATION WARNING: Do not allow familiarity with products to make you careless. Remember that a careless fraction of a second is sufficient to inflict serious injury. WARNING: Always wear eye protection with side shields marked to comply with ANSI Z87.1. Failure to do so could result in objects being thrown into your eyes resulting in possible serious injury. WARNING: Never use blades, wire, or rope on this product. Do not use any attachments or accessories not recommended by the manufacturer of this product. The use of attachments or accessories not recommended can result in serious personal injury. NOTICE: Before each use, inspect the entire product for damaged, missing, or loose parts such as screws, nuts, bolts, caps, etc. Tighten securely all fasteners and caps and do not operate this product until all missing or damaged parts are replaced. Please contact customer service or an authorized service center for assistance. INSTALLING/REMOVING BATTERY PACK See Figure 5. Insert the battery pack into the product as shown. Make sure the latches on each side of the battery pack snap into place and the battery pack is secured before beginning operation. WARNING: Make sure the latch on the bottom of the battery pack snaps in place and the battery pack is fully seated and secure in the trimmer battery port before beginning operation. Failure to securely seat the battery pack could cause the battery pack to fall out, resulting in serious personal injury. NOTE: To avoid serious personal injury, always remove the battery pack and keep hands clear of the lock-out button when carrying or transporting the tool. Depress the latches on each side of the battery pack. Remove the battery pack. For complete charging instructions, see the operator's manuals for your battery pack and charger. STARTING/STOPPING THE STRING TRIMMER See Figure 6. To start the string trimmer, push the lock-out button and pull the switch trigger. To stop the string trimmer, release the switch trigger. 6 - English
-
 1
1 -
2
-
 3
3 -
 4
4 -
 5
5 -
 6
6 -
 7
7 -
 8
8 -
 9
9 -
 10
10 -
 11
11 -
 12
12 -
 13
13 -
14
-
15
-
16
-
17
-
18
-
19
-
20
-
21
-
22
-
23
-
24
-
25
-
26
-
27
-
28
-
29
-
30
 |
 |