Ryobi P3500K Operation Manual - Page 5
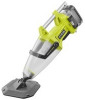
Operation, Assembly - pool vacuum
 |
View all Ryobi P3500K manuals
Add to My Manuals
Save this manual to your list of manuals |
Page 5 highlights
ASSEMBLY UNPACKING This product requires assembly. n Carefully remove the product and any accessories from the box. All items listed in the Includes section must be included at the time of purchase. WARNING: Items in this Assembly section are not assembled to the product by the manufacturer and require customer installation. Use of a product that may have been improperly assembled could result in serious personal injury. n If any parts are damaged or missing, please call 1-800-525-2579 for assistance. WARNING: If any parts are damaged or missing do not operate this product until the parts are replaced. Use of this product with damaged or missing parts could result in serious personal injury. WARNING: Do not attempt to modify this product or create accessories or attachments not recommended for use with this product. Any such alteration or modification is misuse and could result in a hazardous condition leading to possible serious personal injury. ATTACHING THE HANDLE See Figure 1, page 9. The handle has two sets of locking pins. To assemble the handle, locate the set of locking pins closest to the end of the handle. Squeeze the locking pins together and slide the handle through the rear handle bracket on the vacuum housing. After releasing the pins, continue to push the handle through the bracket until the locking pins come out on the other side of the bracket. Squeeze the locking pins together again, and slide the handle into the front handle bracket on the vacuum housing, lining up the locking pins with the holes on the bracket. The handle is locked in place when the locking pins are seated in the holes in the bracket. ATTACHING THE HEAD ASSEMBLY See Figure 2, page 9. Align the locking tab on the head assembly with the detent on the vacuum nosepiece and slide the head assembly onto the vacuum until the tab locks into place. To remove the head assembly, lift the locking tab on the head assembly and remove the head from the vacuum. OPERATION WARNING: Always inspect the vacuum and sealed battery compartment before and after each use for damage or cracks. Discontinue use if the sealed battery compartment is damaged, as this can allow corrosive or conductive liquids to enter the battery pack and result in serious personal injury or property damage. WARNING: Do not allow familiarity with this product to make you careless. Remember that a careless fraction of a second is sufficient to inflict serious injury. WARNING: Always remove battery pack from the product when you are assembling parts, making adjustments, cleaning, or when not in use. Removing battery pack will prevent accidental starting that could cause serious personal injury. WARNING: Do not use any attachments or accessories not recommended by the manufacturer of this product. The use of attachments or accessories not recommended can result in serious personal injury. APPLICATIONS You may use this product for the following purpose: Cleaning debris from pools and spas 5 - English
-
 1
1 -
 2
2 -
 3
3 -
 4
4 -
 5
5 -
 6
6 -
 7
7 -
 8
8 -
 9
9 -
 10
10 -
 11
11 -
12
-
13
-
14
-
15
-
16
-
17
-
18
-
19
-
20
-
21
-
22
-
23
-
24
-
25
-
26
-
27
-
28
 |
 |
