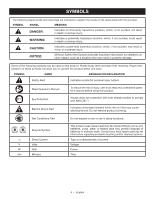
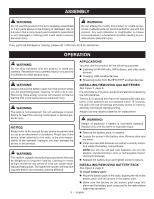
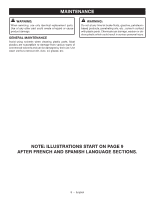
Ryobi P742 User Manual - Page 7
Using A Phone/mp3 Player Not, Included With The Radio, Using A Bluetooth, Enabled Device,
 |
View all Ryobi P742 manuals
Add to My Manuals
Save this manual to your list of manuals |
Page 7 highlights
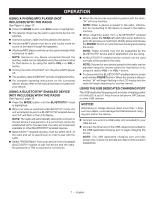
OPERATION USING A PHONE/MP3 PLAYER (NOT INCLUDED) WITH THE RADIO See Figure 4, page 10. Press the MODE button until AUX mode is highlighted. The retainer strap may be used to secure the device into position. Connect auxiliary cable (not included) to the device. The phone/MP3 player must be on and in play mode for sound to be heard through the speakers. All phone/MP3 player controls can be used normally while connected to radio. NOTE: Volume for any device connected through the auxiliary cable can be adjusted using the volume control for that device or by using the radio's VOL + or VOL - button. Turning the radio off will NOT turn the phone/MP3 player off. The auxiliary cable DOES NOT provide charging function. For complete operating instructions for the connected device, always refer to the manual that was included with your device. USING A BLUETOOTH® ENABLED DEVICE (NOT INCLUDED) WITH THE RADIO See Figure 5, page 10. Press the MODE button until the BLUETOOTH® mode is highlighted. When the radio is switched to BLUETOOTH® mode, the unit will attempt to pair to a BLUETOOTH® enabled device and "bt" will flash in the LCD display. NOTE: The radio will automatically attempt to connect to the last device it was paired to. If a connection cannot be established within five seconds, the radio will make itself available to other BLUETOOTH® enabled devices. BLUETOOTH® enabled devices must be within 30 ft. of the radio and set to search/scan in order to pair with the radio. Select "RYOBI Radio" from your device's list of available BLUETOOTH® signals to pair the device and the radio. No password or PIN is required for connection. When the device has successfully paired with the radio, "bt" will stop flashing. NOTE: When a device is paired to the radio, information for connecting to the device is saved in the radio's memory. When streaming audio from a BLUETOOTH® enabled device, press the SCAN left and right arrow buttons to go to the previous or next track. Briefly press and release the PRESET button to cycle between pausing and playing the audio. NOTE: These controls may not be supported by the BLUETOOTH® device and/or application you are using. All BLUETOOTH® enabled device controls can be used normally while paired to the radio. NOTE: Volume for any device paired to the radio can be adjusted using the volume control for that device or by using the radio's VOL + or VOL - button. To disconnect the BLUETOOTH® enabled device, press and hold the PRESET button. When the device is disconnected, "bt" will begin flashing in the LCD display and the radio will begin searching for another device. USING THE USB DEDICATED CHARGING PORT The USB dedicated charging port provides charging power of 5 Volts DC at up to 1 Amp for your cell phone, MP3 player, or other USB devices. NOTICE: Attempting to charge devices rated more than 1 Amp, such as a tablet, could damage the USB dedicated charging port and/or the device. Connect one end of a USB cable (not provided) to your USB device. Connect the other end of the USB cable (not provided) to the USB dedicated charging port to begin charging the device. NOTE: The USB dedicated charging port provides power only; it does not provide any data communication capabilities. 7 - English
-
 1
1 -
 2
2 -
 3
3 -
 4
4 -
 5
5 -
 6
6 -
 7
7 -
 8
8 -
 9
9 -
 10
10 -
 11
11 -
 12
12 -
13
-
14
-
15
-
16
-
17
-
18
-
19
-
20
-
21
-
22
-
23
-
24
-
25
-
26
-
27
-
28
 |
 |