Ryobi P770 Operation Manual - Page 6
Operation, Maintenance - parts
 |
View all Ryobi P770 manuals
Add to My Manuals
Save this manual to your list of manuals |
Page 6 highlights
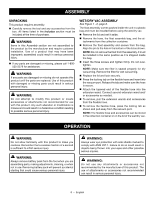
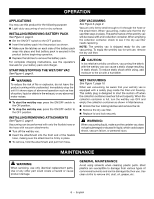
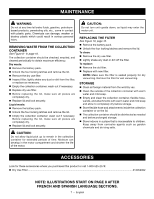
OPERATION APPLICATIONS You may use this product for the following purpose: Light-duty vacuuming of wet or dry surfaces INSTALLING/REMOVING BATTERY PACK See Figure 3, page 9. Set the ON/OFF switch to the OFF position. Insert the battery pack into the product as shown. Make sure the latches on each side of the battery pack snap into place and that battery pack is secured in the product before beginning operation. Depress the latches to remove the battery pack. For complete charging instructions, see the operator's manuals for your battery pack and charger. STARTING/STOPPING THE WET/DRY VAC See Figure 4, page 9. DRY VACUUMING See Figure 6, page 9. Vacuum only items small enough to fit through the hose or the attachment. When vacuuming, make sure that the dry use filter stays in place. The performance of the wet/dry vac will decrease with a full collection container. When emptying the collection container, check to see if the dry use filter needs replacing. NOTE: The wet/dry vac is shipped ready for dry use vacuuming. To equip the wet/dry vac for wet use, remove the dry use filter. CAUTION: In low relative humidity conditions, vacuuming fine debris with the wet/dry vac can cause a static charge resulting in static shock. To reduce static shock while using, add moisture to the air with a humidifier. WARNING: To reduce the risk of fire or explosion, do not leave the product running while unattended. Immediately stop the unit if it shows signs of abnormal operation such as loss of suction, liquid or debris in the exhaust, or any abnormal motor noises. To start the wet/dry vac: press the ON/OFF switch to the ON position. To stop the wet/dry vac: press the ON/OFF switch to the OFF position. INSTALLING/REMOVING ATTACHMENTS See Figure 5, page 9. Vacuuming can be performed with only the flexible hose or the hose with vacuum attachments. Turn off the wet/dry vac. Insert the attachment into the front end of the flexible hose, making sure the attachment is firmly in place. To remove, hold the attachment and pull from hose. WET VACUUMING See Figure 7, page 10. When wet vacuuming, be aware that your wet/dry vac is equipped with a safety plug inside the filter unit housing. This safety plug is designed to shut the suction off when the collection container reaches full wet capacity. When the collection container is full, turn the wet/dry vac OFF and empty the collection container as shown in Maintenance. n Unlock the four locking latches and remove the lid. n Remove the dry use filter. n Replace lid and lock securely. WARNING: When vacuuming liquid, make sure the canister vac does not get submerged or doused in liquid, which could cause shock, vacuum failure, or personal injury. MAINTENANCE WARNING: When servicing, use only identical replacement parts. Use of any other part could create a hazard or cause product damage. GENERAL MAINTENANCE Avoid using solvents when cleaning plastic parts. Most plastics are susceptible to damage from various types of commercial solvents and can be damaged by their use. Use clean cloths to remove dirt, dust, oil, grease, etc. 6 - English
-
 1
1 -
 2
2 -
 3
3 -
 4
4 -
 5
5 -
 6
6 -
 7
7 -
 8
8 -
 9
9 -
 10
10 -
 11
11 -
 12
12 -
13
-
14
-
15
-
16
-
17
-
18
-
19
-
20
-
21
-
22
-
23
-
24
 |
 |