Ryobi PCL445B Operation Manual - Page 10
Warning, Cutting With The Tool Using The, Required Accessory Cutting Wheel, Guard Not Included,
 |
View all Ryobi PCL445B manuals
Add to My Manuals
Save this manual to your list of manuals |
Page 10 highlights
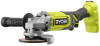
OPERATION Turn on the grinder and let the motor and grinding wheel build up to full speed. Lower the grinder gradually until the grinding wheel contacts the workpiece. WARNING: To prevent loss of control and possible serious personal injury, always operate the grinder with both hands, keeping one hand on the side handle. Keep the grinder tilted at an angle from 5° to 15° and continuously moving at a steady, consistent pace. NOTE: The label on the guard insert should be pointing away from the cutting wheel. Slide the guard insert over the grinding wheel and rotate it until the tab snaps into place. To remove, pull the tab away from the wheel guard and rotate guard insert off of the wheel guard. WARNING: To maintain proper control, always operate the tool with both hands, keeping one hand on the side handle. Loss of control could cause an accident resulting in possible serious injury. NOTICE: If the grinder is held in one spot too long, it will gouge and cut grooves in the workpiece. If the grinder is held at too sharp an angle, it will also gouge the workpiece because of concentration of pressure on a small area. Use just enough pressure to keep the grinder from chattering or bouncing. NOTE: Heavy pressure will decrease the grinder's speed and put a strain on the motor. Normally the weight of the tool alone is adequate for most grinding jobs. Use light pressure when grinding jagged edges or loose bolts where there is the potential for the grinder to snag on the metal edge. Lift the grinder away from the workpiece before turning off the grinder. CUTTING WITH THE TOOL USING THE REQUIRED ACCESSORY CUTTING WHEEL GUARD (NOT INCLUDED) See Figure 8, page 15. Look for the accessory cutting wheel guard (p/n 204772004) online or call 1-800-525-2579. It is important to understand the correct method for cutting with this tool. Refer to the figure in this section to learn the correct way to handle the tool during a cutting operation. WARNING: Always attach the accessory cutting wheel guard to the wheel guard when using a Type 1 straight or cutoff wheel. Failure to use the guard insert could result in serious personal injury. Always install the accessory cutting wheel guard before performing cutting operations. When attached correctly, the wheel guard insert and wheel guard provide protection on both sides of the cutting wheel. Install wheel guard and cutting wheel. Place the edge of the guard insert closest to the label over the edge of the wheel guard. WARNING: Since wheel is exposed on underside of work, keep hands and fingers away from cutting area. Any part of your body coming in contact with moving wheel may result in serious injury. WARNING: Do not grind with the side of the cutting wheel. Abrasive cutting wheels are intended for peripheral grinding, side forces applied to these wheels may cause them to shatter. INSTALLING/REMOVING CUTTING WHEEL See Figure 8, page 15. Place the guard on the shoulder of the bearing cap by aligning index arrows on guard and bearing cap. Press down on guard until it is fully seated. Depress the lever and rotate guard to the correct position. Refer to Positioning the Wheel Guard. NOTE: Be sure the raised ridge on the guard is seated in the groove on the bearing cap. Place the disc flange onto the spindle. Make sure the flats on the bottom of the disc flange are engaged with the flats on the spindle. Place the cutting wheel over the spindle. WARNING: Always install a cutting wheel with the flat side of the flange nut against the wheel. Failure to do so may cause the cutting wheel to crack when tightening the flange nut. This could result in serious in serious personal injury because of loose particles breaking off and being thrown from the tool. Do not overtighten. Thread the flange nut on the spindle with the raised, small diameter portion of the flange nut facing up. 10 - English
-
 1
1 -
2
-
3
-
4
-
 5
5 -
 6
6 -
 7
7 -
 8
8 -
 9
9 -
 10
10 -
 11
11 -
 12
12 -
 13
13 -
 14
14 -
 15
15 -
16
-
17
-
18
-
19
-
20
-
21
-
22
-
23
-
24
-
25
-
26
-
27
-
28
-
29
-
30
-
31
-
32
-
33
-
34
-
35
-
36
-
37
-
38
-
39
-
40
 |
 |
