Ryobi RB101 English Manual - Page 10
Operation - 10 orbital buffer
 |
View all Ryobi RB101 manuals
Add to My Manuals
Save this manual to your list of manuals |
Page 10 highlights
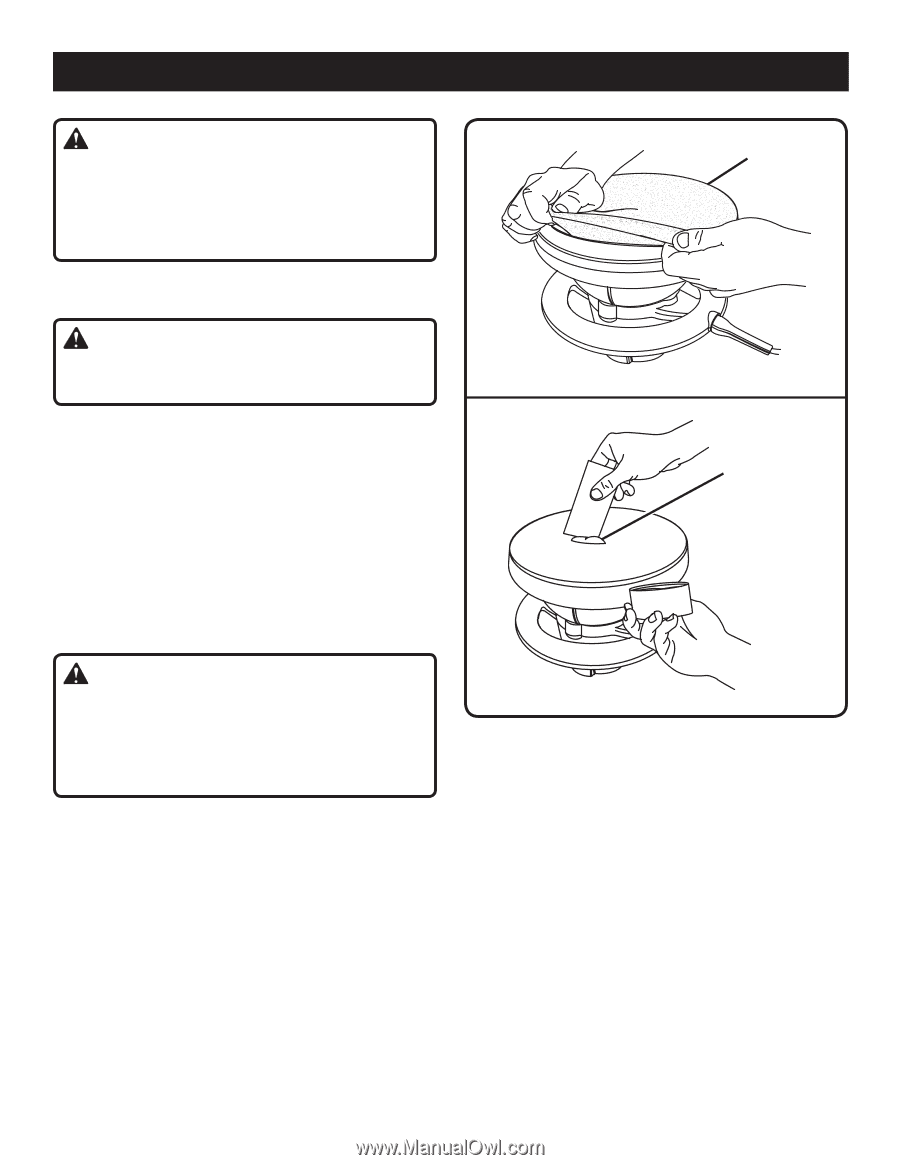
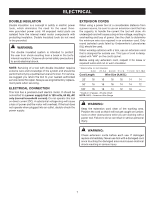
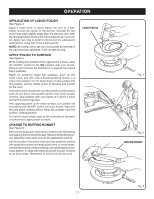
OPERATION WARNING: Before connecting the buffer/polisher to the power source, always check to make sure the switch is not in ON position. Failure to do so could result in accidental starting of the buffer/polisher resulting in possible serious personal injury. ATTACH THE APPLICATION BONNET See Figure 2. WARNING: To avoid injury, always make sure the buffer/polisher is unplugged before attaching bonnets. The buffer/polisher comes with two bonnets, one for applying the polish to the surface and another for buffing the surface. Both are fitted with a drawstring. The application bonnet is the one made of 100% terry cloth. To attach the application bonnet to the pad: Loosen the drawstring so that the bonnet fits completely over the pad. Place the bonnet over the pad so that the outer edge can be drawn over the top of the pad. Carefully tighten the drawstring around the pad and secure it with a bow knot. Tuck the drawstring inside the bonnet. WARNING: The drawstring must be tucked securely inside the bonnet before turning the buffer/polisher on. Failure to do so could result in the drawstring being caught between the motor housing and orbiting foam pad, increasing the risk of serious personal injury. APPLY POLISH TO THE APPLICATION BONNET Most polishes are either in paste or liquid form. Before using any polish read all directions on appropriate applications and proper use. APPLICATION OF PASTE POLISH See Figure 3. Use a putty knife or other flat, blunt object to apply approximately one rounded teaspoon of paste onto the bonnet. Evenly spread the paste over the entire surface of the bonnet. NOTE: Be careful not to use too much polish at one time. If the pad becomes saturated, it will not last as long. Do not apply paste directly to the surface being polished. 10 APPLICATION BONNET Fig. 2 PASTE POLISH Fig. 3
-
 1
1 -
2
-
3
-
4
-
 5
5 -
 6
6 -
 7
7 -
 8
8 -
 9
9 -
 10
10 -
 11
11 -
 12
12 -
 13
13 -
 14
14
 |
 |