Ryobi RB101 English Manual - Page 11
Application Of Liquid Polish, Apply Polish To Surface, Change To Buffing Bonnet - pads
 |
View all Ryobi RB101 manuals
Add to My Manuals
Save this manual to your list of manuals |
Page 11 highlights
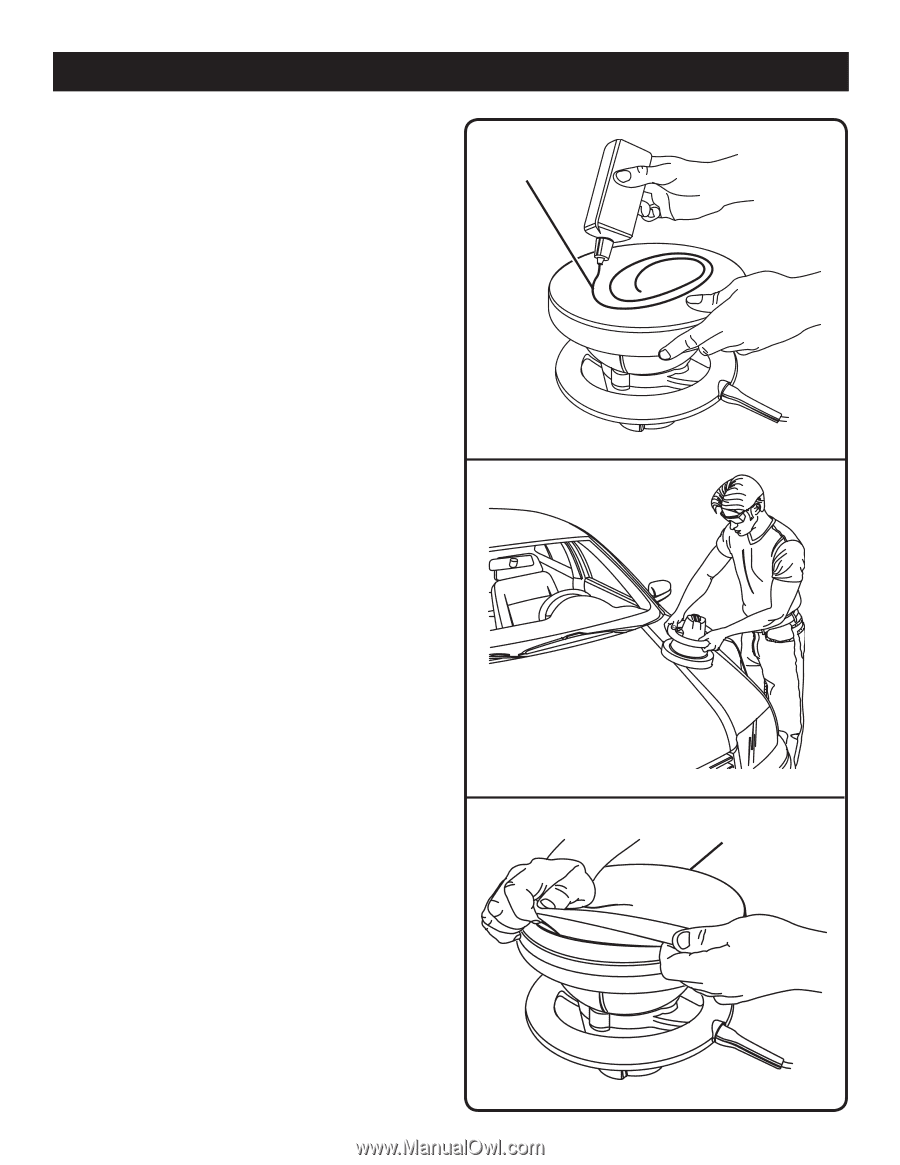
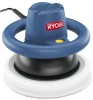
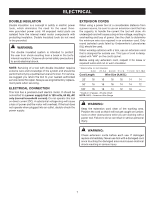
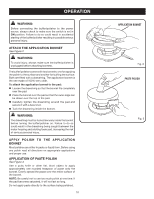
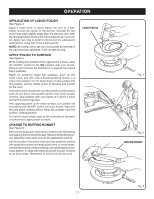
OPERATION APPLICATION OF LIQUID POLISH See Figure 4. Apply a small circle of liquid (about the size of a halfdollar) around the center of the bonnet, followed by two more rings, each slightly larger than the previous one. After the first application, the bonnet will not absorb as much polish. Apply two rings of polish to the bonnet for subsequent applications, using half of the initial quantity. NOTE: Be careful not to use too much polish at one time. If the pad becomes saturated, it will not last as long. APPLY POLISH TO SURFACE See Figure 5. While holding the polisher firmly against the surface, slide the ON/OFF switch to the ON position with your thumb. Always start and stop the polisher on or against the surface being polished. Begin by polishing larger flat surfaces, such as the hood, trunk, and roof. Use a broad sweeping motion in a criss-cross pattern. Do not press down on the surface with the polisher. Let the orbital action of the pad and bonnet do the work. Once flat surfaces have been covered, polish curved surfaces such as car doors and quarter panels. Use small circular motions. Grip polisher with your hands at 3 and 9 o'clock so that the cord hangs free. After applying polish to the entire surface, turn polisher off by pushing the ON/OFF switch with your thumb. Wait until the pad stops rotating before lifting the polisher from the surface. Unplug polisher. For hard to reach areas, such as the underside of bumpers or side mirrors, apply polish by hand. CHANGE TO BUFFING BONNET See Figure 6. Remove the application bonnet by loosening the drawstring and slipping the bonnet off the pad. Replace with buffing bonnet, attaching it the same way as the application bonnet. Buff the surface in the same order as it was polished, starting with large flat surfaces and ending with hard-to-reach areas. Use the same motion as for polishing, a broad sweeping crisscross pattern on large flat areas and small circular motions on all other areas. Remember to let the tool do the work. LIQUID POLISH Fig. 4 Fig. 5 BUFFING BONNET Fig. 6 11
-
 1
1 -
2
-
3
-
4
-
5
-
 6
6 -
 7
7 -
 8
8 -
 9
9 -
 10
10 -
 11
11 -
 12
12 -
 13
13 -
 14
14
 |
 |