Ryobi RY29550 Operator's Manual - Page 12
Assembly, Operation - attachments
 |
View all Ryobi RY29550 manuals
Add to My Manuals
Save this manual to your list of manuals |
Page 12 highlights
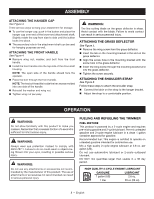
ASSEMBLY ATTACHING THE HANGER cap See Figure 3. There are two ways to hang your attachment for storage. To use the hanger cap, push in the button and place the hanger cap over end of the lower end attachment shaft. Slightly rotate the cap from side to side until the button locks into place. The secondary hole in the attachment shaft can be used for hanging purposes as well. ATTACHING THE FRONT handle See Figure 4. Remove wing nut, washer, and bolt from the front handle. Install the front handle onto the top side of the drive shaft housing. NOTE: The open side of the handle should face the operator. Place the bolt through the front handle. NOTE: The hex bolt head fits inside the hex recess molded into one side of the handle. Reinstall the washer and wing nut. Tighten wing nut securely. WARNING: The line cutting blade on the grass deflector is sharp. Avoid contact with the blade. Failure to avoid contact can result in serious personal injury. Attaching the GRASS DEFLECTOR See Figure 5. Remove the wing screw from the grass deflector. Insert the tab on the mounting bracket in the slot on the grass deflector. Align the screw hole in the mounting bracket with the screw hole in the grass deflector. Insert the wing screw through the mounting bracket and into the grass deflector. Tighten the screw securely. Attaching the Shoulder Strap See Figure 6. Follow these steps to attach the shoulder strap. Connect the latch on the strap to the hanger bracket. Adjust the strap to a comfortable position. OPERATION WARNING: Do not allow familiarity with this product to make you careless. Remember that a careless fraction of a second is sufficient to inflict serious injury. WARNING: Always wear eye protection marked to comply with ANSI Z87.1. Failure to do so could result in objects being thrown into your eyes, resulting in possible serious injury. WARNING: Do not use any attachments or accessories not recommended by the manufacturer of this product. The use of attachments or accessories not recommended can result in serious personal injury. FUELING AND REFUELING the trimmer FUEL MIXTURE This product is powered by a 2-cycle engine and requires pre-mixing gasoline and 2-cycle lubricant. Pre-mix unleaded gasoline and 2-cycle engine lubricant in a clean 1 gallon container approved for gasoline. Recommended fuel: This engine is certified to operate on unleaded gasoline intended for automotive use. Mix a high quality 2-cycle engine lubricant at 2.6 oz. per gallon (US). Do not use automotive lubricant or 2-cycle outboard lubricant. DO NOT mix quantities larger than usable in a 30 day period. high quality 2-cycle engine lubricant Gasoline lubricant 1 gallon (US) 2.6 oz. 1 liter 20 cc (20 ml) 8 - English
-
 1
1 -
2
-
3
-
4
-
5
-
6
-
 7
7 -
 8
8 -
 9
9 -
 10
10 -
 11
11 -
 12
12 -
 13
13 -
 14
14 -
 15
15 -
 16
16 -
 17
17 -
18
-
19
-
20
-
21
-
22
-
23
-
24
-
25
-
26
-
27
-
28
-
29
-
30
-
31
-
32
-
33
-
34
-
35
-
36
-
37
-
38
-
39
-
40
-
41
-
42
-
43
-
44
-
45
-
46
-
47
-
48
-
49
-
50
-
51
-
52
 |
 |