Ryobi RY80942 Operation Manual - Page 17
Rinsing With The Pressure Washer, Using Pump Protector, Moving The Pressure Washer
 |
View all Ryobi RY80942 manuals
Add to My Manuals
Save this manual to your list of manuals |
Page 17 highlights
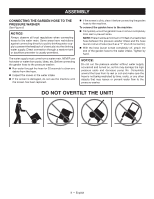
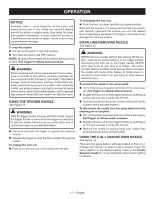
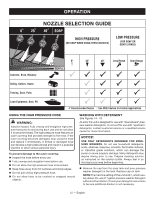
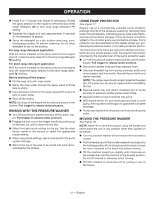
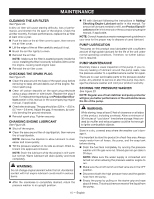
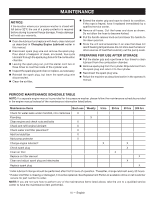
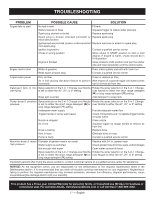
OPERATION n Install 5-in-1 Change-over Nozzle (if necessary). Rotate the spray selector on the nozzle to either the blue short range detergent ( ) or blue long range detergent ( ) setting. n Squeeze the trigger and wait approximately 5 seconds for the detergent to appear. n Spray the detergent on a dry surface using long, even, overlapping strokes. To prevent streaking, do not allow detergent to dry on the surface. For long range detergent application: With the nozzle installed on the spray wand and the engine shut off, rotate the spray selector to the long range detergent [ ] setting. For short range detergent application: With the nozzle installed on the spray wand and the engine shut off, rotate the spray selector to the short range detergent [ ] setting. Before shutting off the engine: n Fill the soap tank with clean water. n Spray the clear water through the spray wand until the tank is empty. n If any detergent remains in the spray, repeat with a second tank of clean water. n Shut off the engine. NOTE: Shutting off the engine will not relieve pressure in the system. Pull trigger to release water pressure. RINSING WITH THE PRESSURE WASHER n Turn off the pressure washer and shut off the water supply. Pull trigger to release water pressure. n Engage the lock out on the trigger handle by pushing up on the lock out until it clicks into the slot. n Select the right nozzle setting for the job. See the chart shown earlier in the manual to select the appropriate nozzle setting. n When using these settings, test a small area first to avoid surface damage. n Start at the top of the area to be rinsed and work down, overlapping the strokes. USING PUMP PROTECTOR See Figure 17. Regular use of a commercially available pump protector prolongs the life of the pressure washer by removing hard water mineral deposits, lubricating pump seals and pistons, and preventing freeze damage. Pump protector should be added to the unit after every use and before storage. Pump protector can be purchased at the retailer where you purchased your pressure washer, or by calling customer service. The instructions that follow are typical for adding pump protector but you should always verify the specific instructions provided by the manufacturer of the pump protector used. n Turn off the pressure washer engine and shut off the water supply. Pull trigger to release water pressure. n Disconnect garden hose and high pressure hose. n Unscrew threaded top from pump protector bottle and remove paper seal from bottle. Reinstall top on bottle and tighten securely. NOTE: The rubber seal should remain inside the threaded top. If it comes out, be sure to replace before reinstalling the top. n Remove bottle cap and attach threaded end of bottle securely to pressure washer pump water intake. n Squeeze bottle to inject contents into pump. n With engine switch off, pull starter grip and rope to cycle pump, then squeeze bottle again to guarantee complete coverage. n Pump is protected when the protector fluid exits the pump outlet. MOVING THE PRESSURE WASHER See Figure 18. NOTE: Never lift or carry this product using the handle and never place the unit in any position other than upright on its wheels. n Turn the pressure washer off and ensure the fuel valve is closed. n Pull the handle up until the handle release knob snaps into the locking position (if not already up and locked). Ensure the lock is secured in the frame hole before moving. n Tilt the machine toward you slightly until it balances on the wheels then roll the machine to the desired position. Do not tilt forward or sideways when moving. n DO NOT attempt to move the unit by pulling on any of the hoses. 13 - English
-
 1
1 -
2
-
3
-
4
-
5
-
6
-
7
-
8
-
9
-
10
-
11
-
 12
12 -
 13
13 -
 14
14 -
 15
15 -
 16
16 -
 17
17 -
 18
18 -
 19
19 -
 20
20 -
 21
21 -
 22
22 -
23
-
24
-
25
-
26
-
27
-
28
-
29
-
30
-
31
-
32
-
33
-
34
-
35
-
36
-
37
-
38
-
39
-
40
-
41
-
42
-
43
-
44
-
45
-
46
-
47
-
48
-
49
-
50
-
51
-
52
-
53
-
54
-
55
-
56
 |
 |