Ryobi RYi2300BTA Operation Manual - Page 16

Operation - oil
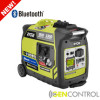
Page 16 highlights

OPERATION NOTICE: This product is equipped with a spark arrestor that has been evaluated by the USDA Forest Service; however, product users must comply with Federal, State, and local fire prevention regulations. Check with appropriate authorities. Contact customer service or a qualified service center to purchase a replacement spark arrestor. NOTICE: Before each use, inspect the entire product for damaged, missing, or loose parts such as screws, nuts, bolts, caps, etc. Tighten securely all fasteners and caps and do not operate this product until all missing or damaged parts are replaced. Please contact customer service or a qualified service center for assistance. APPLICATIONS This generator is designed to supply electrical power for operating compatible electrical lighting, appliances, tools, and motor loads. BEFORE OPERATING THE UNIT GENCONTROL™ LCD DISPLAY See Figure 2. NOTE: The LCD display will not work unless the unit is running. Fuel level: The fuel level indicator will show how much fuel is remaining. Load level: The load level indicator will show the connected load. If the generator is approaching the maximum wattage/amperage capacity, the indicator will blink. If load level capacity is exceeded, the LCD display will show OVERLOAD. To reset the generator, remove all loads from the generator and press the reset button (see fig. 1). Add loads back to the generator one at a time being careful not to exceed the generators wattage rating. Run time: The LCD display will show the approximate remaining run time based on fuel level and load. Auto idle: The LCD display will show if the idle is on or off. Bluetooth®: Once paired, the LCD display will indicate whether or not the GENControl™ app is connected through Bluetooth®. n Only use OUTSIDE and at least 20 feet away from windows, doors, and vents as recommended by the U.S Department of Health and Human Services Centers for Disease Control and Prevention. Your specific home and/ or wind conditions may require additional distance. n NEVER use inside a home or garage, EVEN IF doors and windows are open. n Always position the generator on a flat firm surface. SPECIAL REQUIREMENTS: CHECKING/ADDING LUBRICANT See Figure 3. NOTICE: Attempting to start the engine before it has been properly filled with lubricant will result in equipment failure. NOTE: If a separate engine manual is provided for this product, please follow the instructions provided in the engine manual instead of the information listed below. There may be General or State Occupational Safety and Health Administration (OSHA) regulations, local codes or ordinances that apply to the intended use of the generator. Please consult a qualified electrician, electrical inspector, or the local agency having jurisdiction:  In some areas, generators are required to be registered with local utility companies.  If the generator is used at a construction site, there may be additional regulations which must be observed. USB CHARGING PORTS See Figure 1. Engine lubricant has a major influence on engine performance and service life. For general, all-temperature use, SAE 10W-30 is recommended. Always use a 4-stroke motor lubricant that meets or exceeds the requirements for API service classification SJ. This engine comes with a feature that will shut off the engine when a specific lubricant level is not maintained. The engine will not restart until an appropriate lubricant level is reached. NOTE: Non-detergent or 2-stroke engine lubricants will damage the engine and should not be used. n Loosen the knob at the side of the engine cover. Remove cover and set aside. The USB-dedicated charging ports will charge most USBcompatible devices.  For MP3, cell phones, and other small USB devices (up to 1.9 Amps), connect to the top USB port.  For tablets and high-charging current devices (up to 2.1 Amps) connect to the bottom USB port. NOTE: The USB-dedicated charging port provides power only; it does not provide any communication capabilities. A suitable USB cable must be provided by the user. n Unscrew the oil cap/dipstick and remove. n Wipe dipstick clean and re-seat in hole; do not re-thread. n Remove dipstick again and check lubricant level. Lubricant level should fall between the minimum and maximum marks on the dipstick. n If level is low, add engine lubricant until the fluid level rises between the minimum and maximum marks on the dipstick. n Replace and secure the oil cap/dipstick. n Reinstall cover. 12 - English

  • 1
  • 2
  • 3
  • 4
  • 5
  • 6
  • 7
  • 8
  • 9
  • 10
  • 11
  • 12
  • 13
  • 14
  • 15
  • 16
  • 17
  • 18
  • 19
  • 20
  • 21
  • 22
  • 23
  • 24
  • 25
  • 26
  • 27
  • 28
  • 29
  • 30
  • 31
  • 32
  • 33
  • 34
  • 35
  • 36
  • 37
  • 38
  • 39
  • 40
  • 41
  • 42
  • 43
  • 44
  • 45
  • 46
  • 47
  • 48
  • 49
  • 50
  • 51
  • 52
  • 53
  • 54
  • 55
  • 56
  • 57
  • 58
  • 59
  • 60
  • 61
  • 62
  • 63
  • 64

12 — English
OPERATION
NOTICE:
This product is equipped with a spark arrestor that has
been evaluated by the USDA Forest Service; however,
product users must comply with Federal, State, and
local fire prevention regulations. Check with appropriate
authorities. Contact customer service or a qualified
service center to purchase a replacement spark arrestor.
NOTICE:
Before each use, inspect the entire product for damaged,
missing, or loose parts such as screws, nuts, bolts, caps,
etc. Tighten securely all fasteners and caps and do not
operate this product until all missing or damaged parts
are replaced. Please contact customer service or a quali-
fied service center for assistance.
APPLICATIONS
This generator is designed to supply electrical power for
operating compatible electrical lighting, appliances, tools,
and motor loads.
BEFORE OPERATING THE UNIT
Only use OUTSIDE and at least 20 feet away from
windows, doors, and vents as recommended by the U.S
Department of Health and Human Services Centers for
Disease Control and Prevention. Your specific home and/
or wind conditions may require additional distance.
NEVER use inside a home or garage, EVEN IF doors and
windows are open.
Always position the generator on a flat firm surface.
SPECIAL REQUIREMENTS:
There may be General or State Occupational Safety and
Health Administration (OSHA) regulations, local codes or
ordinances that apply to the intended use of the generator.
Please consult a qualified electrician, electrical inspector, or
the local agency having jurisdiction:
In some areas, generators are required to be registered
with local utility companies.
If the generator is used at a construction site, there may
be additional regulations which must be observed.
USB CHARGING PORTS
See Figure 1.
The USB-dedicated charging ports will charge most USB-
compatible devices.
For MP3, cell phones, and other small USB devices (up
to 1.9 Amps), connect to the top USB port.
For tablets and high-charging current devices (up to 2.1
Amps) connect to the bottom USB port.
NOTE:
The USB-dedicated charging port provides power
only; it does not provide any communication capabilities. A
suitable USB cable must be provided by the user.
GENCONTROL
LCD DISPLAY
See Figure 2.
NOTE:
The LCD display will not work unless the unit is
running.
Fuel level:
The fuel level indicator will show how much fuel is remaining.
Load level:
The load level indicator will show the connected load. If the
generator is approaching the maximum wattage/amperage ca-
pacity, the indicator will blink. If load level capacity is exceeded,
the LCD display will show OVERLOAD. To reset the generator,
remove all loads from the generator and press the reset button
(see fig. 1). Add loads back to the generator one at a time being
careful not to exceed the generators wattage rating.
Run time:
The LCD display will show the approximate remaining run
time based on fuel level and load.
Auto idle:
The LCD display will show if the idle is on or off.
Bluetooth
®
:
Once paired, the LCD display will indicate whether or not
the GENControl™ app is connected through
Bluetooth
®
.
CHECKING/ADDING LUBRICANT
See Figure 3.
NOTICE:
Attempting to start the engine before it has been properly
filled with lubricant will result in equipment failure.
NOTE: If a separate engine manual is provided for this
product, please follow the instructions provided in the
engine manual instead of the information listed below.
Engine lubricant has a major influence on engine perfor-
mance and service life. For general, all-temperature use,
SAE 10W-30 is recommended. Always use a 4-stroke motor
lubricant that meets or exceeds the requirements for API
service classification SJ.
This engine comes with a feature that will shut off the engine
when a specific lubricant level is not maintained. The engine
will not restart until an appropriate lubricant level is reached.
NOTE
: Non-detergent or 2-stroke engine lubricants will
damage the engine and should not be used.
Loosen the knob at the side of the engine cover. Remove
cover and set aside.
Unscrew the oil cap/dipstick and remove.
Wipe dipstick clean and re-seat in hole; do not re-thread.
Remove dipstick again and check lubricant level. Lubricant
level should fall between the minimum and maximum
marks on the dipstick.
If level is low, add engine lubricant until the fluid level rises
between the minimum and maximum marks on the dipstick.
Replace and secure the oil cap/dipstick.
Reinstall cover.