Ryobi TSS702 Operation Manual - Page 29
Nesting Crown Molding Against The, Miter Fence
 |
View all Ryobi TSS702 manuals
Add to My Manuals
Save this manual to your list of manuals |
Page 29 highlights
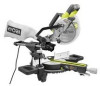
OPERATION NESTING CROWN MOLDING AGAINST THE MITER FENCE See Figure 37 - 39. NOTE: This method of cut is for crown molding up to 3-3/8 in. tall, when using an auxiliary fence (as described on page 24). Do not attempt to cut molding that is larger than 3-3/8 in. tall. NOTE: It may be necessary to adjust the partial sliding miter fence to ensure proper clearance prior to making the cut. Assemble and attach auxiliary fence as shown in figure 35. Loosen the slide lock knob. Slide the saw forwards or backwards to align the arrow on the crown indicator with the arrow on the pivot assembly, then tighten the slide lock knob securely. Set the bevel angle at 0° and the miter angle at 45° to either the left or the right. (For making 90° corners.) Nest and secure the crown molding against auxiliary fence using a spring clamp and hold crown molding securely. Before turning on the saw, perform a dry run of the cutting operation to make sure that no problems will occur when the cut is made. Grasp the saw handle firmly. Depress the trigger lockout lever and squeeze the switch trigger. Allow several seconds for the blade to reach maximum speed. Slowly lower the blade into and through the crown molding. CROWN INDICATOR AUXILIARY FENCE PIVOT ASSEMBLY INDICATOR SPRING CLAMP SPRING CLAMP BOTTOM EDGE AGAINST FENCE Fig. 38 Fig. 37 29 − English CROWN MOLDING Fig. 39
-
 1
1 -
2
-
3
-
4
-
5
-
6
-
7
-
8
-
9
-
10
-
11
-
12
-
13
-
14
-
15
-
16
-
17
-
18
-
19
-
20
-
21
-
22
-
23
-
 24
24 -
 25
25 -
 26
26 -
 27
27 -
 28
28 -
 29
29 -
 30
30 -
 31
31 -
 32
32 -
 33
33 -
 34
34 -
35
-
36
-
37
-
38
-
39
-
40
-
41
-
42
-
43
-
44
-
45
-
46
-
47
-
48
-
49
-
50
-
51
-
52
-
53
-
54
-
55
-
56
-
57
-
58
-
59
-
60
-
61
-
62
-
63
-
64
-
65
-
66
-
67
-
68
-
69
-
70
-
71
-
72
-
73
-
74
-
75
-
76
-
77
-
78
-
79
-
80
-
81
-
82
-
83
-
84
-
85
-
86
-
87
-
88
-
89
-
90
-
91
-
92
-
93
-
94
-
95
-
96
-
97
-
98
-
99
-
100
-
101
-
102
-
103
-
104
 |
 |
