Samsung CLP-325 User Guide - Page 87
Replacing the imaging unit, Supplies
 |
View all Samsung CLP-325 manuals
Add to My Manuals
Save this manual to your list of manuals |
Page 87 highlights
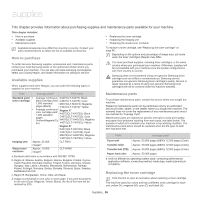
A toner cartridge has reached its estimated cartridge life. The printer stops printing. Also, the Smart Panel program window appears on the computer telling you to replace the cartridge (See "Using the Smart Panel program" on page 69). At this stage, the toner cartridge needs to be replaced. Check the model number for the toner cartridge used in your machine (See "Available supplies" on page 86). Samsung does not recommend using non-genuine Samsung toner cartridge such as refilled or remanufactured. Samsung cannot guarantee non-genuine Samsung toner cartridge's quality or damages it can cause to the machine. Also service or repair required as a result of using non-genuine Samsung toner cartridges will not be covered under the machine warranty. 1. Turn the machine off, then wait a few minutes for the machine to cool. 2. Press the release button, completely open the front cover. 6. Holding both handles a new toner cartridge, thoroughly rock it from side to side to evenly distribute the toner. 7. Place the toner cartridge on a flat surface as shown below and remove the protecting cover. 3. Grasp the handles on the toner cartridge and pull to remove the cartridge from the machine. If toner gets on your clothing, wipe it off with a dry cloth and wash it in cold water. Hot water sets toner into fabric. 8. Make sure that the color of the toner cartridge matches the color slot and then grasp the handles on the toner cartridge. Insert the cartridge until it clicks into place. 4. Take a new toner cartridge out of its package. 5. Pull out the hopper sheet from a new toner cartridge. 9. Close the front cover. Make sure the cover is securely latched and then turn the machine on. If the front cover is not completely closed, the machine will not operate. Replacing the imaging unit When the life span of the imaging unit has expired, the Smart Panel program window appears on the computer, indicating the imaging unit needs to be placed. Otherwise, your machine stops printing. Supplies_ 87
-
 1
1 -
2
-
3
-
4
-
5
-
6
-
7
-
8
-
9
-
10
-
11
-
12
-
13
-
14
-
15
-
16
-
17
-
18
-
19
-
20
-
21
-
22
-
23
-
24
-
25
-
26
-
27
-
28
-
29
-
30
-
31
-
32
-
33
-
34
-
35
-
36
-
37
-
38
-
39
-
40
-
41
-
42
-
43
-
44
-
45
-
46
-
47
-
48
-
49
-
50
-
51
-
52
-
53
-
54
-
55
-
56
-
57
-
58
-
59
-
60
-
61
-
62
-
63
-
64
-
65
-
66
-
67
-
68
-
69
-
70
-
71
-
72
-
73
-
74
-
75
-
76
-
77
-
78
-
79
-
80
-
81
-
 82
82 -
 83
83 -
 84
84 -
 85
85 -
 86
86 -
 87
87 -
 88
88 -
 89
89 -
 90
90 -
 91
91 -
 92
92 -
93
-
94
-
95
-
96
-
97
-
98
-
99
-
100
-
101
-
102
-
103
 |
 |
