Samsung HW-J370 User Manual - Page 14
CONNECTIONS, Connecting the Subwoofer and SWA-7000S to the Main Unit - wireless soundbar system
 |
View all Samsung HW-J370 manuals
Add to My Manuals
Save this manual to your list of manuals |
Page 14 highlights
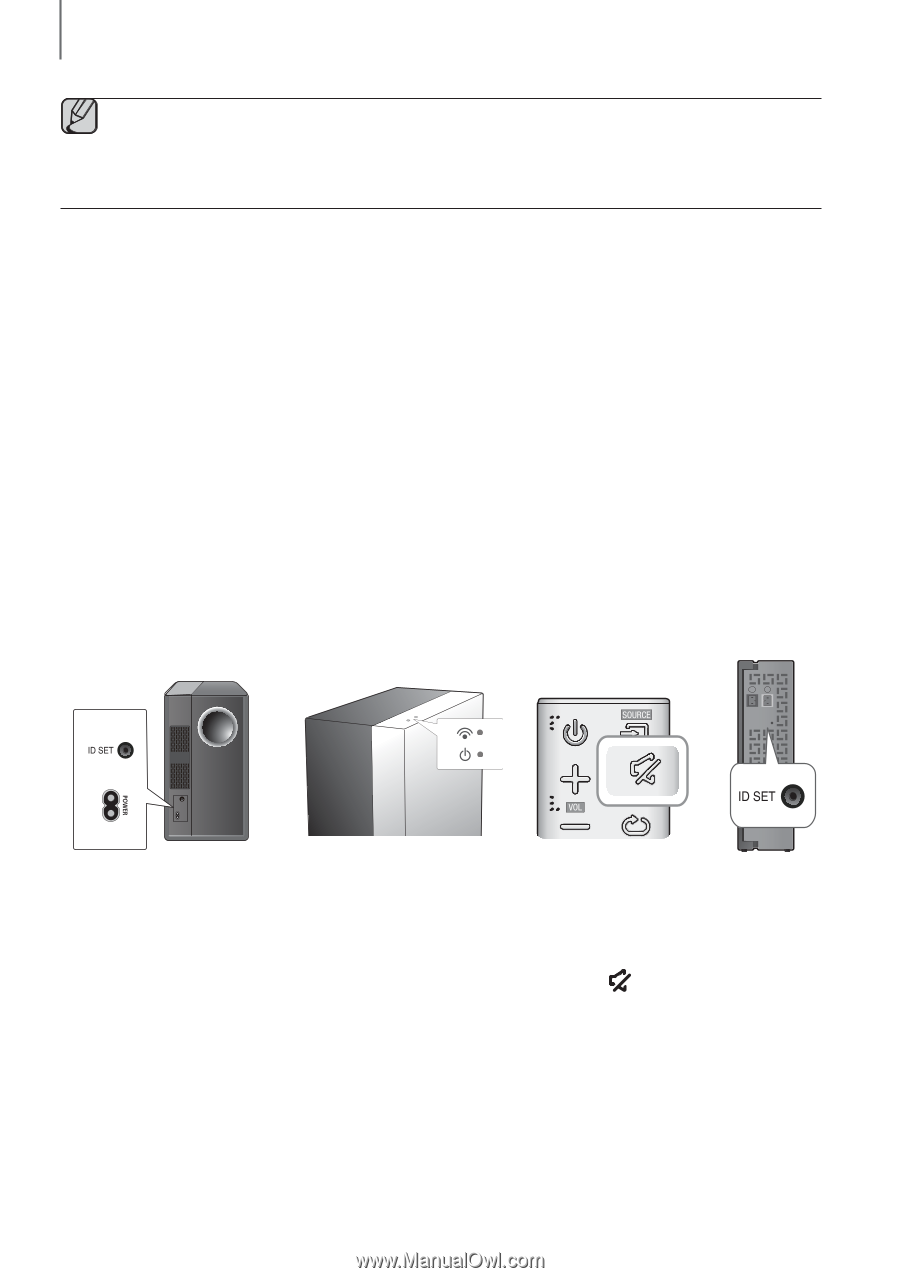
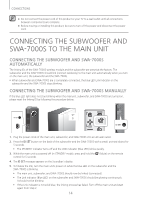
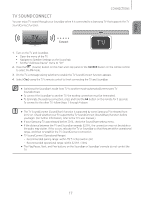
CONNECTIONS CONNECTIONS ●● Do not connect the power cord of this product or your TV to a wall outlet until all connections between components are complete. ●● Before moving or installing this product, be sure to turn off the power and disconnect the power cord. Connecting the Subwoofer and SWA-7000S to the Main Unit Connecting the Subwoofer and SWA-7000S Automatically The linking IDs of the SWA-7000S wireless module and the subwoofer are preset at the factory. The subwoofer and the SWA-7000S should link (connect wirelessly) to the main unit automatically when you turn on the main unit, the subwoofer and the SWA-7000s. • When subwoofer and SWA-7000S are is completely connected, the blue LED Link Indicator on the subwoofer and the SWA-7000S stops blinking. Connecting the Subwoofer and SWA-7000S Manually If the blue LED light does not stop blinking when the mainunit, subwoofer, and SWA-7000S are turned on, please reset the linking ID by following the procedure below. LR SURROUND SPEAKERS OUT SPEAKER IMPEDANCE : 3Ω ID SET 1. Plug the power cords of the main unit, subwoofer, and SWA-7000S into an AC wall outlet. 2. Press the ID SET button on the back of the subwoofer and the SWA-7000S with a small, pointed object for 5 seconds. • The STANDBY indicator turns off and the LINK indicator (Blue LED) blinks quickly. 3. While the main unit is powered off (in STANDBY mode), press and hold the (Mute) on the remote control for 5 seconds. 4. The ID SET message appears on the Soundbar's display. 5. To finalize the link, turn the main unit's power on while the blue LED on the subwoofer and the SWA-7000S is blinking. • The main unit, subwoofer, and SWA-7000S should now be linked (connected). • The Link indicator (Blue LED) on the subwoofer and SWA-7000S should be glowing continuously. It should not be blinking. • If the Link indicator is not solid blue, the linking process has failed. Turn off the main unit and start again from Step 2. 14
-
 1
1 -
2
-
3
-
4
-
5
-
6
-
7
-
8
-
 9
9 -
 10
10 -
 11
11 -
 12
12 -
 13
13 -
 14
14 -
 15
15 -
 16
16 -
 17
17 -
 18
18 -
 19
19 -
20
-
21
-
22
-
23
-
24
-
25
-
26
-
27
-
28
-
29
-
30
 |
 |