Samsung HW-J7501R User Manual - Page 13
INSTALLATION, Holder-Foot, Holder-Support
 |
View all Samsung HW-J7501R manuals
Add to My Manuals
Save this manual to your list of manuals |
Page 13 highlights
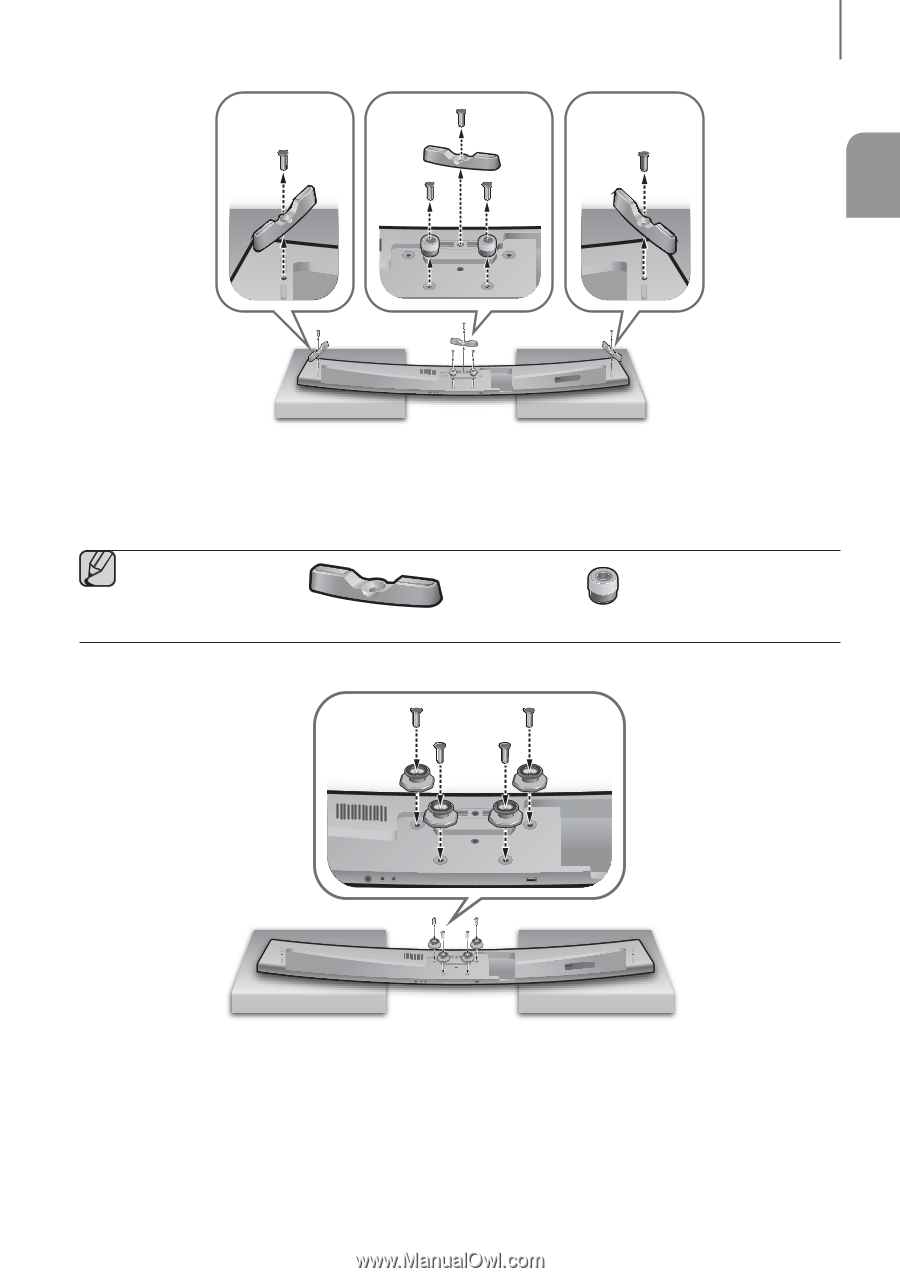
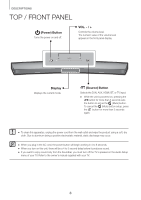
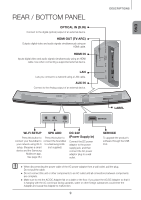
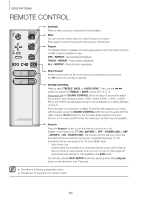
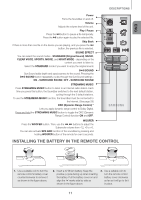
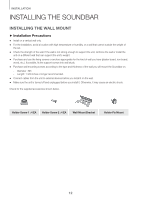
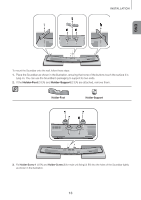
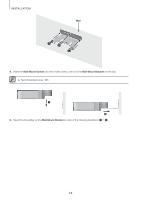
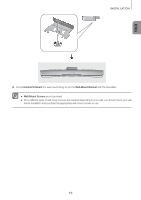
ENG INSTALLATION OPTICAL IN HDMI OUT (TV-ARC) HDMI IN LAN AUX IN DC 24V Wi-Fi SETUP SPK ADD 5V 0.5A OPTICAL IN HDMI OUT (TV-ARC) HDMI IN LAN AUX IN DC 24V Wi-Fi SETUP SPK ADD SERVICE To mount the Soundbar onto the wall, follow these steps: 1. Place the Soundbar as shown in the illustration, ensuring that none of the buttons touch the surface it is lying on. You can use the Soundbar's packaging to support its two ends. 2. If the Holder-Foot (3 EA) and Holder-Support (2 EA) are attached, remove them. Holder-Foot Holder-Support OPTICAL IN HDMI OUT (TV-ARC) HDMI IN LAN AUX IN DC 24V Wi-Fi SETUP SPK ADD SERVICE OPTICAL IN HDMI OUT (TV-ARC) HDMI IN LAN AUX IN DC 24V Wi-Fi SETUP SPK ADD SERVICE 3. Fix Holder-Screw 1 (4 EA) and Holder-Screw 2 (for main unit fixing) (4 EA) into the holes of the Soundbar tightly as shown in the illustration. 13
-
 1
1 -
2
-
3
-
4
-
5
-
6
-
7
-
 8
8 -
 9
9 -
 10
10 -
 11
11 -
 12
12 -
 13
13 -
 14
14 -
 15
15 -
 16
16 -
 17
17 -
 18
18 -
19
-
20
-
21
-
22
-
23
-
24
-
25
-
26
-
27
-
28
-
29
-
30
-
31
-
32
-
33
-
34
-
35
 |
 |