Samsung ML-1640 User Manual - Page 19
Getting started, Setting up the hardware, Printing a demo System requirements, Windows - software
 |
View all Samsung ML-1640 manuals
Add to My Manuals
Save this manual to your list of manuals |
Page 19 highlights
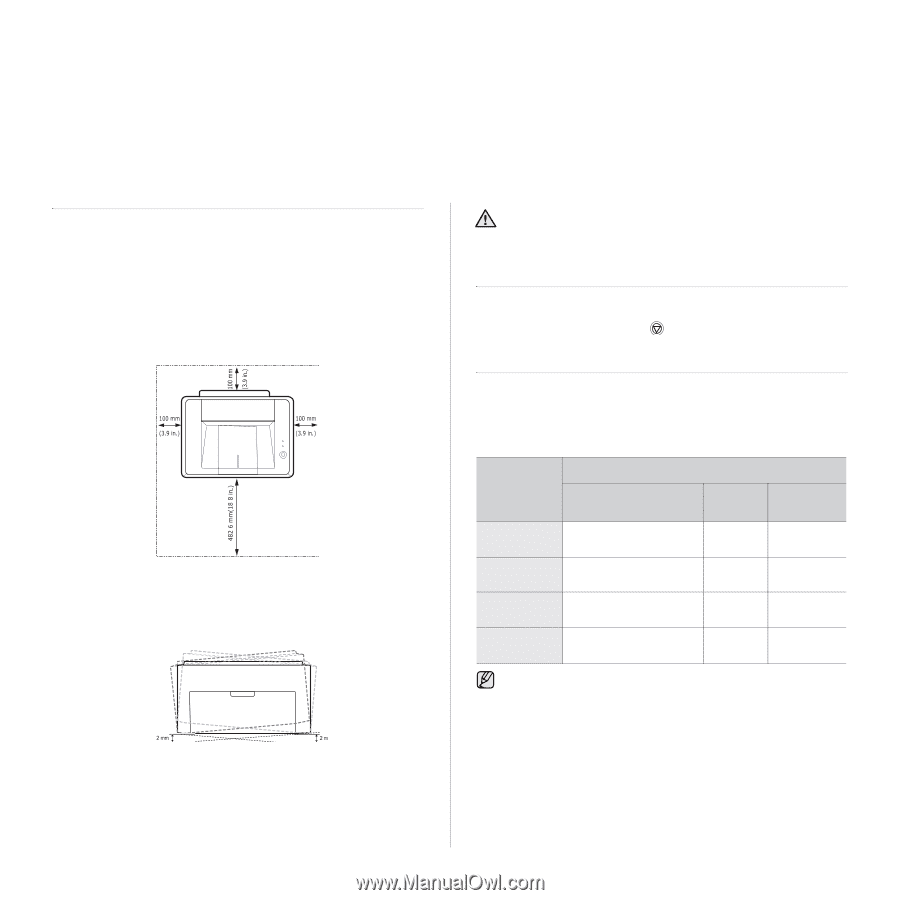
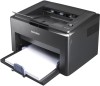
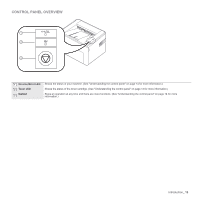
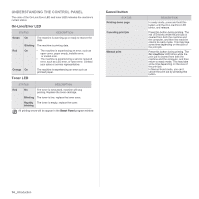
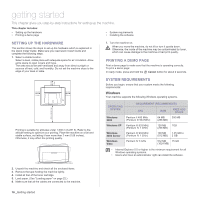
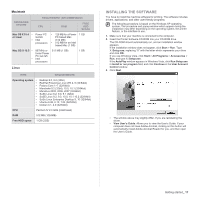
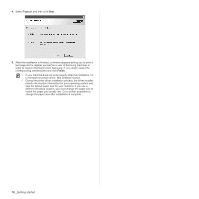
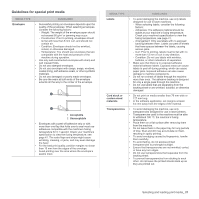
getting started This chapter gives you step-by-step instructions for setting up the machine. This chapter includes: • Setting up the hardware • Printing a demo page • System requirements • Installing the software SETTING UP THE HARDWARE This section shows the steps to set up the hardware which is explained in the Quick Install Guide. Make sure you read Quick Install Guide and complete the following steps. 1. Select a stable location. Select a level, stable place with adequate space for air circulation. Allow extra space to open covers and trays. The area should be well-ventilated and away from direct sunlight or sources of heat, cold, and humidity. Do not set the machine close to the edge of your desk or table. 7. Turn the machine on. When you move the machine, do not tilt or turn it upside down. Otherwise, the inside of the machine may be contaminated by toner, which can cause damage to the machine or bad print quality. PRINTING A DEMO PAGE Print a demo page to make sure that the machine is operating correctly. To print a demo page: In ready mode, press and hold the Cancel button for about 2 seconds. Printing is suitable for altitudes under 1,000 m (3,281 ft). Refer to the altitude setting to optimize your printing. Place the machine on a flat and stable surface, not letting it lean more than 2 mm (0.08 inches). Otherwise, it may affect the printing quality. SYSTEM REQUIREMENTS Before you begin, ensure that your system meets the following requirements: Windows Your machine supports the following Windows operating systems. OPERATING SYSTEM REQUIREMENT (RECOMMENDED) CPU RAM FREE HDD SPACE Windows 2000 Pentium II 400 MHz (Pentium III 933 MHz) 64 MB 300 MB (256 MB) Windows XP Pentium III 933 MHz (Pentium IV 1 GHz) 128 MB 1GB (256 MB) Windows 2003 Server Pentium III 933 MHz (Pentium IV 1 GHz) 128 MB 1.25 GB to (512 MB) 2 GB Windows Vista Pentium IV 3 GHz 512 MB 15 GB (1024 MB) • Internet Explorer 5.0 or higher is the minimum requirement for all Windows operating systems. • Users who have an administrator right can install the software. 2. Unpack the machine and check all the enclosed items. 3. Remove the tape holding the machine tightly. 4. Install all four of the toner cartridge. 5. Load paper. (See "Loading paper" on page 22.) 6. Make sure that all the cables are connected to the machine. 16 _Getting started
-
 1
1 -
2
-
3
-
4
-
5
-
6
-
7
-
8
-
9
-
10
-
11
-
12
-
13
-
 14
14 -
 15
15 -
 16
16 -
 17
17 -
 18
18 -
 19
19 -
 20
20 -
 21
21 -
 22
22 -
 23
23 -
 24
24 -
25
-
26
-
27
-
28
-
29
-
30
-
31
-
32
-
33
-
34
-
35
-
36
-
37
-
38
-
39
-
40
-
41
-
42
-
43
-
44
-
45
-
46
-
47
-
48
-
49
-
50
-
51
-
52
-
53
-
54
-
55
-
56
-
57
-
58
-
59
-
60
-
61
-
62
-
63
-
64
-
65
-
66
-
67
-
68
-
69
-
70
-
71
-
72
-
73
-
74
-
75
-
76
-
77
-
78
-
79
-
80
-
81
-
82
-
83
 |
 |