Samsung SCD33 User Manual (user Manual) (ver.5.0) (English) - Page 84
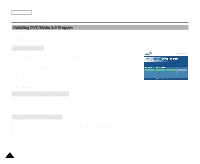
Installing DVC Media 5.0 Program - driver
 |
View all Samsung SCD33 manuals
Add to My Manuals
Save this manual to your list of manuals |
Page 84 highlights
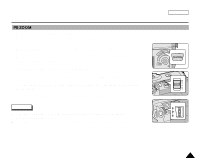
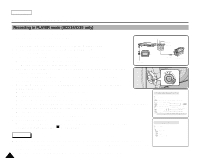
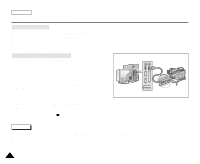
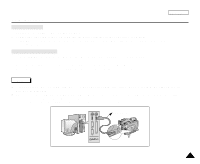
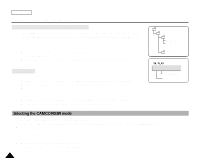
ENGLISH USB interface Installing DVC Media 5.0 Program ✤ Do not connect the camcorder to PC before installing the program. ✤ If another camera or scanner is connected, please disconnect it in advance. ✤ This explanation is based on Windows® 98SE OS. Program installation 1. Insert the software CD into CD-ROM drive. 3. - Installation selection screen appears in the monitor. 2. If the installation selection screen does not appear after inserting the CD click "Run" on the Windows "Start" menu and execute SETUP.EXE file to begin installation. - When CD-ROM drive is set to "D:drive", type "D:\setup.exe" and press Enter. 3. Click one of the icons listed below to install the selected software. s The program automatically checks and installs the driver. s DVC Driver : USB removable Disk Driver (Windows 98SE only) USB PC Camera Driver s Editing Software Using the "Removable Disk" function s You can easily transfer data from a Memory Stick to a PC without additional add-on cards via a USB connection. 1. Set the mode switch to memory, set the power switch to CAM or PLAYER. 2. Connect one end of the USB cable to the USB jack on the camcorder and the other end to the USB connector on your computer. Using the "PC camera" function s You can use this camcorder as a PC CAMERA. s When you connect to a Web site that can provide video chatting functions, you can use your camcorder for such functions. s Using the camcorder with PC installed Net-meeting program, you can conduct video conference. s The PC CAMERA's screen size is 160x120 pixels. s If PC is connected with the USB to the camcoder, the buttons which excepts the POWER SWITCH, MODE SWITCH, ZOOM SWITCH and NITE PIX SWITCH are not operated. 1. Set the mode switch to Tape, set the power switch to CAM. 2. Connect one end of the USB cable to the USB jack on the camcorder and the other end to the USB connector on your computer. 80
-
 1
1 -
2
-
3
-
4
-
5
-
6
-
7
-
8
-
9
-
10
-
11
-
12
-
13
-
14
-
15
-
16
-
17
-
18
-
19
-
20
-
21
-
22
-
23
-
24
-
25
-
26
-
27
-
28
-
29
-
30
-
31
-
32
-
33
-
34
-
35
-
36
-
37
-
38
-
39
-
40
-
41
-
42
-
43
-
44
-
45
-
46
-
47
-
48
-
49
-
50
-
51
-
52
-
53
-
54
-
55
-
56
-
57
-
58
-
59
-
60
-
61
-
62
-
63
-
64
-
65
-
66
-
67
-
68
-
69
-
70
-
71
-
72
-
73
-
74
-
75
-
76
-
77
-
78
-
 79
79 -
 80
80 -
 81
81 -
 82
82 -
 83
83 -
 84
84 -
 85
85 -
 86
86 -
 87
87 -
 88
88 -
 89
89 -
90
-
91
-
92
-
93
-
94
-
95
-
96
-
97
-
98
-
99
-
100
-
101
-
102
-
103
-
104
-
105
-
106
-
107
-
108
-
109
-
110
-
111
-
112
 |
 |