Sanyo CE42LM4N-NA Owner's Manual - Page 5
Terminals, Picture menu, Menu Operation
 |
UPC - 086483065149
View all Sanyo CE42LM4N-NA manuals
Add to My Manuals
Save this manual to your list of manuals |
Page 5 highlights
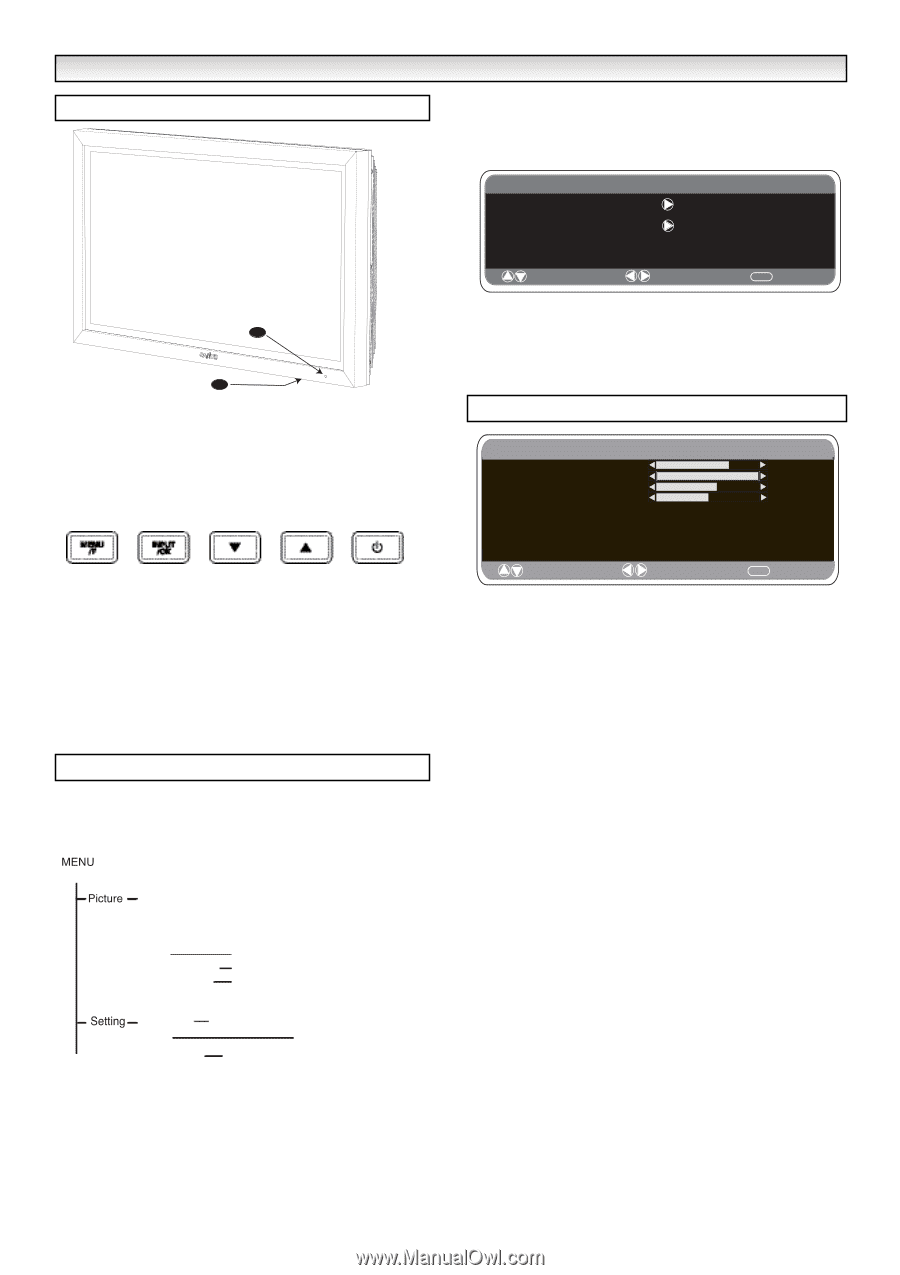
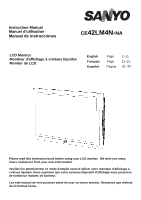
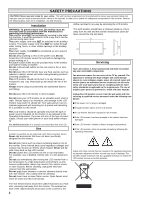
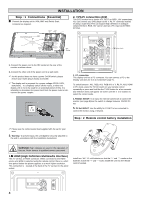
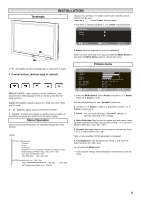
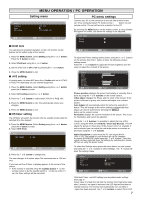
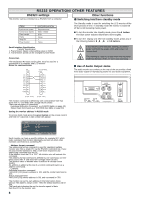
Terminals INSTALLATION During menu operation, the bottom of the screen will show which controls can be used. Press the u button to enter the main menu. A sub menu is selected using the e or d button and pressing the Main Menu Picture Setting 1 2 1. The LCD display will have a Standby light to show there is power. 2. Control buttons (bottom edge of cabinet) Menu/F button: rotate between contrast, Brightness, color, sharpness and OSD language (F/OK on remote control has the same function). Input/ OK button: switch between AV1, RGB, AV2, AV3, HDMI and PC mode. e d buttons: adjust options selected from Menu/F 4 button: To switch from display to standby mode (to switch off, completely disconnect the monitor from the power supply) Menu Operation Many of your monitors functions are controlled through the menu function. Brightness Contrast Colour Sharpness Preset Noise Reduction Dyn. Skin Tone Text Brightness Personal / Dynamic / Standard / Eco Mid / Max / Auto / OFF / Min ON / OFF Max / Mid / Min Child lock Timer AV2 setting OFF / ON Off Time RGB, H/V / Y Pb Pr ON / OFF : Select : Adjust MENU : Exit 8 button when the required sub menu is highlighted. When you have set a Sub menu you can press the MENU button to exit, then the MENU button again to exit the main menu. Picture menu Picture Brightness Contrast Color Sharpness Preset Noise Reduction Dyn. skin tone Text Brightness DCR : Select Personal / Dynamic / Standard / ECO Mid / Max / Auto / Min / OFF ON / OFF Min / Mid / Max ON / OFF : Adjust MENU : Back 1. Press the MENU button. Select Picture using the e or d button. Press the 8 button to enter. Set the picture settings for your "personal" preference. 2. Use the e or d button to select e.g. Brightness and the 7 or 8 button to adjust levels. 3. Preset : You can select either your "Personal" settings, or Dynamic, Standard or Eco settings. 4. Noise Reduction: May be used to reduce any local picture 'noise' (granular appearance) being experienced by Using 7 or 8 to select between Mid / Max / Auto / Min / OFF. 5. Dynamic skin tone: May be used to enhance skin tone by Using 7 or 8 to select between On / Off. Tint : is only available if NTSC equipment is connected. 6. Text Brightness: May be adjusted by Using 7 or 8 button to select between Min / Mid / Max. To exit press the MENU button. ✐ Your personal settings are automatically saved when you exit the menu. 5
-
 1
1 -
 2
2 -
 3
3 -
 4
4 -
 5
5 -
 6
6 -
 7
7 -
 8
8 -
 9
9 -
 10
10 -
 11
11 -
12
-
13
-
14
-
15
-
16
-
17
-
18
-
19
-
20
-
21
-
22
-
23
-
24
-
25
-
26
-
27
-
28
-
29
-
30
-
31
-
32
-
33
-
34
-
35
-
36
 |
 |