Sanyo DP50741 Owners Manual - Page 5
Getting Started - tv remote
 |
View all Sanyo DP50741 manuals
Add to My Manuals
Save this manual to your list of manuals |
Page 5 highlights
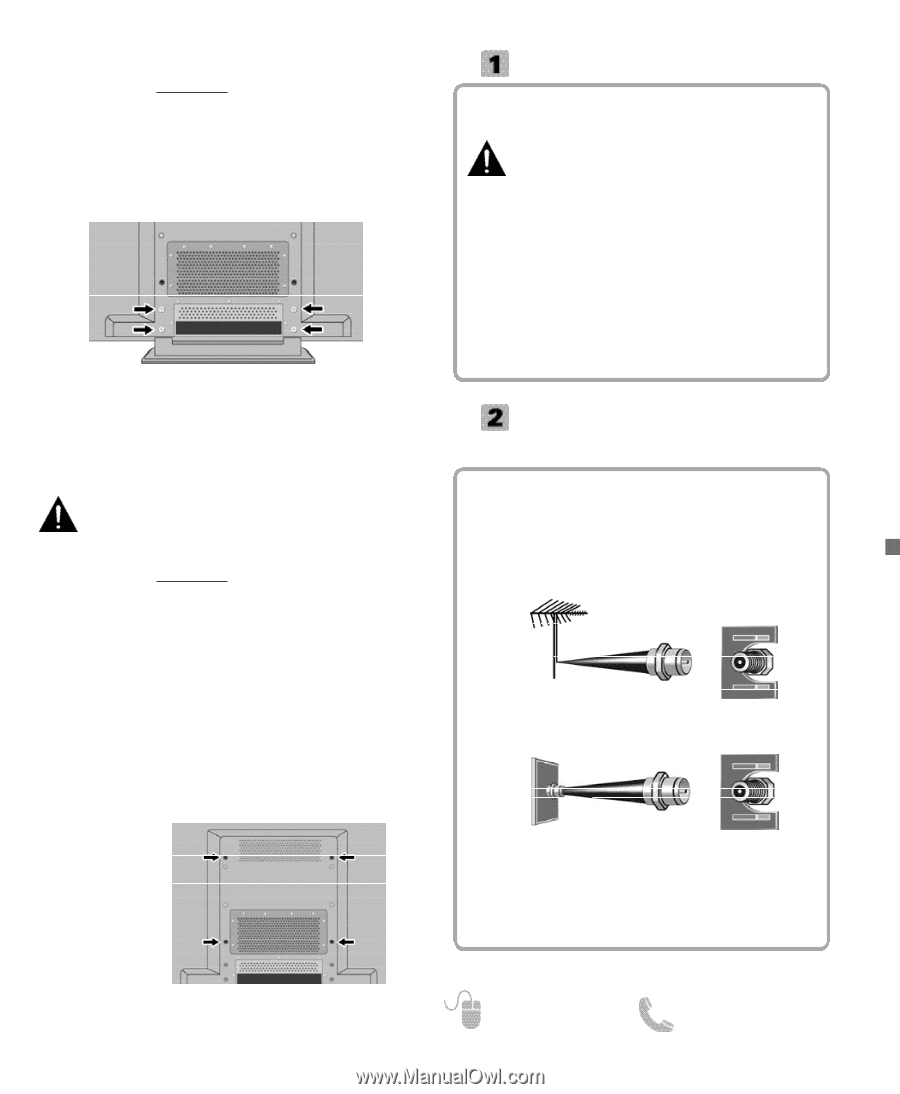
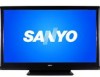
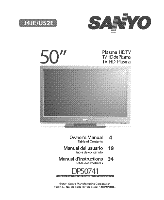
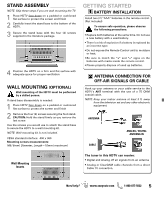
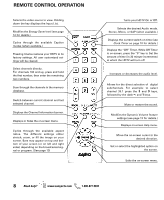
STAND ASSEMBLY ___________ NOTE: Skip these steps if you are wall mounting the TV. 1 Place HDTV face down on a padded or cushioned flat surface to protect the screen and finish 2 Carefully insert the stand base to the bottom of the HDTV. 3 Secure the stand base with the four (4) screws supplied in the literature package. 4 Position the HDTV on a firm and flat surface with adequate space for proper ventilation. WALL MOUNTING (OPTIONAL) Wall mounting of the HDTV must be performed by a skilled person. If stand base disassembly is needed: 1 Place HDTV face down on a padded or cushioned flat surface to protect the screen and finish 2 Remove the four (4) screws securing the foot stand. CAUTION: Hold the stand firmly as you remove the last screw. Use the screws you would use to attach the stand base to secure the HDTV to a wall mounting kit. NOTE: Wall mounting kit is not included. VESA standard interface: 400 x 360 Mounting screws measurements: M6 (6mm) Diameter, Length-16mm (maximum) GETTING STARTED BATTERY INSTALLATION Install two (2) "AAA" batteries in the remote control. (Not included) To ensure safe operation, please observe the following precautions: • Replace both batteries at the same time. Do not use a new battery with a used battery. • There's a risk of explosion if a battery is replaced by an incorrect type. • Do not expose the Remote Control unit to moisture or heat. • Be sure to match the "+" and "-" signs on the batteries with marks inside the remote control. • Please properly dispose of used up batteries. ANTENNA CONNECTION FOR OFF-AIR SIGNALS OR CABLE Hook up your antenna or your cable service to the HDTV's ANT terminal with the use of a 75 OHM coaxial cable. NOTE: Keep your indoor antenna at least 3 ft. away from the television set and any other electronic equipment. ANTENNA CABLE ANALOG / DIGITAL ANTENNA IN Wall Mounting Inserts The tuner in this HDTV can receive: • Digital and Analog off air signals from an antenna • Analog or ClearQAM cable channels from a direct Cable TV connection. Need help? www.sanyoctv.com 1-800-877-5032 5
-
 1
1 -
 2
2 -
 3
3 -
 4
4 -
 5
5 -
 6
6 -
 7
7 -
 8
8 -
 9
9 -
 10
10 -
 11
11 -
12
-
13
-
14
-
15
-
16
-
17
-
18
-
19
-
20
-
21
-
22
-
23
-
24
-
25
-
26
-
27
-
28
-
29
-
30
-
31
-
32
-
33
-
34
-
35
-
36
-
37
-
38
-
39
-
40
-
41
-
42
-
43
-
44
-
45
-
46
-
47
-
48
 |
 |