Sanyo ECD-T1580DV Owners Manual - Page 20
Remote Sensor, 5 Inch TFT Display, Volume Level Adjustment, Mode Selection, Reset, Picture mode - wiring diagram
 |
View all Sanyo ECD-T1580DV manuals
Add to My Manuals
Save this manual to your list of manuals |
Page 20 highlights
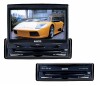
OPERATION Remote Sensor There is a remote sensor on the front panel. On the monitor, there is another remote sensor to receive remote control signal. You can point the remote control handset to the remote sensor on the front panel (when the monitor doesn't stretch out) or the remote sensor on the monitor panel (when the monitor stretches out) and press function keys on the remote control to control the DVD unit. The unit is also connected to an external remote receiver (See the electrical connection diagram above), and the function is the same with the remote sensor on the front panel or on the monitor panel. Notes: The external remote receiver is placed near the monitor for the best to reception of the remote signa. l. If the angle of the monitor from vertical exceeds 30 (Especially the distance exceeds 3m.), controlling the DVD unit through the remote sensor on the front panel may not be effective. You are suggested to use the external re.mote receiver. 6.5 Inch TFT Display When the monitor stretches out, the 6.5 inch color TFT display can show the current state of the unit. Volume Level Adjustment Press VOL+/- buttons on the remote control to increase or decrease the volume level. Mode Selection Press MODE button on the remote control to select among DVD, RADIO TV, AV and RGB mode. wiring is completed. - All the function buttons do not operate. - Error symbol on the display. Picture mode Adjustment Press PICT button on the monitor panel, the picture mode will show on the display, repeatedly press PICT button to select among BRIGHT, CONTRAST, COLOR, TINT (For the unit with NTSC system) and SCREEN. (For the unit with NTSC system): PICTURE BRIGHT 32 CONTRAST 32 COLOR 32 TINT 32 SCREEN 16:9 Press +/- buttons on the monitor panel to adjust the selected item. The corresponding value will show on the display. NOTE (FOR THE UNIT WITH TEL-MUTE AND BRAKE FUNCTION): When there is an incoming call, the unit will be in mute state, and "TEL MUTE" appears on the screen display. If you are driving the car (BRAKE OFF), the picture will not be shown on the screen in DVD/TV/AV mode for safety purpose. Only the audio will be heard. Reset Reset button is placed on the front panel and must be activated with either a ballpoint pen or thin metal object. The reset button is to be activated for the following reasons: - Initial installation of the unit when all 20
-
 1
1 -
2
-
3
-
4
-
5
-
6
-
7
-
8
-
9
-
10
-
11
-
12
-
13
-
14
-
 15
15 -
 16
16 -
 17
17 -
 18
18 -
 19
19 -
 20
20 -
 21
21 -
 22
22 -
 23
23 -
 24
24 -
 25
25 -
26
-
27
-
28
-
29
-
30
-
31
-
32
-
33
-
34
-
35
-
36
-
37
-
38
-
39
-
40
 |
 |
