Sanyo VCC-HD4000 Instruction Manual, VCC-HD4000P Installation - Page 1
Sanyo VCC-HD4000 - Network Camera Manual
 |
UPC - 086483072505
View all Sanyo VCC-HD4000 manuals
Add to My Manuals
Save this manual to your list of manuals |
Page 1 highlights
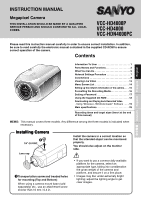
INSTRUCTION MANUAL Megapixel Camera THIS INSTALLATION SHOULD BE MADE BY A QUALIFIED SERVICE PERSON AND SHOULD CONFORM TO ALL LOCAL CODES. VCC-HD4000P VCC-HD4000 VCC-HDN4000PC Deutsch Español Français English Please read this instruction manual carefully in order to ensure correct installation. In addition, be sure to read carefully the electronic manual contained in the supplied CD-ROM to ensure correct operation of the camera. Contents Information To User 1 Parts Names and Functions 3 What You Can Do 5 Network Settings Procedure 7 Connections 8 Viewing Live Video 13 Menu Screen List 14 Setting up the network information of the camera. . . . 15 Formatting the Recording Media 16 Setting a Password 17 Using the Supplied CD-ROM 18 Downloading and Playing back Recorded Video - Using "DLViewer_HDCDownloader" Software - . . . 19 Main specifications 29 Recording times and target sizes (Insert at the end of this manual) MEMO: This manual covers three models. Any difference among the three models is indicated when necessary. Installing Camera 1 1/4"-20 UNC Lens cap Install the camera in a correct location so that the intended object can be monitored properly. You should also adjust on the monitor side. 1Transportation screw and treaded holes for mounting (Top and Bottom) When using a camera mount base (sold separately) etc., use an attachment screw shorter than 10 mm / 0.4 in. • If you want to use a commercially available platform for the camera, select an appropriate type, taking into consideration the gross weight of the camera and platform, and secure it on a firm place. • Images may blur under extremely bright lighting; adjust the lighting angle to get clear images.
-
 1
1 -
 2
2 -
 3
3 -
 4
4 -
 5
5 -
 6
6 -
 7
7 -
8
-
9
-
10
-
11
-
12
-
13
-
14
-
15
-
16
-
17
-
18
-
19
-
20
-
21
-
22
-
23
-
24
-
25
-
26
-
27
-
28
-
29
-
30
-
31
-
32
-
33
-
34
-
35
-
36
-
37
-
38
-
39
-
40
-
41
-
42
-
43
-
44
-
45
-
46
-
47
-
48
-
49
-
50
-
51
-
52
-
53
-
54
-
55
-
56
-
57
-
58
-
59
-
60
-
61
-
62
-
63
-
64
-
65
-
66
-
67
-
68
-
69
-
70
-
71
-
72
-
73
-
74
-
75
-
76
-
77
-
78
-
79
-
80
-
81
-
82
-
83
-
84
-
85
-
86
-
87
-
88
-
89
-
90
-
91
-
92
-
93
-
94
-
95
-
96
-
97
-
98
-
99
-
100
-
101
-
102
-
103
-
104
-
105
-
106
-
107
-
108
-
109
-
110
-
111
-
112
-
113
-
114
-
115
-
116
-
117
-
118
-
119
-
120
-
121
-
122
-
123
-
124
-
125
-
126
-
127
-
128
-
129
-
130
-
131
-
132
-
133
-
134
-
135
-
136
-
137
-
138
-
139
-
140
-
141
-
142
-
143
-
144
-
145
-
146
-
147
-
148
-
149
-
150
-
151
-
152
-
153
-
154
-
155
-
156
-
157
-
158
-
159
-
160
-
161
-
162
-
163
-
164
-
165
-
166
-
167
-
168
-
169
-
170
-
171
-
172
 |
 |
