Schwinn 101 Upright Bike Assembly Manual - Page 8
Instructions, Assembly, Stage
 |
View all Schwinn 101 Upright Bike manuals
Add to My Manuals
Save this manual to your list of manuals |
Page 8 highlights
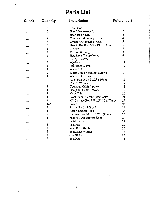
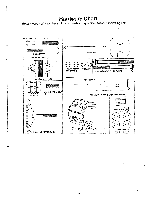
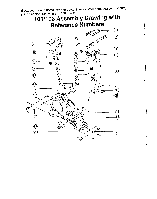
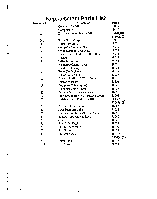
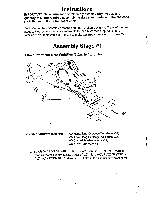
Instructions IMPORTANT!: To ensure ease of assembly please verify the size and quantity of all the required assembly hardware and parts with the enclosed parts list and full size hardware chart. Each step of the assembly process has been broken down into 7 easy-to-follow stages. Please take just a few moments to read over these instructions to familiarize yourself with the process to make assembly quick and trouble-free. Assembly Stage #1 Attach Front and Rear Stabilizer Tubes to Main Unit 26 20 17 24 22 21 Assembly hardware required: (2) 75mm long Carriage Bolt (item #22) (2) 90mm long Carriage Bolt (item #26) (4) Curved Washers (item #17) (4) Acorn Nut (item #24) 1. Attach the FRONT STABILIZER TUBE (#21) to the MAIN UNIT (#20) by inserting the two 75rnrn LONG BOLTS (#22) with the CURVED WASHERS (#17), and ACORN NUTS (#24) into the holes in the stabilizer and front of the 7
-
 1
1 -
2
-
 3
3 -
 4
4 -
 5
5 -
 6
6 -
 7
7 -
 8
8 -
 9
9 -
 10
10 -
 11
11 -
 12
12 -
 13
13 -
14
-
15
 |
 |
