Schwinn 840 Treadmill Assembly and Owner's Manual - Page 16
Final Inspection, Leveling the Machine
 |
View all Schwinn 840 Treadmill manuals
Add to My Manuals
Save this manual to your list of manuals |
Page 16 highlights
9. Connect Power Cord Final Inspection Inspect your machine to ensure that all fasteners are tight and components are properly assembled. Do not use or put the machine into service until the machine has been fully assembled and inspected for correct performance in accordance with the Owner's Manual. Leveling the Machine To stabilize the treadmill, adjust the 2 feet below the front of the base frame. • Lift one side of the machine and turn the foot - clockwise to shorten or counterclockwise to lengthen. • Adjust the foot on the other side if necessary. 16
-
 1
1 -
2
-
3
-
4
-
5
-
6
-
7
-
8
-
9
-
10
-
 11
11 -
 12
12 -
 13
13 -
 14
14 -
 15
15 -
 16
16 -
 17
17 -
 18
18 -
 19
19 -
 20
20 -
 21
21 -
22
-
23
-
24
-
25
-
26
-
27
-
28
-
29
-
30
-
31
-
32
-
33
-
34
-
35
-
36
-
37
-
38
-
39
-
40
-
41
-
42
-
43
-
44
-
45
-
46
-
47
-
48
-
49
-
50
-
51
-
52
-
53
-
54
-
55
-
56
-
57
-
58
-
59
-
60
-
61
-
62
-
63
-
64
-
65
-
66
-
67
-
68
-
69
-
70
-
71
-
72
-
73
-
74
-
75
-
76
-
77
-
78
-
79
-
80
-
81
-
82
-
83
-
84
-
85
-
86
-
87
-
88
 |
 |
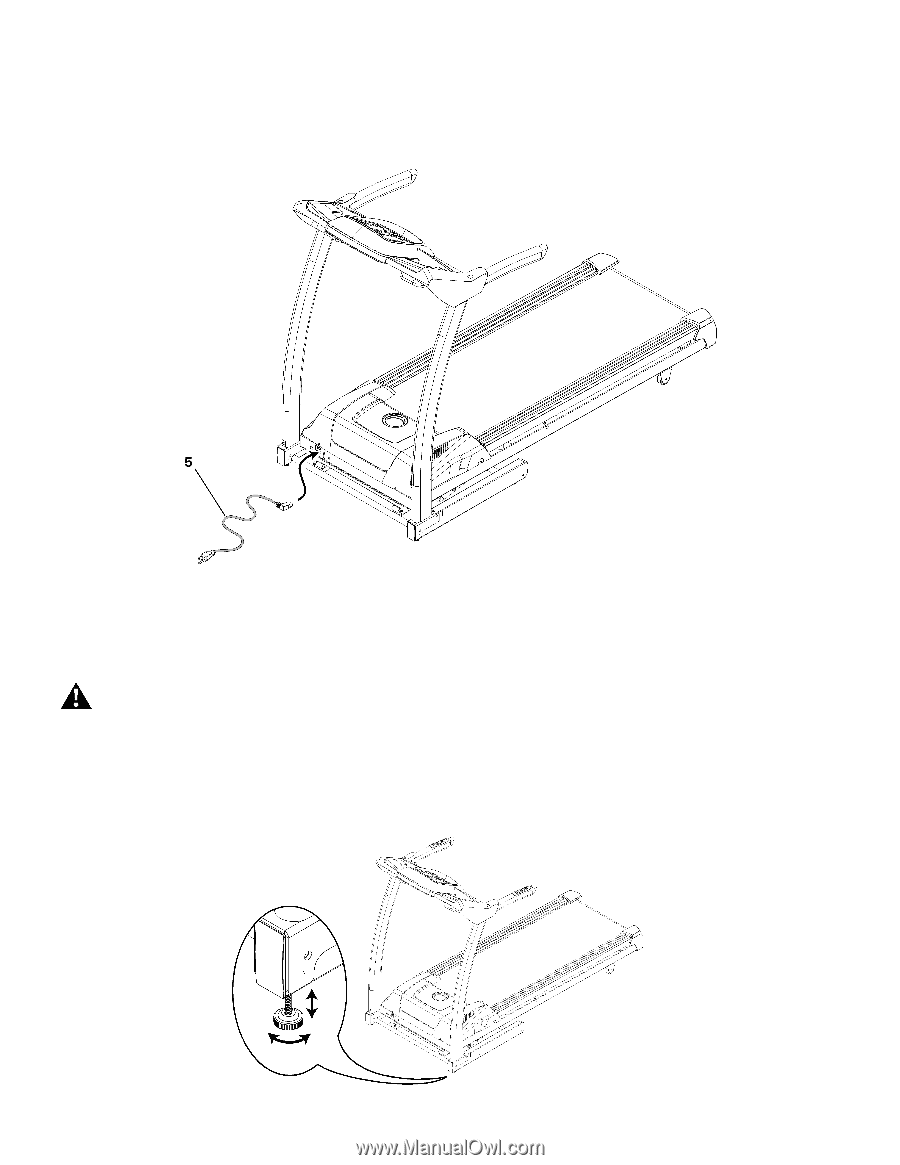
9. Connect Power Cord
Final Inspection
Inspect your machine to ensure that all fasteners are tight and components are properly assembled.
Do not use or put the machine into service until the machine has been fully assembled and inspected for correct
performance in accordance with the Owner’s Manual.
Leveling the Machine
To stabilize the treadmill, adjust the 2 feet below the front of the base frame.
•
Lift one side of the machine and turn the foot — clockwise to shorten or counterclockwise to lengthen.
•
Adjust the foot on the other side if necessary.
16
16
16