Seagate Maxtor OneTouch III USB 2.0 User Guide for Windows & Mac - Page 5
Installing the OneTouch III Mini Edition - guide
 |
View all Seagate Maxtor OneTouch III USB 2.0 manuals
Add to My Manuals
Save this manual to your list of manuals |
Page 5 highlights
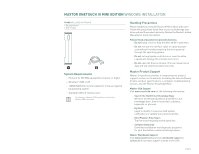
MAXTOR ONETOUCH III MINI EDITION WINDOWS INSTALLATION Installing the OneTouch III Mini Edition Step 1 - Connect the Drive 1. Connect the small connector on the 'Y' cable to your OneTouch III Mini Edition and the red connector to any one of the USB ports on your computer. Note: If your computer does not supply enough power to the OneTouch III Mini Edition through the red connector, plug in the unused black connector on the 'Y' cable to another USB port on your computer (or a powered USB hub). If both ports fail to supply enough power to the drive, an optional power supply should be purchased from Maxtor at www.maxstore.com FIGURE 3 CONNECTING THE ONETOUCH III MINI EDITION Small Connector Step 2 - Install the Software The installation software is located on the OneTouch III Mini Edition. The following steps will guide you through the installation procedure. Highly Recommended - Copy all files on the OneTouch III Mini Edition to your local hard drive. 1. Click Start Run. Browse to the drive letter used for the OneTouch III Mini Edition's drive letter and open Launch.exe. 2. From the Run window, click OK. Note: If an Autoplay window opens for the drive, select Open folder to view files, click OK and then double-click Launch.exe. 3. The following window displays. Select your Language. Black Connector Red Connector PAGE 3
-
 1
1 -
 2
2 -
 3
3 -
 4
4 -
 5
5 -
 6
6 -
 7
7 -
 8
8 -
 9
9 -
 10
10 -
 11
11 -
12
-
13
-
14
-
15
-
16
-
17
-
18
-
19
-
20
-
21
-
22
-
23
-
24
-
25
-
26
-
27
-
28
-
29
-
30
-
31
-
32
-
33
-
34
 |
 |
