Seagate ST34342A Product Manual - Page 10
Attaching cables and mounting the drive
 |
View all Seagate ST34342A manuals
Add to My Manuals
Save this manual to your list of manuals |
Page 10 highlights
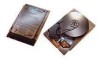
6 Medalist 4342, 3232 and 2122, Rev. C Attaching cables and mounting the drive 1. If you are installing a new ATA interface cable, attach one end of the cable to the interface connector on your computer or host adapter. The ATA cable must be no more than 18 inches long. 2. Thread the interface cable through the drive bay and attach the connector at the end of the interface cable to your new drive. If you have two drives, attach the second drive to the second connector. Pin 1 Figure 2. Attaching the cables ! Caution. To avoid damaging the connector pins, make sure to align pin 1 on the computer or host adapter with pin 1 on your drive or drives. Pin 1 on the interface cable is usually indicated by a stripe along the edge of the cable.
-
 1
1 -
2
-
3
-
4
-
 5
5 -
 6
6 -
 7
7 -
 8
8 -
 9
9 -
 10
10 -
 11
11 -
 12
12 -
 13
13 -
 14
14 -
 15
15 -
16
-
17
-
18
-
19
-
20
-
21
-
22
-
23
-
24
-
25
-
26
-
27
-
28
-
29
-
30
-
31
-
32
-
33
-
34
-
35
-
36
-
37
-
38
-
39
-
40
-
41
-
42
-
43
-
44
-
45
-
46
-
47
-
48
 |
 |

6
Medalist 4342, 3232 and 2122, Rev. C
Attaching cables and mounting the drive
1.
If you are installing a new ATA interface cable, attach one end
of the cable to the interface connector on your computer or
host adapter. The ATA cable must be no more than 18 inches
long.
2.
Thread the interface cable through the drive bay and attach
the connector at the end of the interface cable to your new
drive. If you have two drives, attach the second drive to the
second connector.
Figure 2. Attaching the cables
Caution.
To avoid damaging the connector pins, make
sure to align pin 1 on the computer or host adapter with
pin 1 on your drive or drives. Pin 1 on the interface
cable is usually indicated by a stripe along the edge of
the cable.
Pin 1
!