Seagate STD224000N Installation Manual - Page 7
Installing an internal DAT drive - jumpers
 |
UPC - 662676603727
View all Seagate STD224000N manuals
Add to My Manuals
Save this manual to your list of manuals |
Page 7 highlights
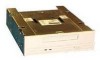
Seagate DAT Drive Installation Manual 3 Installing an internal DAT drive Internal drive installation involves three main steps: 1. Configuring the drive 2. Mounting the drive 3. Connecting power and interface cables Internal DAT drives come in two configurations, for mounting in 3.5-inch or 5.25-inch drive bays, respectively. Except for mounting the drive, installation procedures are the same for both types of drives. Configuring an internal DAT drive Before you install the tape drive in your computer, you may need to configure the drive's SCSI ID or other drive features. Most features are set using a bank of dipswitches on the underside of the drive. To control SCSI termination and terminator power or to configure the drive for remote SCSI address selection, use the jumpers on the back of the drive (beneath the interface and power connectors). Dip-switch settings Figures 1 and 2 on page 4 show the location of dip switches on the underside of 3.5-inch and 5.25-inch internal drives, respectively. You can access the switchbank through a rectangular cutout in the drive shell. ® Note. DDS-3 drives have two additional reserved dip switches on each switchbank. These reserved switches are not shown in Figures 1 and 2.
-
 1
1 -
 2
2 -
 3
3 -
 4
4 -
 5
5 -
 6
6 -
 7
7 -
 8
8 -
 9
9 -
 10
10 -
 11
11 -
 12
12 -
13
-
14
-
15
-
16
-
17
-
18
-
19
-
20
-
21
-
22
-
23
-
24
-
25
-
26
-
27
-
28
-
29
-
30
-
31
-
32
-
33
-
34
-
35
-
36
-
37
-
38
-
39
-
40
-
41
-
42
-
43
-
44
-
45
-
46
-
47
-
48
-
49
-
50
-
51
-
52
-
53
-
54
-
55
-
56
-
57
-
58
-
59
-
60
-
61
-
62
-
63
-
64
-
65
-
66
-
67
-
68
-
69
-
70
-
71
-
72
-
73
-
74
-
75
-
76
-
77
-
78
-
79
-
80
-
81
-
82
 |
 |
