Sharp AF-S60EX AFS50EX|AFS60EX Operation Manual - Page 7
and the outside window sash., tween the top of the inside
 |
View all Sharp AF-S60EX manuals
Add to My Manuals
Save this manual to your list of manuals |
Page 7 highlights
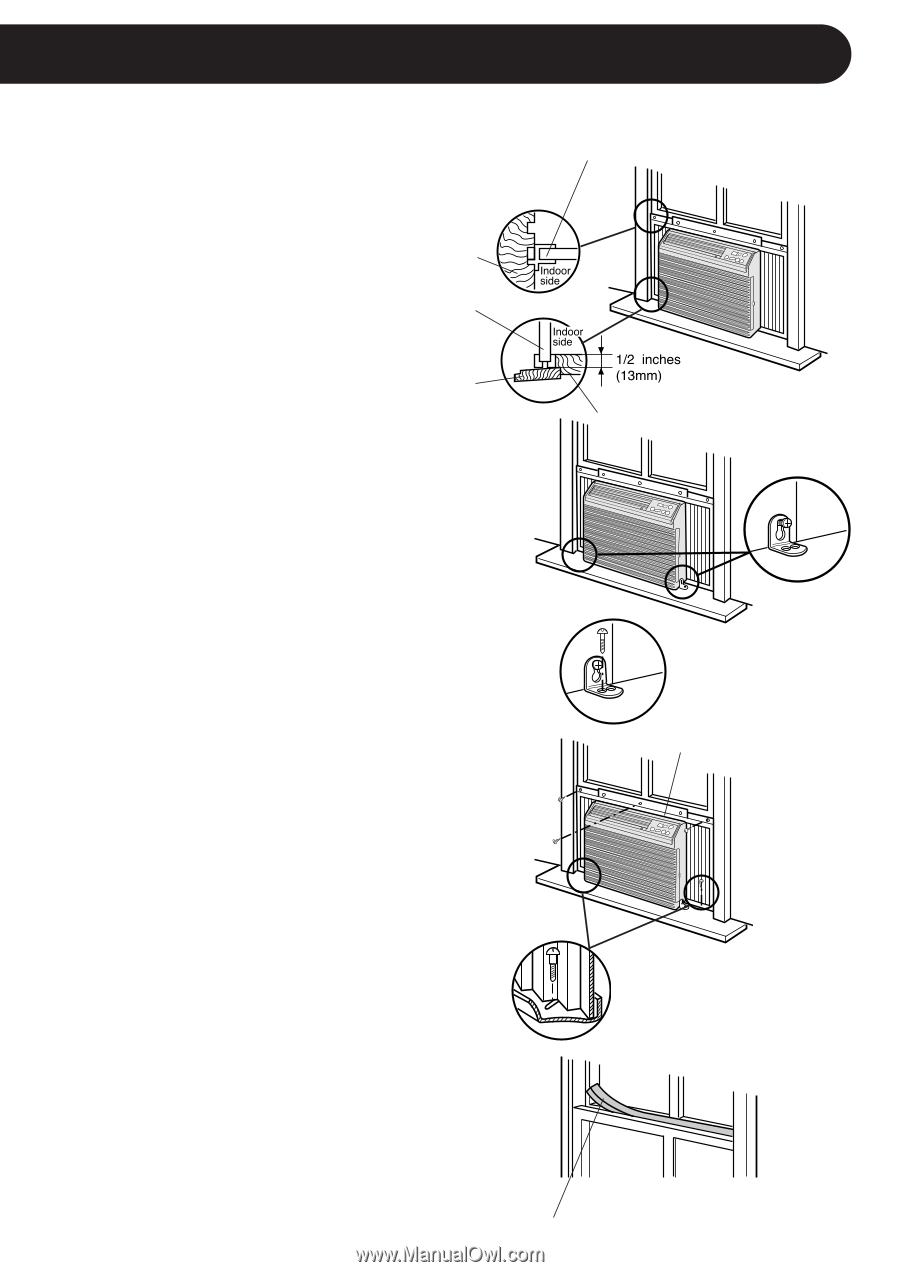
INSTALLATION INSTRUCTIONS 5 Insert the closure assemblies on both sides into the rails of the jamb. Jamb (Left) Closure assembly (Left) Sill 6 Loosen screws on both sides of the cabinet, then hang the base pan angle on and secure the screws again. Closure assembly (Left) Indoor side Indoor side 1/2 inches (13mm) Stool 7 Secure the base pan angle to the sill by using the hole of the front side on the angle with one screw. (L=1", 25.4mm) 8 Secure the top angle of the unit and the top of the closure assemblies to the sash with three of the provided screws. (L=1", 25.4mm) And secure the bottom of the closure assemblies to the sill with two of the provided screws. (L=1", 25.4mm) 9 Cut the window sash foam seal to the proper length and seal the opening between the top of the inside window sash and the outside window sash. Window sash foam seal Top angle 7
-
 1
1 -
 2
2 -
 3
3 -
 4
4 -
 5
5 -
 6
6 -
 7
7 -
 8
8 -
 9
9 -
 10
10 -
 11
11 -
 12
12 -
13
-
14
-
15
-
16
-
17
-
18
-
19
-
20
 |
 |