Sharp DK-CL3P DK-CL3P Operation Manual - Page 10
tem connection, continued
 |
UPC - 074000369771
View all Sharp DK-CL3P manuals
Add to My Manuals
Save this manual to your list of manuals |
Page 10 highlights
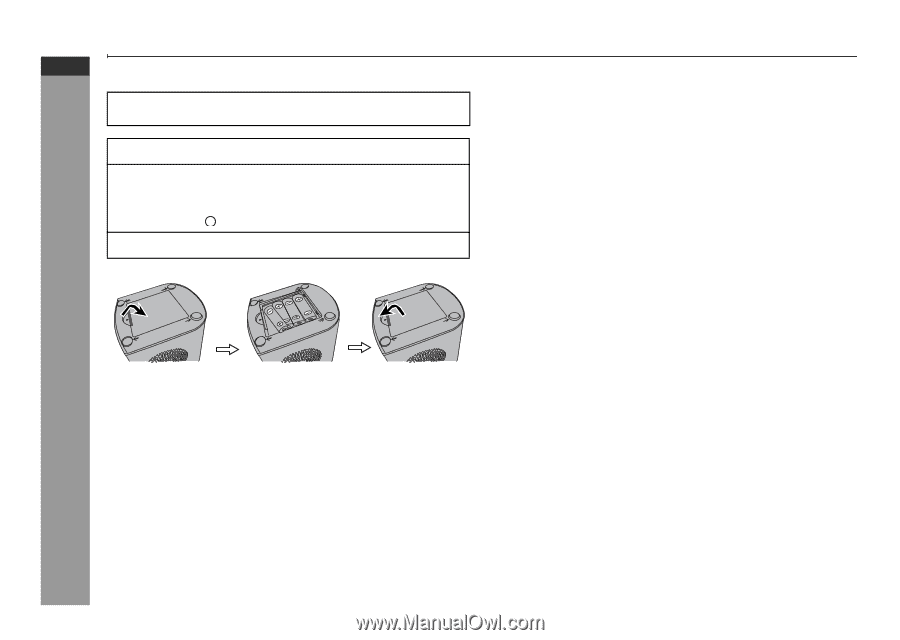
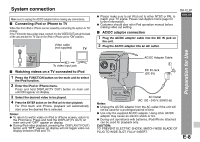
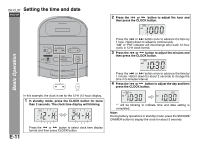
DK-CL3P ENGLISH System connections (continued) ■ Install/Replace backup batteries Use 4 "AA" size batteries (UM/SUM-3, R6, HP-7 or similar). Batteries are not included. 1 Open the battery cover. 2 Insert the batteries according to the direction indicated in the battery compartment. When inserting or removing the batteries, push them towards the - battery terminal. 3 Close the cover. Note: Battery life may vary depending on the temperature, battery types and usage conditions. Precautions for battery use: ● Installing the batteries incorrectly may cause the unit to malfunction. ● Insert the batteries according to the direction indicated in the battery compartment. ● Replace all old batteries with new ones at the same time. ● Do not mix old and new batteries. ● Batteries (battery pack or batteries installed) shall not be exposed to excessive heat such as sunshine, fire or the like. Caution: Do not use rechargeable batteries (nickeI-cadmium battery, etc.). Preparation for Use OPEN OPEN OPEN Notes: ● Backup battery system is use to provide continuous alarm operation and clock setting in event of a power failure. During battery replacement, please make sure the AC/DC adaptor is connected, otherwise all setting may be lost. ● Remove the batteries if the unit will not be used for a long period of time to prevent battery leakage which may cause potential damage. ● The first time the batteries is install, the clock will blinking on the display. Please set the time and date (refer page 11). E-9
-
 1
1 -
2
-
3
-
4
-
 5
5 -
 6
6 -
 7
7 -
 8
8 -
 9
9 -
 10
10 -
 11
11 -
 12
12 -
 13
13 -
 14
14 -
 15
15 -
16
-
17
-
18
-
19
-
20
-
21
-
22
-
23
-
24
-
25
-
26
 |
 |