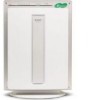
Sharp FP-N40CX FP-N40CX Operation Manual - Page 12
Preparation, Filter Installation, Inserting Batteries In The Remote Control - filter replacement
 |
View all Sharp FP-N40CX manuals
Add to My Manuals
Save this manual to your list of manuals |
Page 12 highlights
PREPARATION Be sure to remove the power plug from the wall outlet. FILTER INSTALLATION To maintain the quality of the filters, they are placed in the main unit within plastic bags. Be sure to remove the filters from the plastic bags before using the unit. 1 Filters Removal 1 Place the unit facing up Lay the unit on a flat surface such as a table, making sure that the stand does not contact the surface. 2 Remove the Front Panel Press in the hook on the bottom of the Front Panel and lift to re- 2 move. Place so that stand does not touch surface. Soft cloth Table, etc. 1 Front Panel 2 1 Hook 3 Remove the Pre-Filter, and then remove the Washable Active Carbon Filter (black) and True HEPA Filter (white) from the plastic bags. The Washable Active Carbon Filter is reinforced with cardboard to prevent it losing its shape. 1 Pre-Filter Washable Active Carbon Filter INSERTING BATTERIES IN THE REMOTE CONTROL 1 Remove the back cover Press and slide the back cover to remove. 2 Insert batteries Insert batteries with and as shown below. 3 Close the back cover Battery Information • The batteries for this remote control are for initial use only . Change the batteries when necessary. • Incorrect usage of the batteries may cause battery fluid leakage and/or damage. Take care of the following when handling: • When replacing the batteries, replace both batteries with new ones of the same type. (Use 2 AA manganese batteries.) • When not using the unit or remote control for an extended period, remove the batteries. (This prevents malfunction of the remote control from battery fluid leakage.) • The batteries of the accessory are for initial use only and may be depleted within 1 year. E-10
-
 1
1 -
2
-
3
-
4
-
5
-
6
-
 7
7 -
 8
8 -
 9
9 -
 10
10 -
 11
11 -
 12
12 -
 13
13 -
 14
14 -
 15
15 -
 16
16 -
 17
17 -
18
-
19
-
20
-
21
-
22
-
23
-
24
-
25
-
26
-
27
-
28
-
29
-
30
-
31
-
32
-
33
-
34
-
35
-
36
-
37
-
38
-
39
-
40
-
41
-
42
-
43
-
44
 |
 |
