Sharp LC19SB25U LC-19SB15U LC-19SB25U LC-19SB25U-W Operation Manual - Page 37
View Mode for PC input mode
 |
UPC - 074000371156
View all Sharp LC19SB25U manuals
Add to My Manuals
Save this manual to your list of manuals |
Page 37 highlights
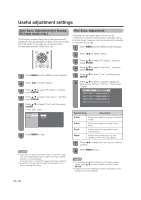
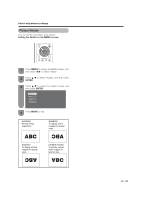
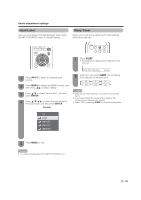
Useful adjustment settings View Mode (for PC input mode) You can select the screen size. • Connect the PC before making adjustments. (See page 15w.) • Selectable screen size may vary with input signal type. 1 Press VIEW MODE. • The View Mode menu displays. Example Example (Input 4:3 signal) (Input 16:9 signal) 2 Press VIEW MODE or a/b while the View Mode menu is displayed to select a desired item on the menu. Input signal Example: Screen size images Side Bar Stretch 4:3 Keeps the original An image fully fills the aspect ratio in a full screen. screen display. Input signal 16:9 Stretch Dot by Dot An image fully fills the screen. Detects the resolution of the signal and displays an image with the same number of pixels on the screen. 37
-
 1
1 -
2
-
3
-
4
-
5
-
6
-
7
-
8
-
9
-
10
-
11
-
12
-
13
-
14
-
15
-
16
-
17
-
18
-
19
-
20
-
21
-
22
-
23
-
24
-
25
-
26
-
27
-
28
-
29
-
30
-
31
-
 32
32 -
 33
33 -
 34
34 -
 35
35 -
 36
36 -
 37
37 -
 38
38 -
 39
39 -
 40
40 -
 41
41 -
 42
42 -
43
-
44
-
45
-
46
-
47
-
48
-
49
-
50
-
51
-
52
-
53
-
54
-
55
 |
 |
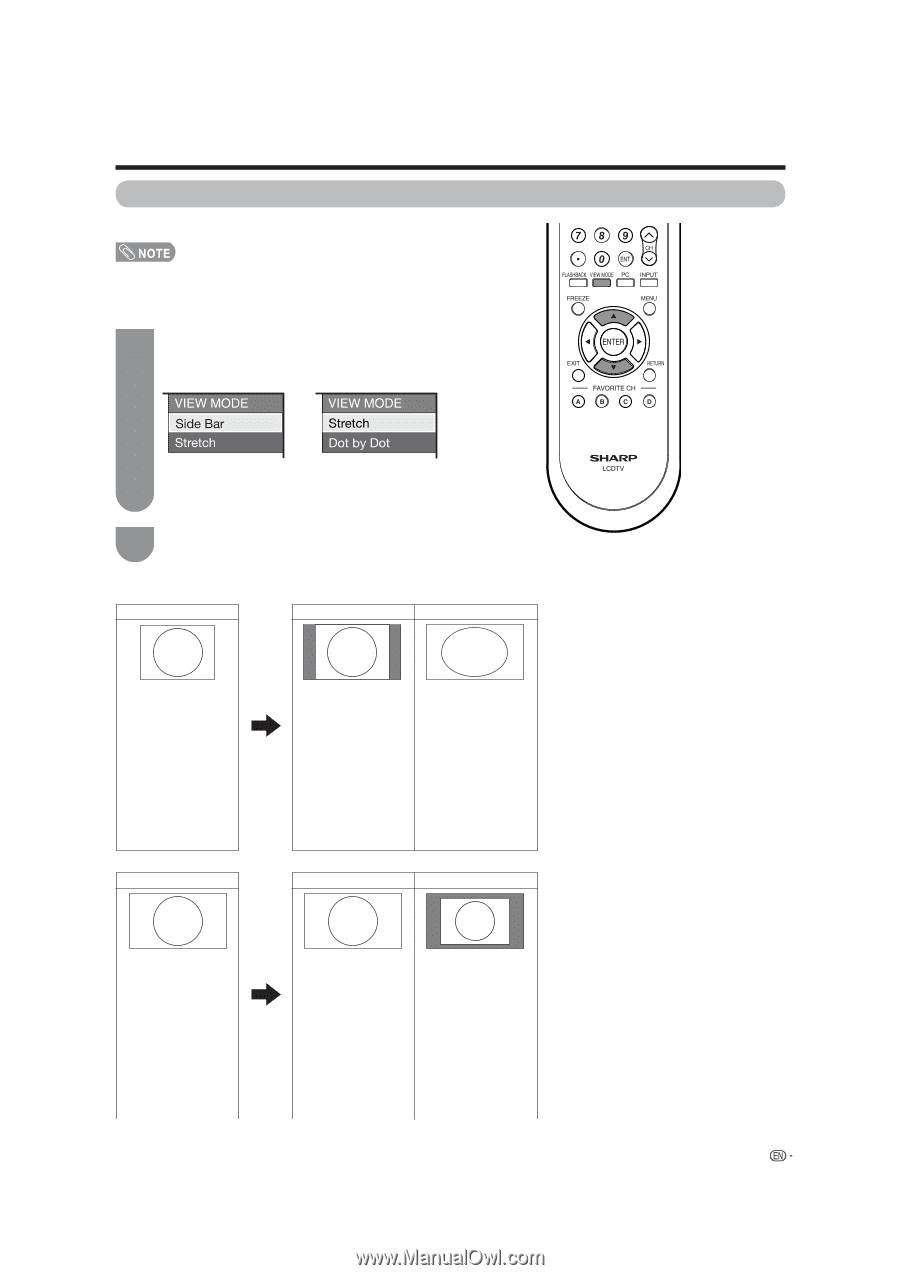
(Input 4:3 signal)
(Input 16:9 signal)
37
View Mode (for PC input mode)
You can select the screen size.
• Connect the PC before making adjustments. (See page
15w.)
• Selectable screen size may vary with input signal type.
1
2
Press
VIEW MODE
.
• The View Mode menu displays.
Press
VIEW MODE
or
a
/
b
while the View
Mode menu is displayed to select a desired
item on the menu.
Example
Example: Screen size images
Input signal
Side Bar
Stretch
Keeps the original
aspect ratio in a full
screen display.
An image fully fills the
screen.
4:3
Detects the resolution
of the signal and
displays an image
with the same
number of pixels on
the screen.
An image fully fills the
screen.
16:9
Input signal
Dot by Dot
Stretch
Useful adjustment settings
Example